
Your Custom Text Here
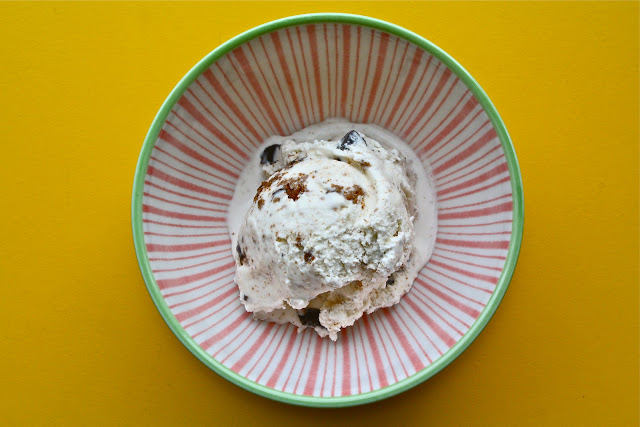
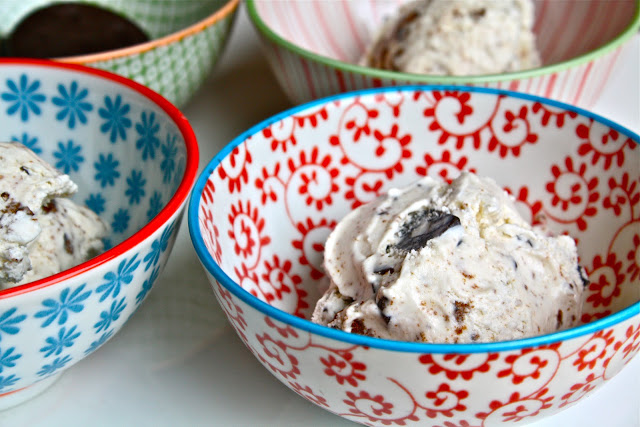
Molly Moon's "Scout" Mint Ice Cream
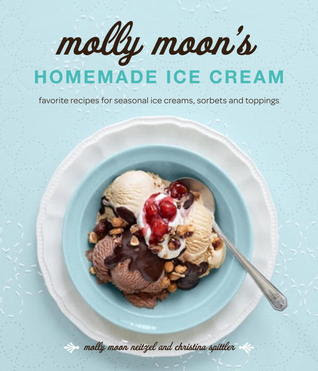
It's been just over a month since my husband got me an ice cream maker for my birthday. Quite frankly I'm surprised the motor hasn't given out (yes, I've been making a lot of ice cream). In addition to the ice cream maker, I also received two terrific cookbooks: Molly Moon' s Homemade Ice Cream and People's Pops: 55 Recipes for Ice Pops, Shave Ice, and Boozy Pops from Brooklyn's Coolest Pop Shop. I decided to start with the Molly Moon's book.
I first heard of Molly Moon's about 4 1/2 years ago. I was 6 months pregnant with my first son Otis and we were trying to figure out whether or not we should relocated to Seattle. Our apartment in the Prospect Heights section of Brooklyn was feeling pretty crowded and it was going to seem even smaller once the baby arrived. We were also starting to sour on the city, despite having most of our family and closest friends around. I always loved the Pacific Northwest, so we booked a flight and flew to Seattle to check things out.
Seattle had a lot of things going for it: employment prospects were better for me because I was a member of the Washington Bar. And the overall cost of living, while not cheap, was more affordable than NYC. The food scene (amazing), hiking options (tons), and the politically active citizenry of Seattle made us think it would be a good place to live.
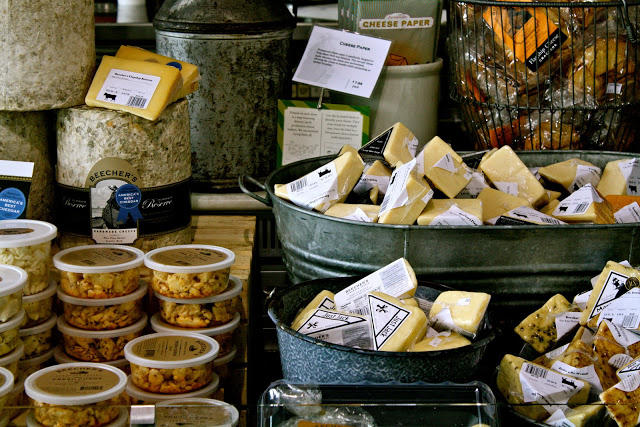
Once we got there we ate; we ate a lot. We went to Macrina Bakery for brunch, shopped at the Pikes Place Market, and stumbled upon a cheese festival that happened to be taking place while we were in town. We slurped tons of pho, dined at Tilth (oh lord that place is good)and walked around Gasworks Park. We also got tickets to see the Mariners clobber the Red Socks at Safeco field. (I was rooting for the Mariners because I was in their stadium. Of course I'm also a New Yorker and a Yankee fan-- so I don't have much love for the Boston Red Sox!)


We took a little side trip to Vancouver, which was fabulous (more great food and lots of great walks). Upon our return to Seattle we decided to get some ice cream. The spot? Molly Moon's. The line? Around the block. I heard their salted caramel flavor was incredibly popular and worth the wait. It was to-die-for. We got a pint.
Anyway here we are, 5 years later. Lots of things have changed since that trip to Seattle. We are living in Denver, not Seattle, and our family now has 5 happy members (I'm including our trusted Rottweiler in this count). One thing that hasn't changed much is my love of ice cream...especially Molly Moon's.

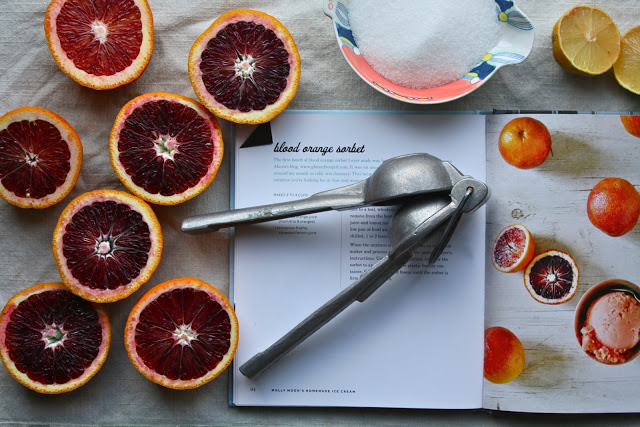
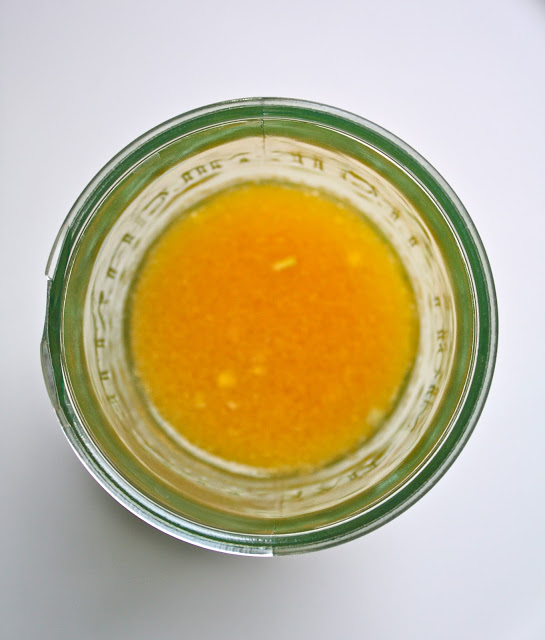
Salted Caramel was the first recipe I tried. I paired it with a warm Ghirardelli brownie (above) and it was fantastic. Next up was Mexican Chocolate (nice heat from Vietnamese, a.k.a Saigon, Cinnamon) and blood orange sorbet (seasonal and refreshing).


I did my happy-dance the minute my husband returned from the grocery store. I could see those boxes through the shopping bag. Know which boxes I mean? Hmmmm? Yes? The little green boxes that are hard to find and sold by Girl Scouts around the nation? Thin mints! Yes, thin mints! THIN MINTS!
People, it's very hard not to fall in love with this one. I hope you enjoy it as much as we did. A special thank you goes out to the awesome people at Molly Moon's who let me publish their recipe.
xo,
Batya
"Scout" Mint Ice Cream (Courtesy of Molly Moon's Homemade Ice Cream, printed with permission)
Makes 1- 1 1/2 Quarts
Ingredients
1 cup whole milk
2 cups heavy cream
3/4 cup sugar
Pinch of kosher salt
2 teaspoons peppermint extract
1 1/2 cups crushed Thin Mint Girl Scout cookies (about 15 cookies)
Note: The cookies can be crushed into pieces as big or as small as you want them to be in your ice cream. We shoot for pea-size pieces and leave a cookie or two mostly intact- because who doesn't love finding a big cookie in their ice cream?
Preparation
Put the milk, cream, sugar, and salt into a small, heavy-bottomed saucepan. Cook over medium heat, whisking occasionally to dissolve the sugar. Before the mixture has come to a boil, remove from the heat. Pour the mixture into a shallow pan or bowl and place in the refrigerator to chill thoroughly, 1 to 2 hours.
When the mixture is cold, stir in the peppermint extract. Pour it into an ice cream maker and process according to the manufacturer's instructions(mine takes 20-25 minutes from start to finish once the power is turned on and the bowl starts turning). During the last few minutes of processing, add the cookies. Using a rubber spatula, transfer the ice cream to an airtight glass or plastic freezer container. Cover tightly and freeze until the ice cream is firm, at least 4 hours.
Note: You have to freeze the bowl that comes with the ice cream maker for 24 hours prior to use, so don't forget to do this in advance!
Enjoy :)

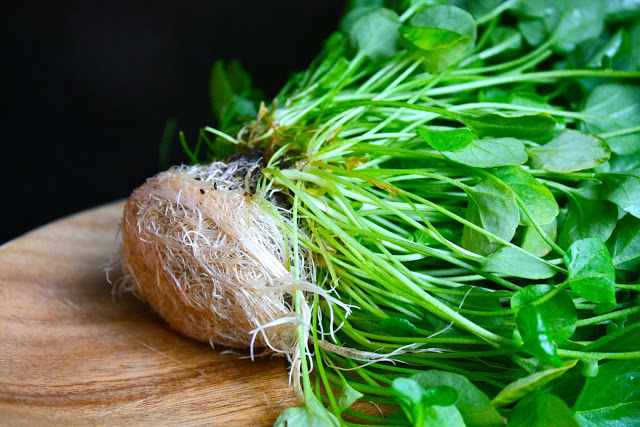
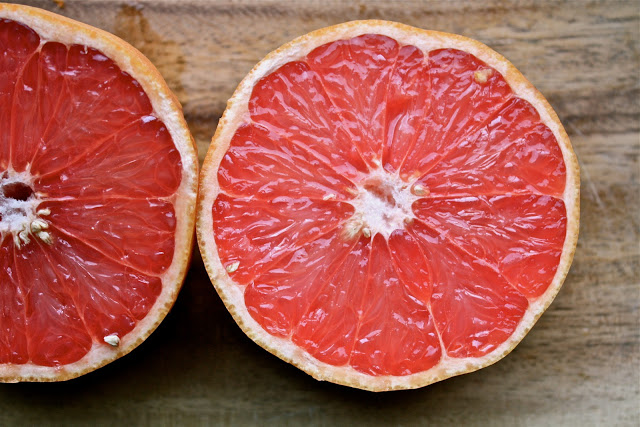
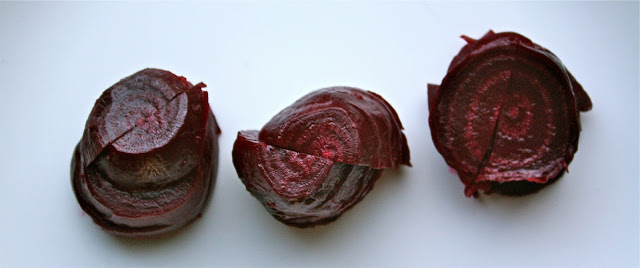
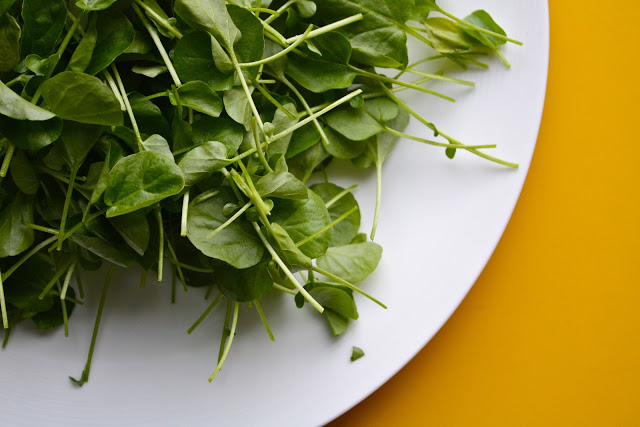
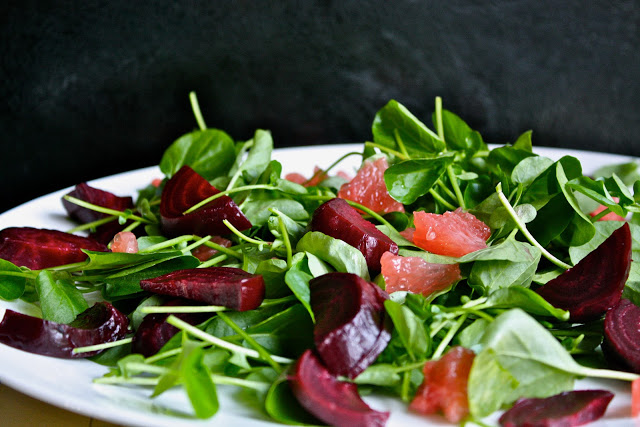
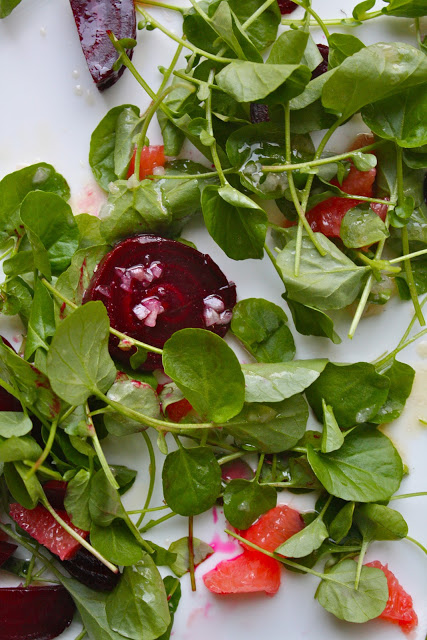
red rocks in january and a winter citrus salad (beets, grapefruit and watercress)
We absolutely love living in Colorado, but every now and again we get a bout of homesickness. Technology helps us connect with our families back east, but nothing, and I mean nothing, is a substitute for a face-to-face conversation; an in-person visit. When someone buys a ticket, gets on a plane, doesn't mind sleeping on an inflatable mattress for a week and is more than happy to wake up in the morning with your early-rising kids...well, that just says love.
Aunt Barbara, my mother-in-law's sister, has visited us twice since we moved here. On her most recent trip she came with us to the petting zoo, hiked a trailhead at Red Rocks, and was more than accommodating when we did a little house-hunting. She also washed every dish I own until it sparkled like a diamond. Aunt Barbara did some babysitting too, so my husband and I were able to get a few nights off to celebrate my birthday weekend. We had some great meals at Jonsey's Eat Bar and The Kitchen...and a few drinks too. When we dropped Aunt Barbara off at the airport we asked, "When are you coming back?" And we really meant it.
Clean sheets and a comfortable bed are one way to make a guest feel welcome. But so is good food. For Aunt Barbara's first night I made Baked Ziti with homemade sauce and this salad (below). It's fresh, clean and seasonal too. This is one to make before winter citrus is no longer at its peak. Here it is...enjoy!
xo
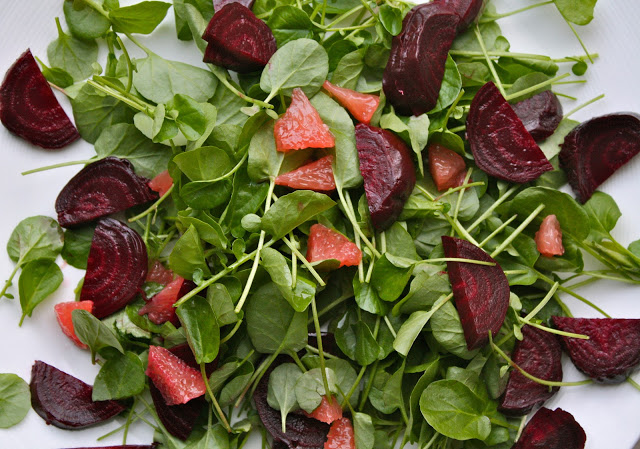
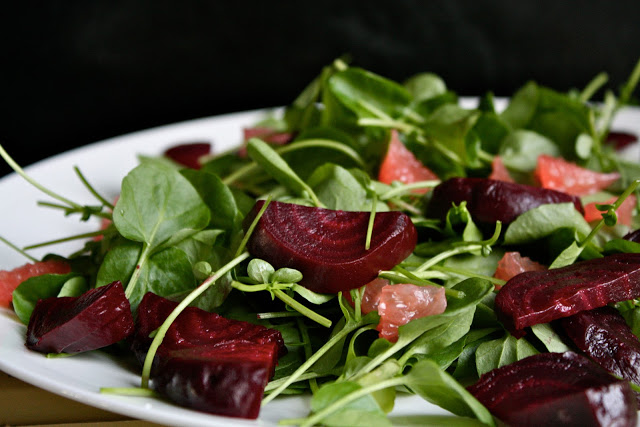
Grapefruit-and-Beet Salad (Adapted slightly from The New York Times)
Originally published with Eat, Memory: The Ideology of Taste by Roy Blount Jr., November 27, 2005
Ingredients
1/2 pound beets (2 or 3), trimmed
3 tablespoons extra virgin olive oil, plus more for beets
Kosher salt
2 large red or pink grapefruit, peeled, white pith removed
1/2 shallot, finely diced
2 1/2 teaspoons fresh lemon juice
1/2 teaspoon Dijon-style mustard
1 bunch watercress, stemmed and trimmed (about 2 cups)
Freshly ground black pepper
Preparation
- Preheat the oven to 350F. Lay the beets on one end of a sheet of aluminum foil, sprinkle with olive oil and season with salt. Fold over the remaining foil and crimp the edges to seal. Place on a baking sheet and bake for 45 minutes to 1 hour, or until fork tender (this step usually takes me about 1 hr. 15 minutes.) Cool and peel, then slice into 1/4-inch-thick half-moons.
- Segment the grapefruit and set aside the membrane. Gently pat the segments dry with a paper towel. Squeeze 1* teaspoon juice from the membrane and reserve.*You can do a little more if you want a more intense grapefruit flavor.
- Combine shallot, reserved grapefruit juice, lemon juice and salt to taste in a bowl. Let sit for 10 minutes. Whisk in mustard, then 3 tablespoons olive oil. Adjust seasoning.
- In a large bowl, add the beets, grapefruit segments and watercress. Season with salt and freshly ground black pepper. (Don't neglect this step. Salt and pepper are key!) Gently fold the dressing into the salad.
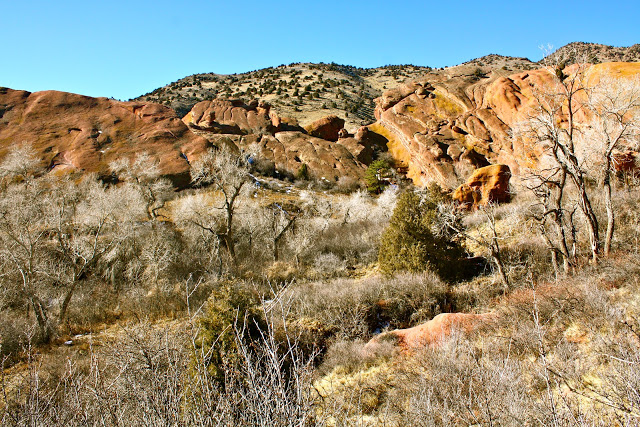
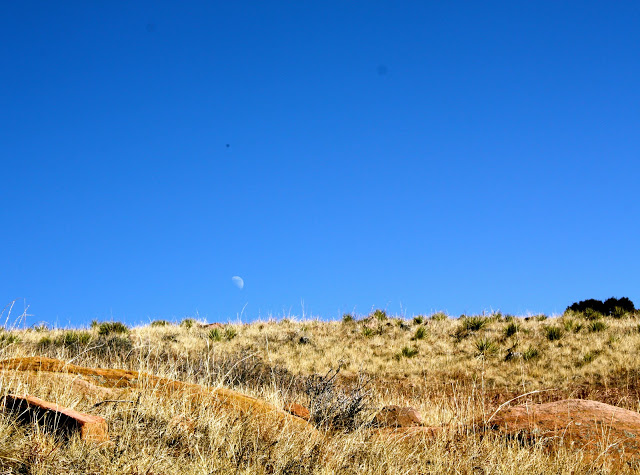
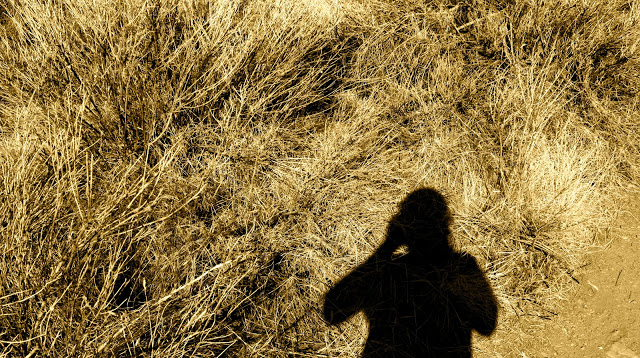
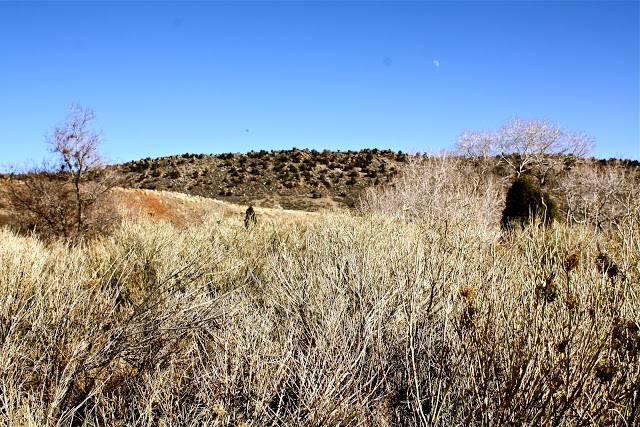
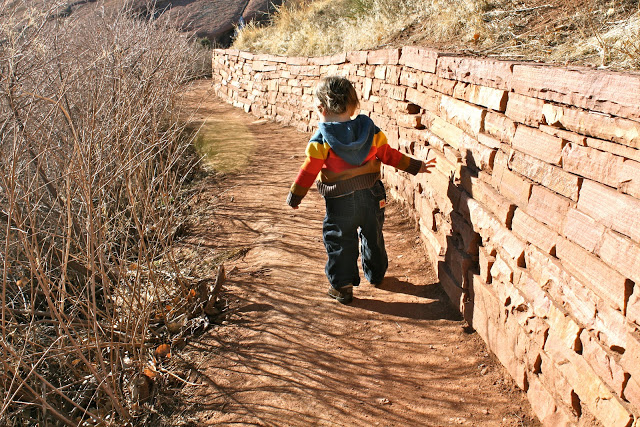
I like seeing how the colors change with the seasons. At one of my favorite hiking spots near Red Rocks there's green brush in the spring, the rocks look redder in the summer (and there are wildflowers too), leaves start falling in the autumn and the grasses are dry and the color of honey-straw in the winter.
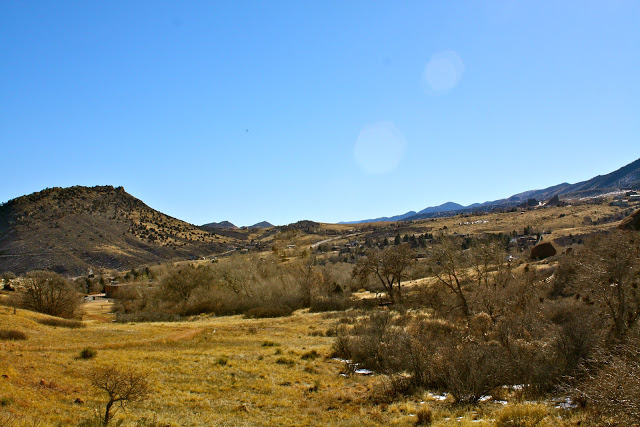
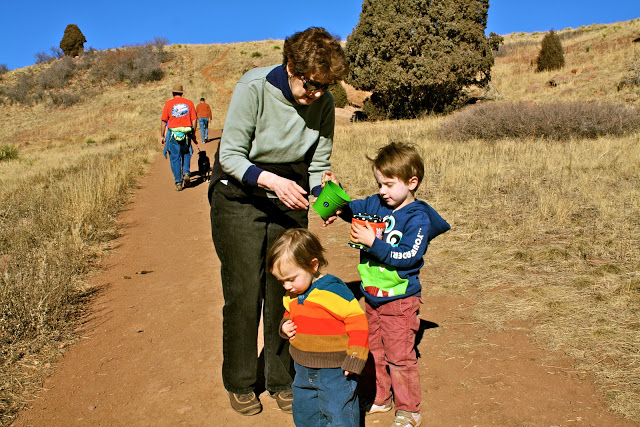
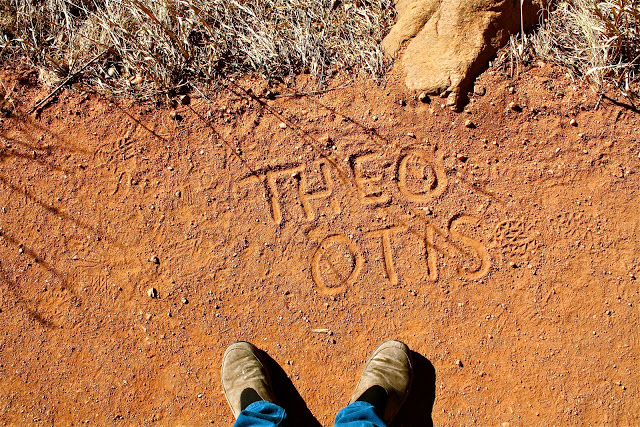
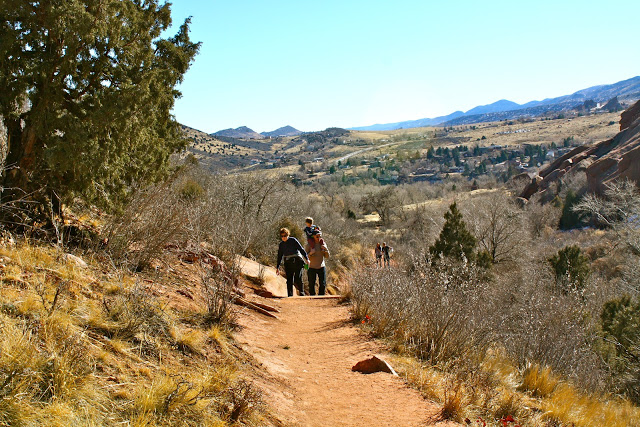
It had been quite some time since we went to Red Rocks, so when Aunt Barbara said she was game to go on a hike, we piled in the car and headed out in the direction of Morrison, Colorado. After Morrison we drove a few more miles before we got to the trailhead where I've taken the boys several times. Otis had his 'hiking bucket' and was ready for rock collecting. Theo was content picking up small twigs. My husband had the day off from work so he was happy to be getting some fresh air. And Aunt Barbara, realizing just how strong the Colorado sun can be, understood why hiking in the middle of January can be a wonderful way to spend an afternoon...


inspiration from the kitchen in boulder: parsnip soup puree with mushrooms

I'm a winter baby, born in the middle of January, right on the cusp of Capricorn and Aquarius. My special day also falls on (or very close to) our country's inauguration day. So in 1981, I wrote to President-Elect Ronald Reagan and asked to be invited to the big party. You know, because I was a birthday girl and all. The letter went something like:
Dear President-Elect Ronald Reagan,
I turn 5 years old the very same day you will become the President of the United States. Can I come to your inauguration party and stay with you and Nancy at the White House?
Sincerely,
Batya S.
Bronx, New York
I asked my dad for a thumbtack and up the photo went- it hung right over my bed for about a year. It's funny to think of it now since my own political inclinations are far to the left. But at the time I was just a kid and I really liked that picture.
I toyed with the idea of writing to President Obama and asking him for inauguration day tickets (or at least entrance to a party). But in the end I never got around to it. Instead we did what we always do when birthdays arrive...we celebrated with lots of good food.

This year I had my birthday dinner at The Kitchen in Boulder. I can't say enough good things about that place. I didn't know what to expect since The Kitchen seems to pride itself on its close relationship with local food growers and it emphasizes seasonal produce. I mean it is the dead of winter, after all. Root cellar vegetables-- that's pretty much what comes to mind when I think of the winter. But my birthday dinner, that meal, was absolutely impeccable and extremely delicious...the chefs did an impressive job with the less than glorious bounty of mid-January.
I've been trying to recreate the meal at home. So this is my attempt to figure out the starter soup: parsnip soup puree with sauteed mushrooms. I think it comes close enough...

There are so many good recipes out there. Some are basic, some are thick, some are complicated and have lots of ingredients and some use walnut pesto. In the end, I went with something fairly straightforward and simple. The result was a very satisfying rich soup, which I topped with sauteed shiitake mushrooms. Enjoy!
Parsnip Soup Puree with Sauteed Mushrooms
Inspired by the Kitchen Community (The Kitchen, Boulder)
Heavily influenced by Orangette and Edible Brooklyn through this post
Yields 2-4 servings
Adjust the thickness of the soup by adding stock/water. Also season well with salt.
Soup:
1 tablespoon unsalted butter
3 parsnips, peeled and diced into 1/2 inch cubes
2 carrots, peeled and diced
3/4 cup vegetable stock
3/4 cup water (with more for thinning out the soup)
salt, to taste
1/2 cup of heavy cream
Mushrooms:
1 tablespoon of unsalted butter
2 large handful of shitake mushrooms
salt, to taste
large pinch of dried thyme or 2-3 fresh sprigs
1/2 cup of stock or water
Poached egg (optional)
Preparation: Soup
Peel the parsnips, trim and discard the ends, and cut them into 1/2-inch pieces. Put 1 tablespoon of unsalted butter in a large pot, over low-medium heat. Add the parsnips and carrots. Heat for about 5 to 7 minutes, mixing every few minutes. Add the vegetable stock and the water. Bring to a simmer, and cook, uncovered, until the parsnips (and carrots) can easily be pierced with a fork, about 20 to 25 minutes.
Working in batches, puree the soup in a blender or use an immersion blender. If you think the consistency is too thick, you can add additional water or stock. Pour the pureed soup back into the pot and stir in the cream.
Taste for salt, and serve hot. Top with sauteed mushrooms and/or a poached egg.
Preparation: Mushrooms
Sauté mushrooms in butter over medium-high heat until mushrooms start to brown and soften, about 4 minutes. Add salt. Add stock and thyme; cook, stirring occasionally, until liquid reduces to a glossy, stew-like consistency, about 4 more minutes. Remove thyme sprigs (if using fresh). Spoon mushrooms on top of parsnip soup puree.
In Instagram: Coffee & Pie (Ottolenghi and Tamimi's Jerusalem Herb Pie)...and link love!

It's been almost 15 years since my mother escorted me on a 3-day road-trip from New York City to Madison, Wisconsin, which is where I originally started law school (this was long before I realized that I did not actually want to be an attorney). And it was on that road-trip that I figured out just how different we sounded from some of our Midwestern countrymen. Less me, more my mother.
My mother's accent is 100% pure Bronx. She grew up in the 1950s and 60s on the Grand Concourse (which if you're wondering, does have the second largest collection of Art Deco architecture outside of Miami). The accent is very particular and it's distinct from its more popularized Brooklyn counterpart. As for my accent, I like to think that I don't really have one. Maybe it's slightly more pronounced if I drink a few glasses of wine, or right after I've talked with my mother on the phone. But for the most part, I think that I can 'pass' as someone who is generally from the Northeast, or mid-Atlantic...unless I say the words dog, ball or coffee...
My mother's accent is 100% pure Bronx. She grew up in the 1950s and 60s on the Grand Concourse (which if you're wondering, does have the second largest collection of Art Deco architecture outside of Miami). The accent is very particular and it's distinct from its more popularized Brooklyn counterpart. As for my accent, I like to think that I don't really have one. Maybe it's slightly more pronounced if I drink a few glasses of wine, or right after I've talked with my mother on the phone. But for the most part, I think that I can 'pass' as someone who is generally from the Northeast, or mid-Atlantic...unless I say the words dog, ball or coffee...

..which brings me to Novo Coffee. They're one of the top 10 roasters in the country, and they happen to roast right here in Denver. Their coffee is served at some of the city's top restaurants, but there aren't too many places where you can buy their beans retail. So I was happy to discover that their warehouse is open on Friday between 1 and 3 pm for retail purchases. (I'd call before you go- just to confirm.)
Last month I finally found some time to check it out. I was greeted by Herb Brodsky, a co-founder of Novo. And it took me less than a minute to peg his accent...
This Bronx-born coffee roaster relocated to Denver back in 1995 and started his business shortly thereafter. But geographic kinship aside, Novo roasts some of the best beans I've ever tasted- thanks in part to their master-roaster Erich Rosenberg. My boys and I toured the facility and I schmoozed with Herb. And for a brief moment he suspected that he had dated my mother. But there were lots of ladies with the surname Goldstein in the Bronx in those days, so it was an easy mistake to make. It turns out they never dated.
This Bronx-born coffee roaster relocated to Denver back in 1995 and started his business shortly thereafter. But geographic kinship aside, Novo roasts some of the best beans I've ever tasted- thanks in part to their master-roaster Erich Rosenberg. My boys and I toured the facility and I schmoozed with Herb. And for a brief moment he suspected that he had dated my mother. But there were lots of ladies with the surname Goldstein in the Bronx in those days, so it was an easy mistake to make. It turns out they never dated.
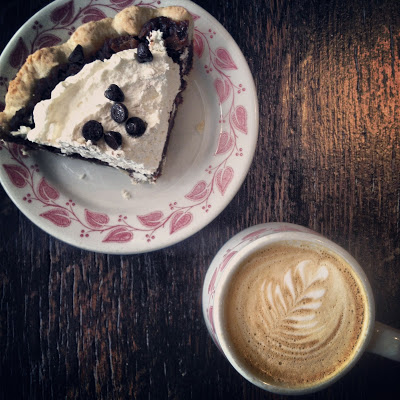
On the hunt for more good coffee and/or cappuccino, I also found The Humble Pie, which is located in the Baker Historic District of the city. In addition to great coffee, they also have some of the best pies around. There are savory and sweet options, so obviously I got one of each.

Feeling inspired by both coffee and pie, I decided to drink a nice cup of joe while scouring my favorite blogs and cookbooks for some pie ideas. I found an herb pie recipe from Jerusalem that looked so good, I just had to make it...even though it's a bit different from the pies that originally inspired me at The Humble Pie.
I hope you like this pick. It reminds me (a bit) of my favorite Moosewood Spanakopita...just with more herbs. 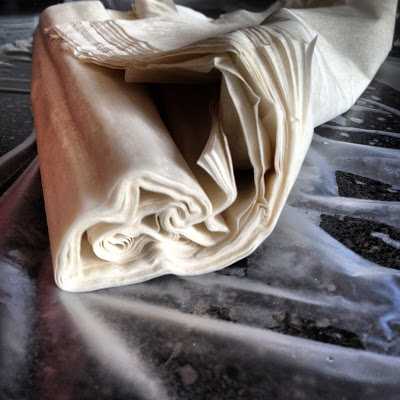
And here you go...
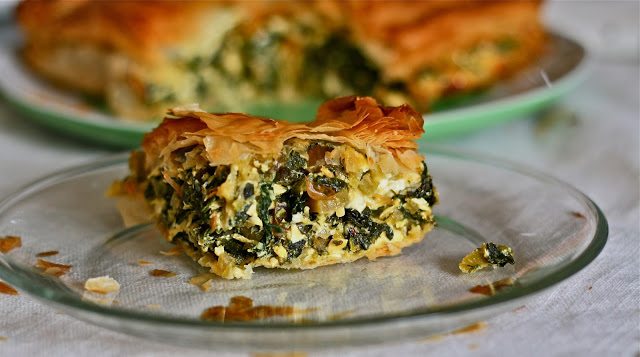
Herb Pie (adapted slightly from Yotam Ottoleghi and Sami Tamimi's Jerusalem)
Serves 4
This pie can happily sit at the center of a vegetarian meal.
Ingredients
2 tablespoons olive oil, plus extra for brushing the pastry
1 large onion, diced
1 lbs. Swiss chard, stems and leaves finely shredded but kept separate
3-4 stalks celery, thinly sliced
4 scallions (green onion), chopped
1 large bunch fresh spinach (The original recipes uses 1 3/4 ounces of arugula, which I think the British call rocket.)
1 ounce flat-leaf parsley, chopped (I used between 1/2-3/4 cup)
1 ounce fresh mint, chopped (I used between 1/2-3/4 cup)
2/3 ounce dill, chopped (I used about 1/2 cup)
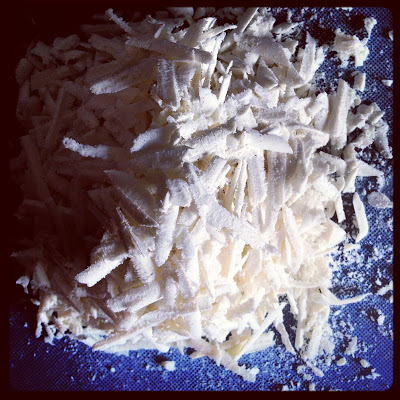
4 ounces of anari or ricotta cheese, crumbled (I used about 3/4 cup of Myzithra)
3 1/2 ounces aged cheddar, grated (I used about 3/4 cup)
2 ounces feta cheese, crumbled (I used about 2 small, but full, handfuls)
the grated zest of 1 lemon
2 medium free-range eggs
1/3 teaspoon salt
1/2 teaspoon coarsely ground black pepper
1/2 teaspoon of superfine sugar
9 ounces filo pastry
Preparation
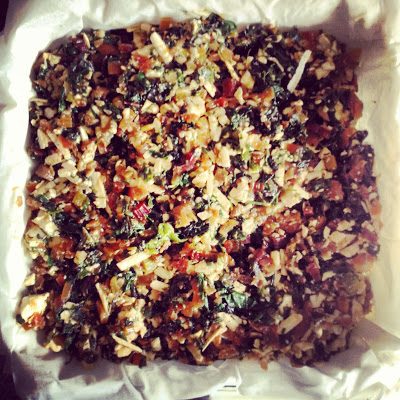
- Preheat the oven to 400F/200C. Pour the olive oil into a deep frying-pan over medium heat. Add the onion and sauté for 8 minutes without browning. Add the chard stems and the celery and continue cooking for 4 minutes, stirring occasionally. Add the chard leaves, increase the heat to medium-high and stir as you cook for 4 minutes, until the leaves wilt. Add the scallion/green onion, spinach (or arugula) and herbs and cook for 2 minutes more. Remove from the heat and transfer to a colander to cool.
- Once the mixture is cool, squeeze out as much water as you can and transfer to a mixing bowl. (I didn't have much water to drain-- probably because I'm at altitude and the water evaporates more quickly.) Add the three cheeses, lemon zest, eggs, salt, pepper and sugar and mix well.
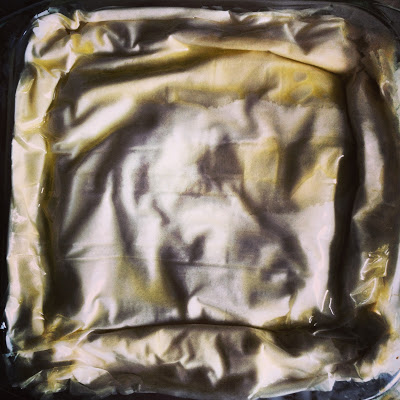
- Lay out a sheet of filo pastry and brush it with some olive oil. Cover with another sheet and continue in the same manner until you have 5 layers of filo brushed with oil, all covering an area large enough to line the sides and bottom of a 8 1/2-inch pie dish, plus extra to hang over the rim. Line the pie dish with the pastry, fill with the herb mix and fold the excess pastry over the edge of the filling, trimming the pastry as necessary to create a 3/4 inch border.
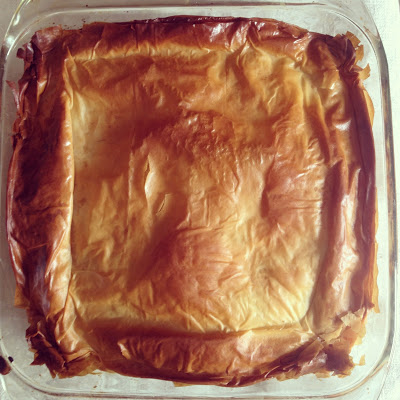
- Make another set of 5 layers of filo brushed with oil and place them over the pie. Scrunch the pastry a little to create a wavy, uneven top and trim the edges so it just covers the pie. Brush generously with olive oil and bake for 40 minutes, or until the filo turns a nice golden brown. Remove from the oven and serve warm or at room temperature.
* * *
link love...
discovery of the week. and they run a fabulous company.
another new-to-me food blog.
ordered this.
time is up!
building that bridge...
on the book shelf (thanks Jo Ellen for the recommendation).
a fabulous looking winter salad (thanks, Yana).
Please note: These are heart-felt recommendations. I have no business relationship or sponsorship with Novo Coffee, The Humble Pie or any of the links mentioned on this blog.
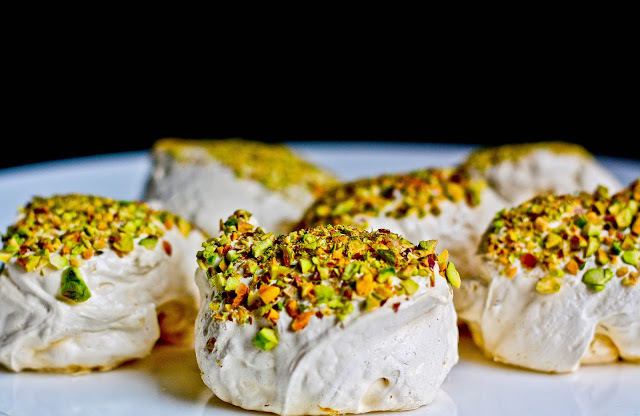
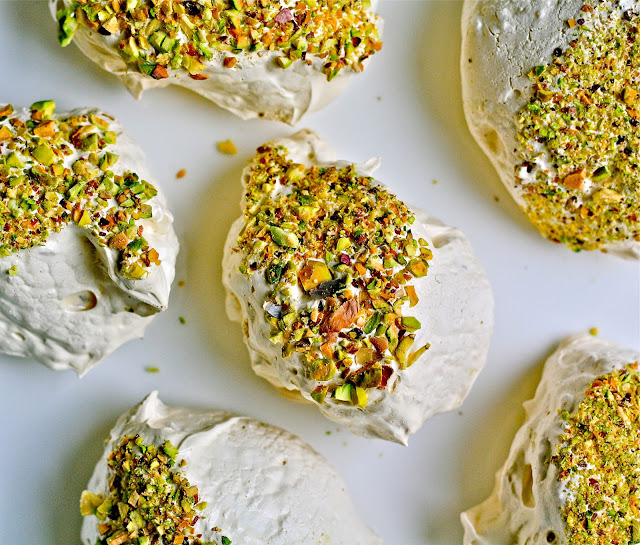
Pistachio-Rosewater Meringues (and another year on Earth)
I'm hooked on the (relatively new and critically
acclaimed) HBO show Girls.
The younger-me identifies with the show's main character who lives a
post-college life in New York City and grapples with life's ebbs and
flows, self-doubt, job insecurity and budget crunching. And while the show
takes me down memory lane just a bit, as I watch it I find myself being
thankful that I am, in fact, a little bit older. I occasionally grumble about
moving out of the 25-34 age demographic, but I wouldn't want to go back (not
that you can anyway). I like this station of life.
I've thought long and hard about my politics and core beliefs. I've
considered (at great lengths) what's important to me and what really isn't
a priority anymore. I've re-evaluated and re-assessed. Emotional stability and
self-confidence, which eluded me somewhat in my twenties, I've been able to
find in my mid-(ahem, late) thirties.
I'll admit that every now and again I'm stuck by the desire to
hunt down some one from my past and shout out, "Hey, remember me? I'm
not a mess anymore! I've got it together! I'm an adult!" But those moments
are few and far between, as I'm not looking for anyone's validation in the way
that I might have been a decade ago. That's the benefit of age.
Which brings me to my birthday meringues...
I first tasted these Pistachio-Rosewater Meringues at a dinner
party a few years ago. My friend Yana had us over for an
Ottolenghi-Middle-Eastern-inspired feast. The meal was spectacular and it was
capped off by these little beauties: sweet, light, delicate and delicious,
meringues.
I'd always wanted to make them at home, but I didn't know the
first thing about baking. And I was certain that I would mess them up if I even
tried. So I never did.
But several years have passed and I'm a bit older and a bit
wiser. I'm also fairly confident in the kitchen. When I saw rosewater
at my local market, I decided to pick up a bottle. I
knew then and there that those
meringues were getting made in the not-so-distant future.
I made them last night and they came out perfectly. I also
discovered that while they might appear challenging to make, the ingredients
are simple and the preparation is straight-forward.
My take-way from the meringue success, and using it as a
metaphor for the next year of my life, is this: Have the confidence to try new
things and don't let prospect of failure stop
you in your tracks. You've got it together. You know who are. That is the gift
of age. Enjoy it and happy birthday (to me).

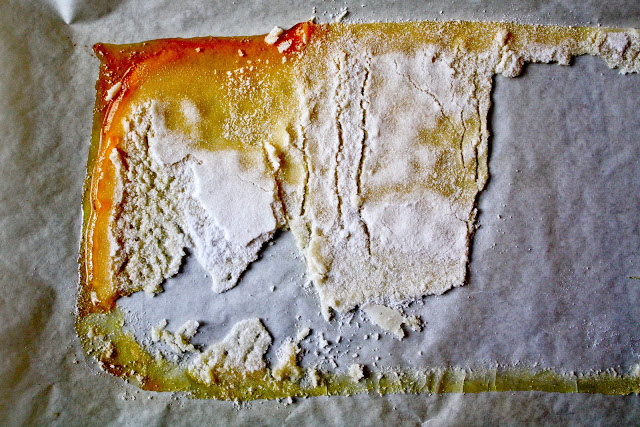
The sugar began to caramelize pretty quickly, so I had to start
again. I've since learned from a CCN
contributor that Denverites (or those cooking at altitude) should use a
thermometer and heat the oven 10 degrees lower than the suggested temperature,
as Denver's boiling temperature is 10 degrees lower than what you'll find at
sea level.


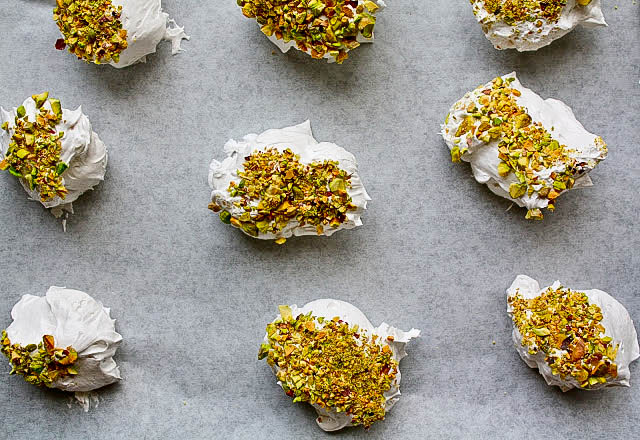
Pistachio-Rosewater Meringues
Inspiration and combination from Yotam Ottolenghi's eponymous
cookbook, Ottolenghi.
With some adaptions from the Joy of Baking and the Guardian UK.
See additional links below.
Yields 12-16
Ingredients
1 cup of granulated sugar (I used white, not
caster)
4 egg whites (Cold eggs are easier to
separate. Once they are separated, cover the egg whites and let them come
to room temperature before using, about 30 minutes.)
*In general, the ratio for meringues is 1/4 cup of sugar/per egg
white.
1 1/4 teaspoons of rosewater or orange blossom
water
A big handful of pistachio nuts, finely chopped
(about 1/4 cup)
Preparation
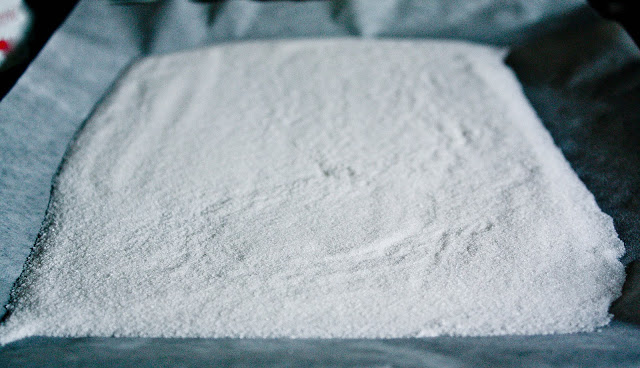
1. Preheat the oven to 400F. Spread the sugar
evenly over a baking tray lined with parchment paper. Put the tray in the oven
for 8 minutes or until the sugar is hot and starting to dissolve at edges, but
not caramelized. (See photo note above if you live in Denver.)
2. While the sugar is in oven, put the egg whites
in bowl of an electric mixer fitted with a whisk. When sugar is almost ready,
turn mixer on high and let it work for a minute or until the egg whites start
to froth.
3. Carefully pour the sugar into the whisked
whites (I used the parchment paper as a funnel and poured the sugar in that
way). Add the rosewater (or orange blossom water) and continue whisking on high
for 10 minutes or until the meringue is beautifully smooth, and holds a shape.
4. Reduce the oven temperature to 225F** Important
step.
5. Line a baking tray or two with parchment paper
(the one you just used for the sugar is fine). And spread the pistachios on a
board and finely chop them.
6. Get two big kitchen spoons.
Use one spoon to scoop up a big ball of the meringue, and use the other spoon
to scrape it off and gently roll the ball into the pistachios. Place the meringues nuts-up on the baking tray. Repeat this
step.
7. Place the meringues in the oven and bake for 2
hours. Rotate the baking sheet every 1/2 hour. Check to see if they're done.
They should be dry on the outside and soft on the inside.
Store the meringues in a dry place at room
temperature.
Note: Some recipes suggest that you leave the meringues in the oven
for another 4 hours--with the temperature off (this is after the initial 2
hours of baking is complete). I didn't do this (I baked them for 2 hours at
225F) and I thought the texture was spot-on.

I came across this Guardian
link on "How to Make
Perfect Meringues" which offers up some more guidance on all
things meringue.
The Daily Dish/LA Times weighs in
on the subject.
And some notes from The Joy
of Baking (though I didn't
use cream of tartar):
There are a few things to keep in mind when making meringue
cookies. The standard ratio when making hard meringues is 1/4 cup (50 grams) of
granulated white sugar for every egg white. This amount of sugar is needed to
give the meringue its crispness. Adding the sugar gradually to the egg whites
ensures that the sugar completely dissolves and does not produce a gritty
meringue. Cream of tartar is used in the whipping of egg whites to stabilize
them and allows them to reach maximum volume. Also, it is a good idea to use
parchment paper or aluminum foil to line your baking sheets, not wax paper, as
the meringue will sometimes stick to wax paper.
Baking the meringues in a slow
oven allows for gradual evaporation of the moisture from the meringues. If the
oven temperature is too high, the outside of the meringue will dry and set too
quickly. You will also notice that the outside of the meringue separates from
the inside. Another indicator that your oven is too high is when the meringue
starts to brown which causes the sugar to caramelize. If this happens, lower
the temperature about 25 degrees F. If you decide to make meringues on a rainy
or humid day, you will probably have to bake the meringues longer (could be up
to 30 minutes more) than on a dry day. Lastly, to prevent cracking of the
meringues, do not open the oven door during the first half of the baking time.


I enjoy traveling, photography, hiking, street art, design, architecture, food trucks, gardening, the cosmos, cooking with the seasons, political activism and wallpaper! I know my interests span a variety of categories, here's where they all come together.

