
Your Custom Text Here
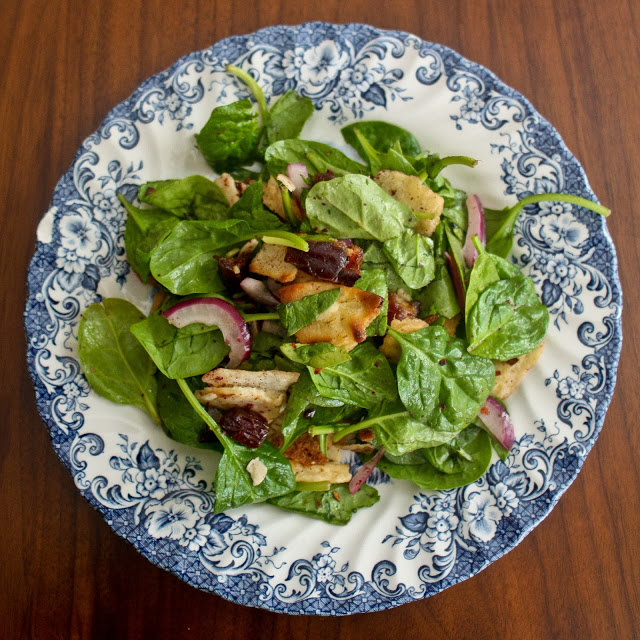
ottolenghi and tamimi's baby spinach salad with dates + almonds (or, the best salad ever)
I’ve always gravitated toward Middle-Eastern cooking. A lot of the
region’s staples happen to be vegetarian and I’m familiar with the food, having
lived and travelled throughout the area. Of course what really keeps me coming
back to the recipes is the taste.
When we lived in Brooklyn I was a regular at Tanoreen, perhaps one of the best
restaurants in the city and worth the shlep to Bay Ridge on the R train. If you
haven't been to Tanoreen, Rawia Bisharah's beloved and ever-popular restaurant,
you're missing out on the most delicious Middle-Eastern (in this case
Palestinian) food this side of the Atlantic.

When I want to make Middle-Eastern food at home, since I no longer
live within a train ride of Tanoreen, I grab Jerusalem. It
has amazing recipes and mouth-watering photos. And on a personal
note, I find the connection between Ottolenghi (who's from the Jewish part of
Jerusalem) and Tamimi (who's from the Palestinian part of Jerusalem) to be a
source of inspiration in a place where it’s sometimes hard to find areas of commonality,
let alone a deep friendship.
I wanted to keep things a bit light last week, so when I spotted this
recipe for Baby Spinach Salad with Dates and Almonds I knew it would be
perfect. The ingredients are straightforward and I had everything on hand
except sumac, which is a wonderful spice with a kind of tart flavor. So the
sumac hunt began…
It was kind of disappointing. I told Otis and Theodore, "We're
going on a special treasure hunt. Doesn't that sound like fun?" At first
they looked excited, but after making three separate stops and coming up empty-handed
they were loosing interest...fast.
It was after 6 p.m. so the good spice shops in town were already
closed. I picked up my phone and called another “specialty market” and was
transferred to bulk. I asked, “Hey, do you guys have sumac at your Colfax
location?” The lady on the other end said, “Hold on, I’ll check.” I was put on
hold for about 10 minutes. Then a voice at the other end of the phone said,
“You probably meant Turmeric. Yes we do.” Sigh. (If I wanted Turmeric I would
have asked for it…)
As if coming out of a fog, I said to myself, “What on Earth are you
doing? You know where to get really great Middle-Eastern food and spices. Get
with it girl…” So we drove to Aurora (a suburb of Denver with a large immigrant
community and awesome food),
made our way to S. Parker road where Arash Market was waiting for us with open
doors. And there it was, hanging on a wall surrounded by lots of other spices, a
little packet of sumac.
Baby Spinach Salad with Dates + Almonds
(Courtesy of Jerusalem: A Cookbook by Yotam Ottolenghi and
Sami Tamimi)
Yields 4 to 6 servings
Ingredients
1 tablespoon wine vinegar
1/2 medium red onion, thinly sliced
3 1/2 ounces dates (100 grams), preferably Medjool, pitted and quartered
lengthwise (add more if you're so inclined)
Salt
2 tablespoons unsalted butter (30 grams)
2 tablespoons olive oil, divided
2 small pitas (about 3 1/2 ounces, or 100 grams), roughly torn into 1
1/2 -inch pieces
1/2 cup whole unsalted almonds (75 grams), coarsely chopped (I used
slivered almonds and added them to the pan with the pita for about 1 minute.)
2 teaspoons sumac
1/2 teaspoon chile flakes
5 to 6 ounces baby spinach leaves (150 grams)
2 tablespoons freshly squeezed lemon juice
Preparation
- · Put vinegar, onion and dates in a small bowl. Add a pinch of salt and mix well with your hands. Leave to marinate for 20 minutes, then drain any residual vinegar and discard. (It didn't have any residual liquid.)
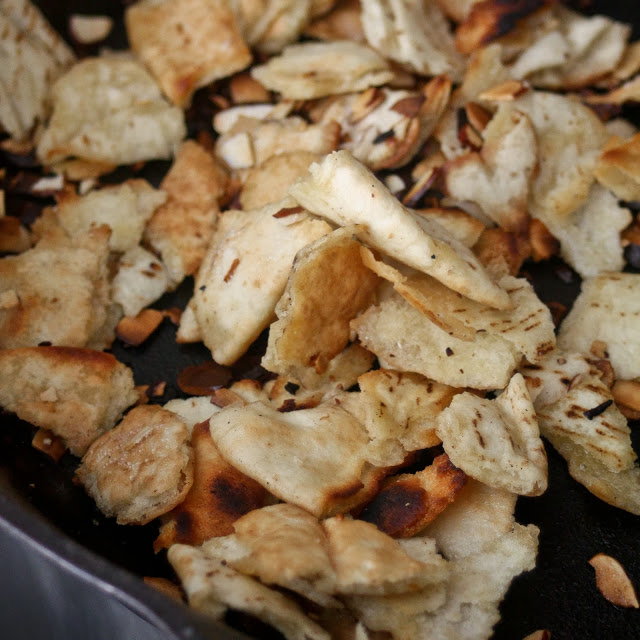
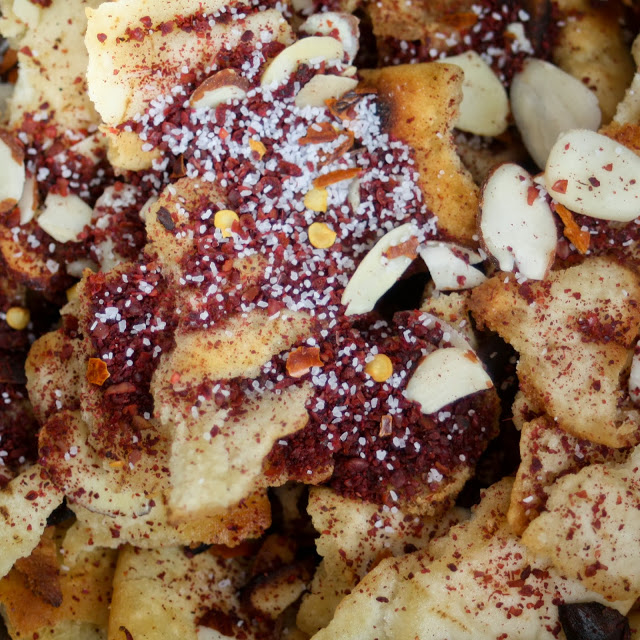
- · Meanwhile, heat butter and 1 tablespoon olive oil in a medium frying pan over medium heat. Add pita and cook for 4 to 6 minutes, stirring all the time, until pita is golden. Add almonds and continue cooking until pita is crunchy and browned and almonds are toasted and fragrant, about 2 minutes more. Remove from heat and mix in sumac, chile flakes and 1/4 teaspoon salt. Set aside to cool.
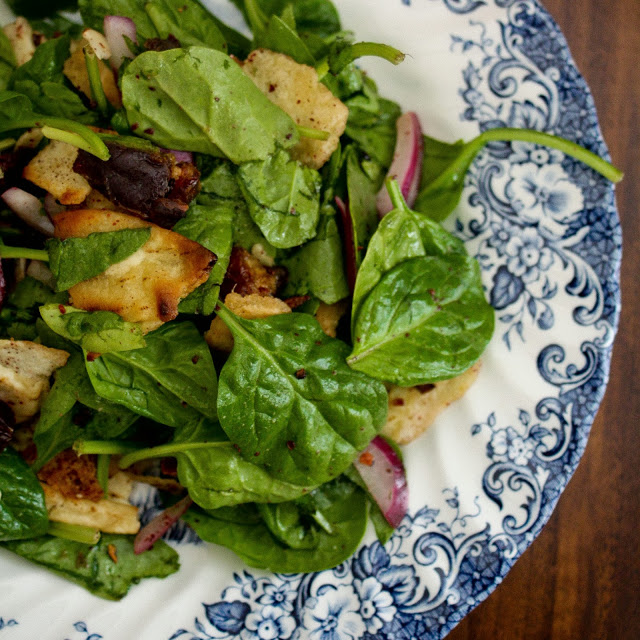
- · When ready to serve, toss spinach leaves with pita mix in a large mixing bowl. Add dates and red onion, remaining 1 tablespoon olive oil, the lemon juice and another pinch of salt. Taste for seasoning and serve immediately.
In Instagram: Coffee & Pie (Ottolenghi and Tamimi's Jerusalem Herb Pie)...and link love!

It's been almost 15 years since my mother escorted me on a 3-day road-trip from New York City to Madison, Wisconsin, which is where I originally started law school (this was long before I realized that I did not actually want to be an attorney). And it was on that road-trip that I figured out just how different we sounded from some of our Midwestern countrymen. Less me, more my mother.
My mother's accent is 100% pure Bronx. She grew up in the 1950s and 60s on the Grand Concourse (which if you're wondering, does have the second largest collection of Art Deco architecture outside of Miami). The accent is very particular and it's distinct from its more popularized Brooklyn counterpart. As for my accent, I like to think that I don't really have one. Maybe it's slightly more pronounced if I drink a few glasses of wine, or right after I've talked with my mother on the phone. But for the most part, I think that I can 'pass' as someone who is generally from the Northeast, or mid-Atlantic...unless I say the words dog, ball or coffee...
My mother's accent is 100% pure Bronx. She grew up in the 1950s and 60s on the Grand Concourse (which if you're wondering, does have the second largest collection of Art Deco architecture outside of Miami). The accent is very particular and it's distinct from its more popularized Brooklyn counterpart. As for my accent, I like to think that I don't really have one. Maybe it's slightly more pronounced if I drink a few glasses of wine, or right after I've talked with my mother on the phone. But for the most part, I think that I can 'pass' as someone who is generally from the Northeast, or mid-Atlantic...unless I say the words dog, ball or coffee...

..which brings me to Novo Coffee. They're one of the top 10 roasters in the country, and they happen to roast right here in Denver. Their coffee is served at some of the city's top restaurants, but there aren't too many places where you can buy their beans retail. So I was happy to discover that their warehouse is open on Friday between 1 and 3 pm for retail purchases. (I'd call before you go- just to confirm.)
Last month I finally found some time to check it out. I was greeted by Herb Brodsky, a co-founder of Novo. And it took me less than a minute to peg his accent...
This Bronx-born coffee roaster relocated to Denver back in 1995 and started his business shortly thereafter. But geographic kinship aside, Novo roasts some of the best beans I've ever tasted- thanks in part to their master-roaster Erich Rosenberg. My boys and I toured the facility and I schmoozed with Herb. And for a brief moment he suspected that he had dated my mother. But there were lots of ladies with the surname Goldstein in the Bronx in those days, so it was an easy mistake to make. It turns out they never dated.
This Bronx-born coffee roaster relocated to Denver back in 1995 and started his business shortly thereafter. But geographic kinship aside, Novo roasts some of the best beans I've ever tasted- thanks in part to their master-roaster Erich Rosenberg. My boys and I toured the facility and I schmoozed with Herb. And for a brief moment he suspected that he had dated my mother. But there were lots of ladies with the surname Goldstein in the Bronx in those days, so it was an easy mistake to make. It turns out they never dated.
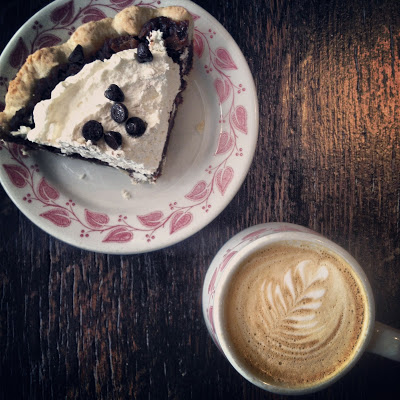
On the hunt for more good coffee and/or cappuccino, I also found The Humble Pie, which is located in the Baker Historic District of the city. In addition to great coffee, they also have some of the best pies around. There are savory and sweet options, so obviously I got one of each.

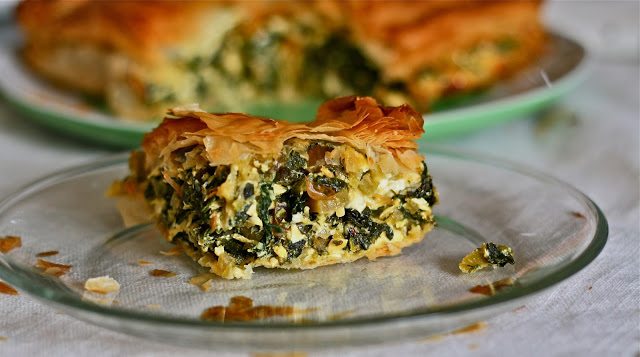
Feeling inspired by both coffee and pie, I decided to drink a nice cup of joe while scouring my favorite blogs and cookbooks for some pie ideas. I found an herb pie recipe from Jerusalem that looked so good, I just had to make it...even though it's a bit different from the pies that originally inspired me at The Humble Pie.
I hope you like this pick. It reminds me (a bit) of my favorite Moosewood Spanakopita...just with more herbs. 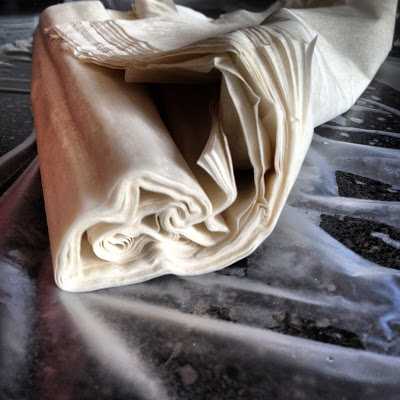
And here you go...
Herb Pie (adapted slightly from Yotam Ottoleghi and Sami Tamimi's Jerusalem)
Serves 4
This pie can happily sit at the center of a vegetarian meal.
Ingredients
2 tablespoons olive oil, plus extra for brushing the pastry
1 large onion, diced
1 lbs. Swiss chard, stems and leaves finely shredded but kept separate
3-4 stalks celery, thinly sliced
4 scallions (green onion), chopped
1 large bunch fresh spinach (The original recipes uses 1 3/4 ounces of arugula, which I think the British call rocket.)
1 ounce flat-leaf parsley, chopped (I used between 1/2-3/4 cup)
1 ounce fresh mint, chopped (I used between 1/2-3/4 cup)
2/3 ounce dill, chopped (I used about 1/2 cup)
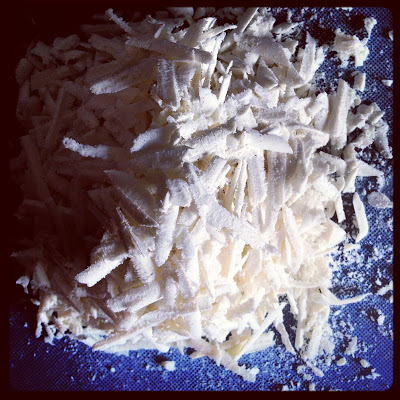
4 ounces of anari or ricotta cheese, crumbled (I used about 3/4 cup of Myzithra)
3 1/2 ounces aged cheddar, grated (I used about 3/4 cup)
2 ounces feta cheese, crumbled (I used about 2 small, but full, handfuls)
the grated zest of 1 lemon
2 medium free-range eggs
1/3 teaspoon salt
1/2 teaspoon coarsely ground black pepper
1/2 teaspoon of superfine sugar
9 ounces filo pastry
Preparation
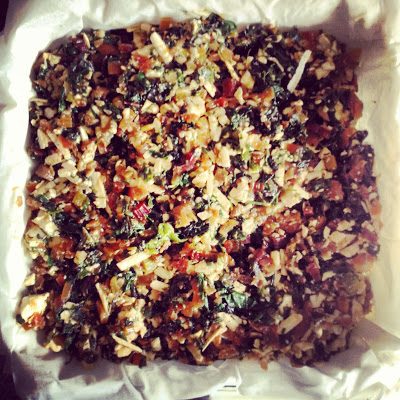
- Preheat the oven to 400F/200C. Pour the olive oil into a deep frying-pan over medium heat. Add the onion and sauté for 8 minutes without browning. Add the chard stems and the celery and continue cooking for 4 minutes, stirring occasionally. Add the chard leaves, increase the heat to medium-high and stir as you cook for 4 minutes, until the leaves wilt. Add the scallion/green onion, spinach (or arugula) and herbs and cook for 2 minutes more. Remove from the heat and transfer to a colander to cool.
- Once the mixture is cool, squeeze out as much water as you can and transfer to a mixing bowl. (I didn't have much water to drain-- probably because I'm at altitude and the water evaporates more quickly.) Add the three cheeses, lemon zest, eggs, salt, pepper and sugar and mix well.
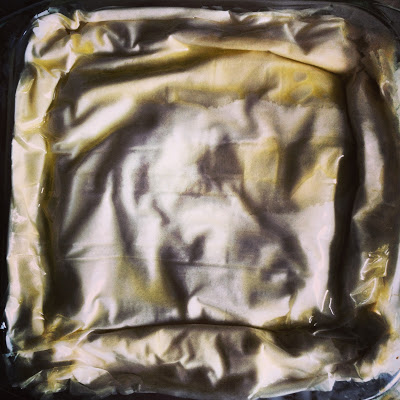
- Lay out a sheet of filo pastry and brush it with some olive oil. Cover with another sheet and continue in the same manner until you have 5 layers of filo brushed with oil, all covering an area large enough to line the sides and bottom of a 8 1/2-inch pie dish, plus extra to hang over the rim. Line the pie dish with the pastry, fill with the herb mix and fold the excess pastry over the edge of the filling, trimming the pastry as necessary to create a 3/4 inch border.
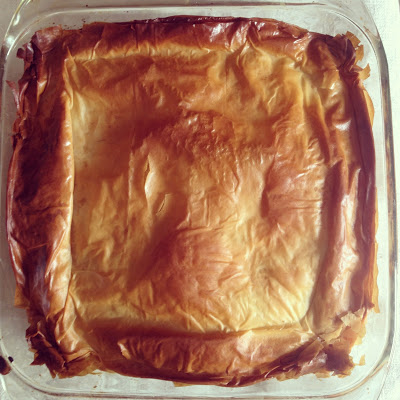
- Make another set of 5 layers of filo brushed with oil and place them over the pie. Scrunch the pastry a little to create a wavy, uneven top and trim the edges so it just covers the pie. Brush generously with olive oil and bake for 40 minutes, or until the filo turns a nice golden brown. Remove from the oven and serve warm or at room temperature.
* * *
link love...
discovery of the week. and they run a fabulous company.
another new-to-me food blog.
ordered this.
time is up!
building that bridge...
on the book shelf (thanks Jo Ellen for the recommendation).
a fabulous looking winter salad (thanks, Yana).
Please note: These are heart-felt recommendations. I have no business relationship or sponsorship with Novo Coffee, The Humble Pie or any of the links mentioned on this blog.
Tomatillo-Sauced Enchiladas with Spinach and Mushrooms (To Go!)
I grew up in New York City, which is an
incredibly diverse place. Yet surprisingly, and somehow, Cinco de Mayo flew under my radar. There's a Mexican neighborhood in Sunset Park,
Brooklyn, but it's nothing compared to the size of the Mexican communities in
Texas, Arizona, New Mexico, Colorado or California.
Anyway, I first heard of the holiday the year after I graduated from college and moved to
San Francisco. An office mate invited me to what would be my first Cinco de Mayo party. "Cinco de what?" I replied, as I
opened my day planner. Then I said something like, "Sure, I'd love to come
to the party! What's that date again?" There were blank stares. And a few eye rolls.
Many years later, I've got dozens of Cinco de Mayo parties under my belt. And here in Colorado there are tons of
festivities around town and a two-day celebration is held at Civic Center
Park. We decided to go to a friend's house to celebrate on the 5th and went
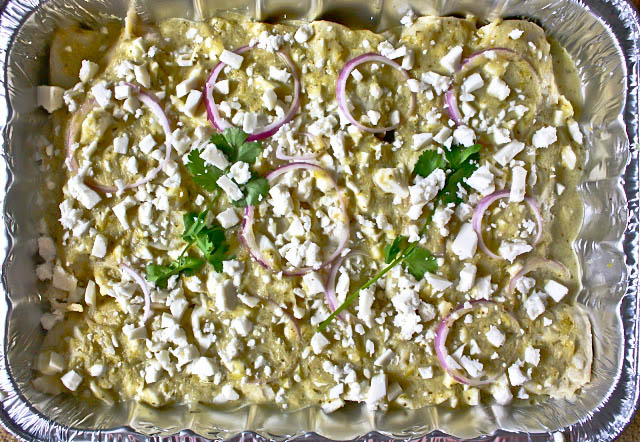
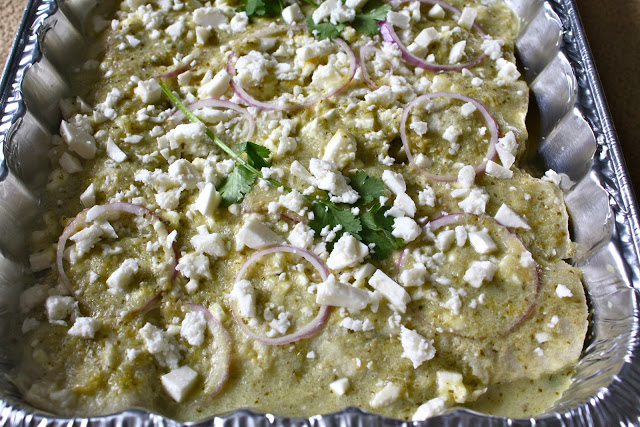
downtown on the 6th. For the occasion I made these Tomatillo-Sauced Spinach
& Mushroom Enchiladas. They were delicious. I ate so many that I felt like
a piñata about to burst. In a good way, sort of.
I adjusted the heat of the tomatillo salsa a bit,
but you can tweak it to your suit your taste preference. I thought the dish was
a really nice twist on a casual, yet traditional, Mexican entree.
I had some tomatillo salsa (salsa verde) to
spare, so the next morning I put it on top of some baked eggs with Gruyere, which was also very delicious!
Enjoy!
Tomatillo-Sauced Enchiladas with Spinach and
Mushrooms (Adapted from Rick Bayless, via Cookstr)
Yield : Serves 4
Ingredients
3 garlic cloves, peeled
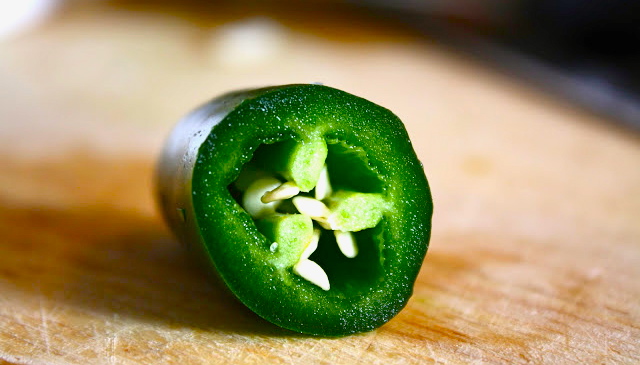
1 medium-sized (2 1/2 inches) jalapeño, stemmed,
seeded and quartered (if you want it hotter, leave the seeds in-- I've made it
both ways)
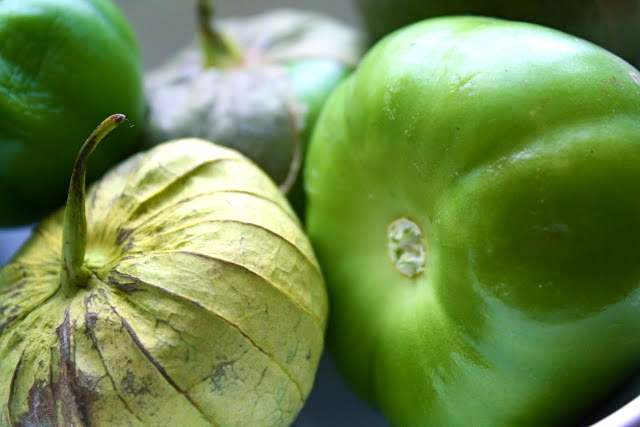
1 ½ pounds (10 to 12 medium) tomatillos, husked,
rinsed and cut into quarters
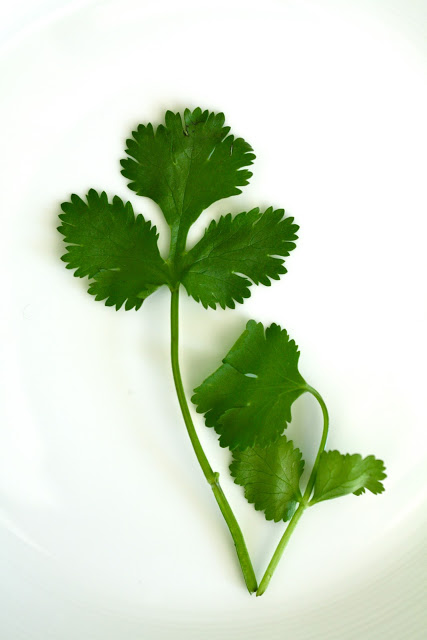
¾ cup (loosely packed) roughly chopped cilantro,
plus a few extra sprigs for garnish
4 tablespoons vegetable oil or olive oil, plus
some for the tortillas
2 cups vegetable broth, plus water as needed
8 ounces mushrooms (I used button, but you can
use oyster or shiitake too), stemmed and sliced
1 large red onion, thinly sliced
10 ounces (about 10 cups) spinach, stems removed
Salt
12 corn tortillas, preferably store-bought
5 tablespoons Mexican cream, sour cream, heavy
cream or crème fraiche
1 cup (4 ounces) crumbled Mexican queso fresco
Directions
Turn on the oven to 350 degrees. With a food
processor or blender running, drop in the garlic and chiles one piece at a
time, letting each piece get finely chopped before adding the next. Add the
tomatillos and cilantro; process until smooth.
Heat 1 ½ tablespoons of the oil in a medium
(3-quart) saucepan over medium-high. Add the puree and cook, stirring nearly
constantly, until the mixture has reduced to the consistency of thick tomato
sauce, about 7 minutes. (The more you cook down this base, the richer and
sweeter the tomatillo sauce will be.) Add the broth and simmer over medium heat
for about 10 minutes to blend the flavors. (If the heat is a bit too much, you
can mellow it a bit by adding some water.)
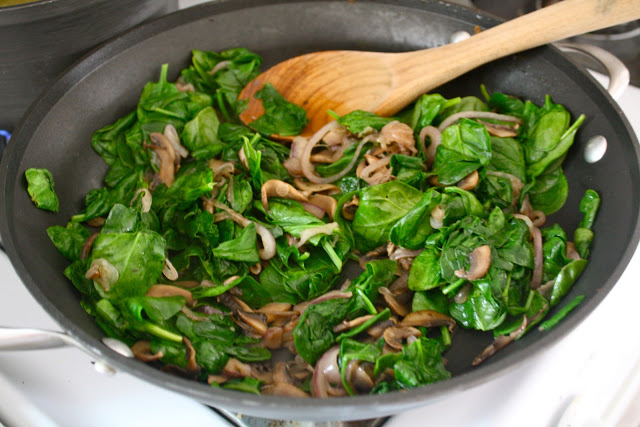
While the sauce is simmering, heat the remaining
1 ½ tablespoons oil in a very large (12-inch) skillet over medium-high. Add the
mushrooms and cook, stirring nearly constantly, for a couple of minutes, until
they begin to brown. Add about three-quarters of the onion (reserve the rest
for garnish) and continue cooking, stirring frequently, for another minute or
two, until the onion looks translucent. Add the spinach and optional chicken or
ham and cook, stirring constantly, for a minute or so, until the spinach is
wilted. Season with salt, usually a scant teaspoon. Cover to keep warm.
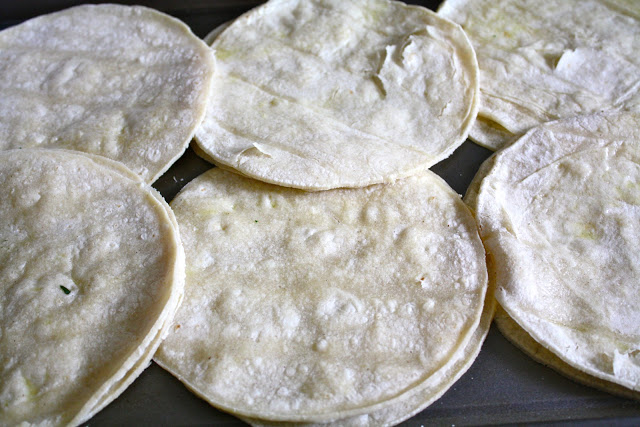
Lay out the tortillas on a baking sheet and spray
or brush lightly on both sides with oil or bacon drippings, then stack them in
twos. Slide the tortillas into the oven and bake just long enough to make them
soft and pliable, about 3 minutes. Remove from the oven and stack them in a
single pile; cover with a kitchen towel to keep warm. (This step is necessary.
If you skip it, and try filling the tortillas without baking or frying them,
they will fall apart when you start to roll them up.)
Stir the cream (or its stand-in) into the sauce.
Taste and season with salt, usually about 1 teaspoon (add the sugar if the
sauce seems quite tart to you). Holding a tortilla by one edge, dip most of it
into the sauce, then lay it on a plate. Spoon a heaping 2 tablespoons filling
down the center, roll up and lay seam side down in a dinner plate. Repeat with
2 more tortillas, arranging them on the same dinner plate. Douse the enchiladas
with about ¼ cup of the warm sauce, sprinkle with a quarter of the crumbled
cheese and garnish with some of the reserved onion and cilantro sprigs.
Assemble the rest of the servings, and carry to the table without hesitation.
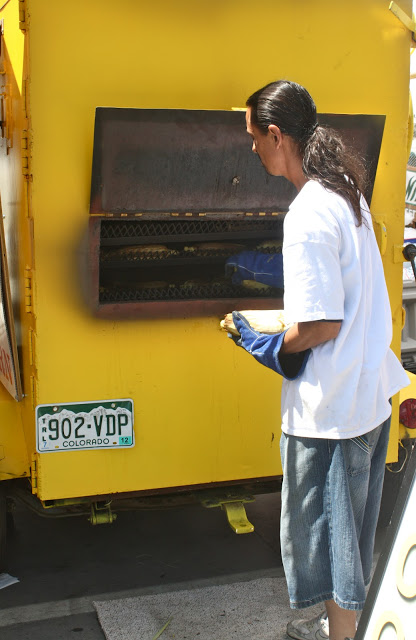
The day after Cinco de Mayo we decided to
head down to the Civic Center to check out the scene and eat some food. (The
temperature had also dropped about 20 degrees, so it was a much better day for
walking around.) The park was seemingly less crowded than it had been the day
before, but there were still lots of people, great food stalls and live
music...and a lot of Tecate.
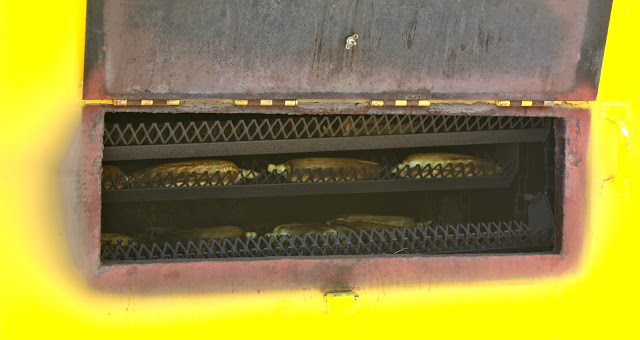
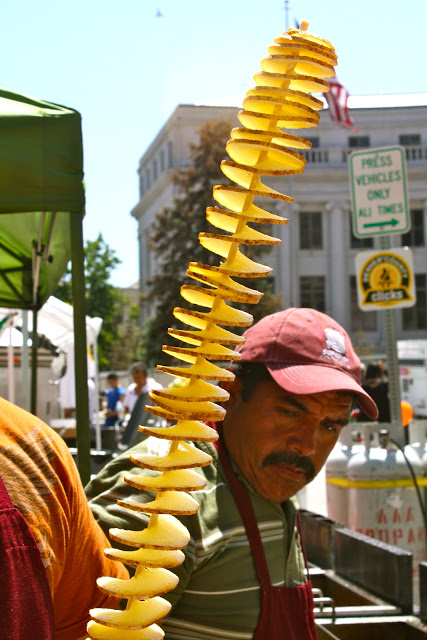
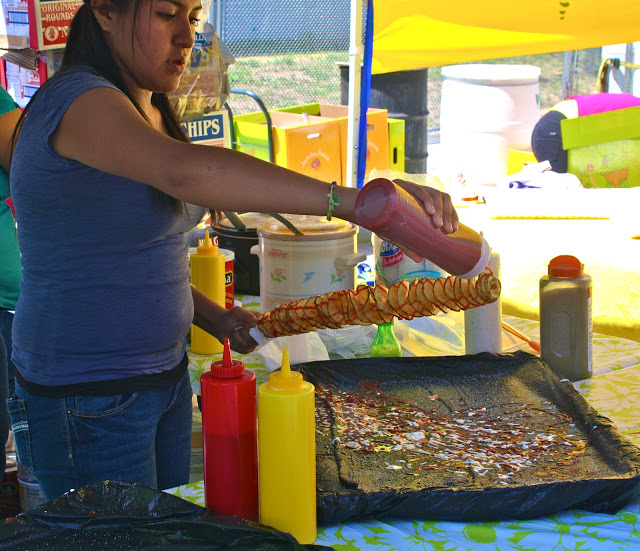
My favorite snack of the day were the elotes, ears of corn
smothered in mayonnaise, chili powder and cotija cheese. Mmm, yum.
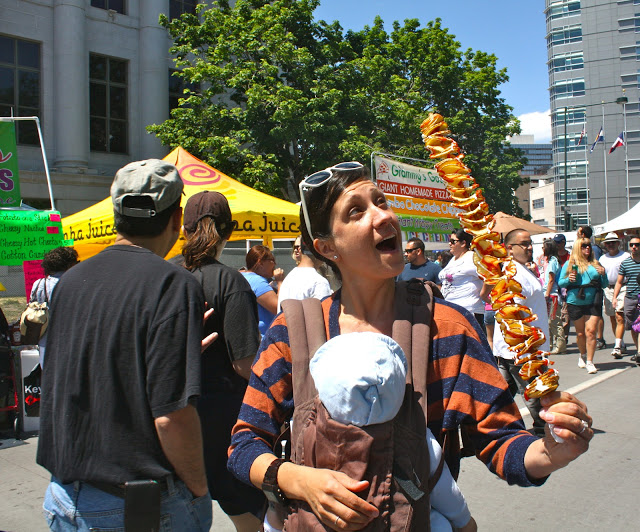
We topped things off with a funnel cake, which is
decidedly un-Mexican, but very much a part of fair/street food. Deep fried
batter sprinkled with powdered sugar?! Yes, please!
On the way back to the car we passed the Denver
Art Museum (YSL is still going on), the main library, some great public
art, and the Clyfford Still
Museum (still one of my favorites, pardon the pun).
All in all, we had a great time celebrating Cinco
de Mayo and I'm looking forward to celebrating again next year, on the 5th
of May!


Inner Francophile: Spinach Quiche, Dorie Greenspan's Mustard Tart and The Yves St. Laurent Retrospective

When it was announced that the Yves Saint Laurent retrospective that wowed audiences at the Petit Palais in Paris two years ago would travel to Denver this week, and nowhere else in the United States, the question on many minds was: why Denver?
“America isn’t just New York or Los Angeles or Chicago or Boston,” said Pierre Bergé, Saint Laurent’s longtime partner in life and business and the head of the designer’s foundation. “Besides, Denver asked me. Voilà!” - New York Times, T Magazine, Blog
Looks like we moved out of Brooklyn and over to Denver at just the right time! I love museums-- permanent collections, special exhibits, retrospectives, Classical, Neo-Classical, the Classics, Abstract Expressionism, fashion, interiors and design, architecture...I love it all. So when I heard that the Denver Art Museum was the exclusive U.S. venue for the Yves St. Laurent retrospective, I was giddy with excitement. Positively giddy. G-I-D-D-Y.
 |
| The "Big Sweep" by Claes Oldenburg and Coosje van Bruggen, outside DAM. |

Feeling the spirit of YSL, I toyed with the idea of wearing a wool pants suit for my museum visit. But it was really warm that day so it didn't seem terribly practical to be donning wool. Well that, and I was heading over to the exhibit straight from the kid's playground. So there I was, at the museum's biggest fashion event, dressed rather unfashionably. But who cares, right? I was there! Yes, I was there, enjoying the exhibit, for over two hours, sans children.
There is no photography allowed inside the venue, so you will have to take my word on this-- the retrospective was wonderful. Magnificent, really. The presentation, curation and collection were impeccable. I may have to go back one more time...
Now it doesn't take much for me to get in touch with my inner Francophile, so in honor of Yves, I decided to make two quiches this week. And get this-- I made the dough too. Oh yes. Mais oui! I rolled out some pâte brisée, which literally means "short pastry." And I did it twice. Turns out that making tart dough isn't difficult at all, you just have to be mindful that it needs to chill for three hours before you can actually use it.
I decided to go with a spinach quiche (originally from Bon Appetit Magazine) and a mustard tart (from Dorie Greenspan's tome, Around My French Table). I followed Dorie's recipe for pâte brisée as well.
I decided to parbake both crusts for 20 minutes, with oiled foil on top (more on this below), and then let the pies bake an additional 2 minutes once the foil was removed. In retrospect, I should have let them bake a few minutes longer. I think the crust would have been a bit more flaky. That said, all in all, it was a very successful (first!) attempt at making homemade quiche.
So here they are. I hope you enjoy the recipes. And if you find yourself in Denver before July 8th, definitely visit the Denver Art Museum's retrospective on YSL.
I'm off to channel Catherine Deneuve...and hoping that Netflix delivers Belle De Jour lickety-split.
Au revoir!
Pâte Brisée/ Tart Dough (Courtesy of Dorie Greenspan, Around My French Table)
Yield: Makes one 9 - to 9 ½-inch tart shell
Be prepared: The dough should chill for at least 3 hours.
Ingredients
1 1/4 cups all-purpose flour
1 teaspoon sugar
1/2 teaspoon salt
6 tablespoons (3/4 stick) very cold (or frozen) unsalted butter, cut into bits
1 large egg
1 teaspoon ice water

 To make the dough by hand: Put the flour, sugar, and salt in a large bowl. Drop in the bits of butter and, using your hands or a pastry blender, work the butter into the flour until it is evenly distributed. You’ll have large and small butter bits, and that’s fine — uniformity isn’t a virtue here. Beat the egg and water together, drizzle over the dough, and, using a fork, toss the dough until it is evenly moistened. Reach into the bowl and, using your fingertips, mix and knead the dough until it comes together. Turn it out onto a work surface, gather it into a ball (if the dough doesn’t come together easily, push it, a few spoonfuls at a time, under the heel of your hand or knead it some more), and flatten it into a disk.

Chill the dough for at least 3 hours. (The dough can be refrigerated for up to 5 days.)
When you’re ready to make the tart shell, butter a 9- to 9 1/2-inch fluted tart pan with a removable bottom (butter it even if it’s nonstick).
To roll out the dough: I like to roll out the dough between sheets of wax paper or plastic wrap or in a lightly floured rolling cover, but you can roll it out on a lightly floured work surface. If you’re working between sheets of paper or plastic wrap, lift the paper or plastic often so that it doesn’t roll into the dough, and turn the dough over frequently. If you’re just rolling on the counter, make sure to lift and turn the dough and reflour the counter often. The rolled-out dough should be about ¼ inch thick and at least 12 inches in diameter.
Transfer the dough to the tart pan, easing it into the pan without stretching it. (What you stretch now will shrink in the oven later.) Press the dough against the bottom and up the sides of the pan. If you’d like to reinforce the sides of the crust, you can fold some of the excess dough over, so that you have a double thickness around the sides. Using the back of a table knife, trim the dough even with the top of the pan. Prick the base of the crust in several places with a fork.

Chill — or freeze — the dough for at least 1 hour before baking.
Center a rack in the oven and preheat the oven to 400 degrees. Press a piece of buttered foil (or use nonstick foil) against the crust’s surface. If you’d like, you can fill the covered crust with rice or dried beans (which will be inedible after this but can be used for baking for months to come) to keep the dough flat, but this isn’t really necessary if the crust is well chilled. Line a baking sheet with a silicone baking mat or parchment paper and put the tart pan on the sheet.

To partially bake the crust: Bake for 20 minutes, then very carefully remove the foil (with the rice or beans). Return the crust to the oven and bake for another 3 to 5 minutes, or until it is lightly golden. Transfer the baking sheet to a cooling rack and allow the crust to cool before you fill it.
To fully bake the crust: Bake for an additional 10 minutes, or until it is an even golden brown. Transfer the baking sheet to a cooling rack and allow the crust to cool before you fill it.
Storing: Well wrapped, the dough can be kept in the refrigerator for up to 5 days or frozen for up to 1 month. Although the fully baked crust can be wrapped airtight and frozen for up to 2 months, I prefer to freeze the unbaked crust in the pan and bake it directly from the freezer — it has a fresher flavor. Just add about 5 minutes or so to the baking time.


Ingredients
3 carrots (not too fat), trimmed and peeled
3 thin leeks, white and light green parts only, cut lengthwise in half and washed
2 rosemary sprigs
3 large eggs
6 tablespoons crème fraîche or heavy cream
2 tablespoons Dijon mustard, or to taste
2 tablespoons grainy mustard, preferably French, or to taste
Salt, preferably fleur de sel, and freshly ground white pepper
1 9- to 9½-inch tart shell made from Tart Dough (recipe above), partially baked and cooled
Method
Center a rack in the oven and preheat the oven to 425 degrees. Line a baking sheet with a silicone baking mat or parchment paper.


Yield: Makes one 9 - to 9 ½-inch tart shell
Be prepared: The dough should chill for at least 3 hours.
Ingredients
1 1/4 cups all-purpose flour
1 teaspoon sugar
1/2 teaspoon salt
6 tablespoons (3/4 stick) very cold (or frozen) unsalted butter, cut into bits
1 large egg
1 teaspoon ice water
Method
To make the dough in a food processor: Put the flour, sugar and salt in the processor and whir a few times to blend. Scatter the bits of butter over the flour and pulse several times, until the butter is coarsely mixed into the flour. Beat the egg with the ice water and pour it into the bowl in 3 small additions, whirring after each one. (Don’t overdo it — the dough shouldn’t form a ball or ride on the blade.) You’ll have a moist, malleable dough that will hold together when pinched. Turn the dough out onto a work surface, gather it into a ball (if the dough doesn’t come together easily, push it, a few spoonfuls at a time, under the heel of your hand or knead it lightly), and flatten it into a disk.
To make the dough in a food processor: Put the flour, sugar and salt in the processor and whir a few times to blend. Scatter the bits of butter over the flour and pulse several times, until the butter is coarsely mixed into the flour. Beat the egg with the ice water and pour it into the bowl in 3 small additions, whirring after each one. (Don’t overdo it — the dough shouldn’t form a ball or ride on the blade.) You’ll have a moist, malleable dough that will hold together when pinched. Turn the dough out onto a work surface, gather it into a ball (if the dough doesn’t come together easily, push it, a few spoonfuls at a time, under the heel of your hand or knead it lightly), and flatten it into a disk.
To make the dough by hand: Put the flour, sugar, and salt in a large bowl. Drop in the bits of butter and, using your hands or a pastry blender, work the butter into the flour until it is evenly distributed. You’ll have large and small butter bits, and that’s fine — uniformity isn’t a virtue here. Beat the egg and water together, drizzle over the dough, and, using a fork, toss the dough until it is evenly moistened. Reach into the bowl and, using your fingertips, mix and knead the dough until it comes together. Turn it out onto a work surface, gather it into a ball (if the dough doesn’t come together easily, push it, a few spoonfuls at a time, under the heel of your hand or knead it some more), and flatten it into a disk. Chill the dough for at least 3 hours. (The dough can be refrigerated for up to 5 days.)
When you’re ready to make the tart shell, butter a 9- to 9 1/2-inch fluted tart pan with a removable bottom (butter it even if it’s nonstick).
To roll out the dough: I like to roll out the dough between sheets of wax paper or plastic wrap or in a lightly floured rolling cover, but you can roll it out on a lightly floured work surface. If you’re working between sheets of paper or plastic wrap, lift the paper or plastic often so that it doesn’t roll into the dough, and turn the dough over frequently. If you’re just rolling on the counter, make sure to lift and turn the dough and reflour the counter often. The rolled-out dough should be about ¼ inch thick and at least 12 inches in diameter.
Transfer the dough to the tart pan, easing it into the pan without stretching it. (What you stretch now will shrink in the oven later.) Press the dough against the bottom and up the sides of the pan. If you’d like to reinforce the sides of the crust, you can fold some of the excess dough over, so that you have a double thickness around the sides. Using the back of a table knife, trim the dough even with the top of the pan. Prick the base of the crust in several places with a fork.
Chill — or freeze — the dough for at least 1 hour before baking.
Center a rack in the oven and preheat the oven to 400 degrees. Press a piece of buttered foil (or use nonstick foil) against the crust’s surface. If you’d like, you can fill the covered crust with rice or dried beans (which will be inedible after this but can be used for baking for months to come) to keep the dough flat, but this isn’t really necessary if the crust is well chilled. Line a baking sheet with a silicone baking mat or parchment paper and put the tart pan on the sheet.
To partially bake the crust: Bake for 20 minutes, then very carefully remove the foil (with the rice or beans). Return the crust to the oven and bake for another 3 to 5 minutes, or until it is lightly golden. Transfer the baking sheet to a cooling rack and allow the crust to cool before you fill it.
To fully bake the crust: Bake for an additional 10 minutes, or until it is an even golden brown. Transfer the baking sheet to a cooling rack and allow the crust to cool before you fill it.
Storing: Well wrapped, the dough can be kept in the refrigerator for up to 5 days or frozen for up to 1 month. Although the fully baked crust can be wrapped airtight and frozen for up to 2 months, I prefer to freeze the unbaked crust in the pan and bake it directly from the freezer — it has a fresher flavor. Just add about 5 minutes or so to the baking time.
* * *
Gérard’s Mustard Tart (Courtesy of Dorie Greenspan, Printed in The New York Times, Diner's Journal)
Be sure to use strong mustard from Dijon. Dorie's friend Gérard Jeannin uses Dijon’s two most popular mustards in his tart: smooth, known around the world as Dijon, and grainy or old-fashioned, known in France as “à l’ancienne.” You can use either one or the other, or you can adjust the proportions to match your taste, but whatever you do, make sure your mustard is fresh, bright colored, and powerfully fragrant. Do what Gérard would do: smell it first. If it just about brings tears to your eyes, it’s fresh enough for this tart.Ingredients
3 carrots (not too fat), trimmed and peeled
3 thin leeks, white and light green parts only, cut lengthwise in half and washed
2 rosemary sprigs
3 large eggs
6 tablespoons crème fraîche or heavy cream
2 tablespoons Dijon mustard, or to taste
2 tablespoons grainy mustard, preferably French, or to taste
Salt, preferably fleur de sel, and freshly ground white pepper
1 9- to 9½-inch tart shell made from Tart Dough (recipe above), partially baked and cooled
Method
Center a rack in the oven and preheat the oven to 425 degrees. Line a baking sheet with a silicone baking mat or parchment paper.
Cut the carrots and leeks into slender bâtons or sticks: First cut the carrots lengthwise in half, then place the halves cut side down on the cutting board and cut crosswise in half or cut into chunks about 3 inches long. Cut the pieces into 1/ 8- to 1/4-inch-thick matchsticks. If your carrots were fat and you think your matchsticks don’t look svelte enough, cut them lengthwise in half. Cut the leeks in the same way.
Fit a steamer basket into a saucepan. Pour in enough water to come almost up to the steamer, cover, and bring to a boil. Drop the carrots, leeks, and 1 rosemary sprig into the basket, cover, and steam until the vegetables are tender enough to be pierced easily with the tip of a knife, 10 to 15 minutes. Drain the vegetables and pat them dry; discard the rosemary sprig.
In a medium bowl, whisk the eggs together with the crème fraîche or heavy cream. Add the mustards, season with salt and white pepper — mustard has a tendency to be salty, so proceed accordingly — and whisk to blend. Taste and see if you want to add a little more of one or the other mustards.
Put the tart pan on the lined baking sheet and pour the filling into the crust. Arrange the vegetables over the filling — they can go in any which way, but they’re attractive arranged in spokes coming out from the center of the tart. Top with the remaining rosemary sprig and give the vegetables a sprinkling of salt and a couple of turns of the pepper mill.
Bake the tart for about 30 minutes, or until it is uniformly puffed and lightly browned here and there and a knife inserted into the center of the custard comes out clean. Transfer the tart to a cooling rack and let it rest for 5 minutes before removing the sides of the pan.
Serve hot, warm, or at room temperature (or lightly chilled).
Serving: The tart is delicious just out of the oven, warm, at room temperature, or even slightly chilled — although that wouldn’t be Gérard’s preference, I’m sure. If you’re serving it as a starter, cut it into 6 portions; if it’s the main event, serve it with a lightly dressed small salad.
Storing: Like all tarts, this is best soon after it is made, but leftovers can be covered, chilled, and nibbled on the next day.
* * *
Spinach Quiche (Courtesy of Bon Appetit Magazine and Smitten Kitchen, with a modification or two...)
Ingredients
4 ounces of cream cheese, room temperature
4 ounces of cream cheese, room temperature
1/2 cup half and half (or milk)
3 eggs
1 10-ounce package frozen chopped spinach, thawed and drained
1/2 cup grated cheddar (you could use Gruyere too)
1/4 cup grated Parmesan
3 green onions, thinly sliced
1/4 teaspoon salt
1/4 teaspoon pepper
Preheat oven to 425°. Beat cream cheese in medium bowl until smooth. Gradually beat in half and half and eggs. Mix in remaining ingredients. Pour mixture into prepared crust. Bake until crust is golden brown and filling is set, about 25 minutes. Cool 10 minutes before serving.
Preheat oven to 425°. Beat cream cheese in medium bowl until smooth. Gradually beat in half and half and eggs. Mix in remaining ingredients. Pour mixture into prepared crust. Bake until crust is golden brown and filling is set, about 25 minutes. Cool 10 minutes before serving.

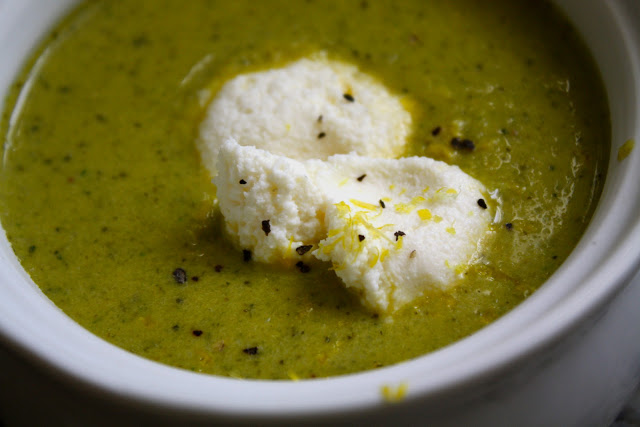
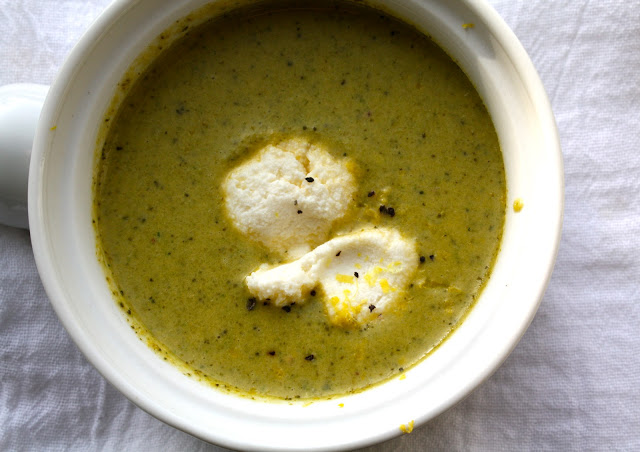
Broccoli Soup with Lemon and Ricotta

Before I was getting most of my recipe ideas from Pinterest, I had spent a considerable amount of time on Saveur magazine's list, "Sites We Love." I came across one that I thought had a really cute idea- pairing dishes with music. The site is called "Turntable Kitchen" and each of the recipes has a suggested musical accompaniment. This was of particular interest to me because I had just commented to a friend that I needed to expand my musical repertoire. I think somewhere around the age of 30 I noticed that I had been listening to the same artists over and over (and over again). And I wasn't really downloading anything new on my iPod. It's like, you hit a certain age, you are x number of years away from your college graduation, and you find yourself thinking "Who the hell is that?" while watching the Grammys. What I like about the aforementioned site is that you can find some inspirational ideas for the kitchen and satisfy that new-music craving too.
Everyone in our family loved the soup, but you really have to season it well. Since there are so few ingredients, good seasoning is key to making this soup successful.
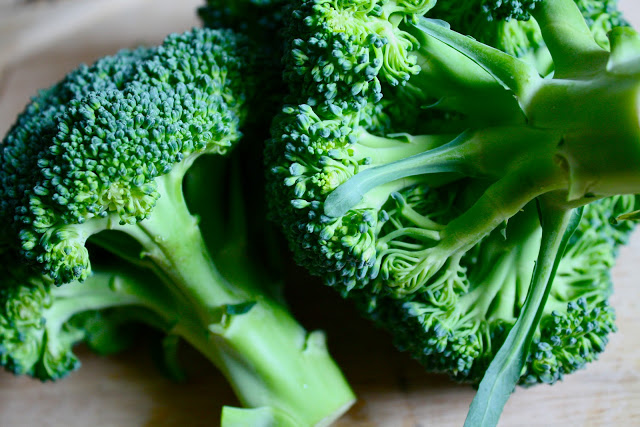
What I like about the soup is that the real flavor of broccoli comes through...it's not hidden under a pound of cheddar cheese (though, confession: there is a cup of cream in the pot). It feels light and the fresh ricotta and lemon add nice texture and acid. I served it with a thick slice of Italian bread from the Denver Bread Company. It totally hit the spot and it was the perfect lunch.
So, get this soup going while you listen to The Shins- Chutes Too Narrow...or just come up with a pairing that you like better. Enjoy!
Broccoli Soup with Lemon and Ricotta (Courtesy of The Turntable Kitchen, adapted from Donna Hay)
Serves 4
Ingredients
1 tablespoon of butter
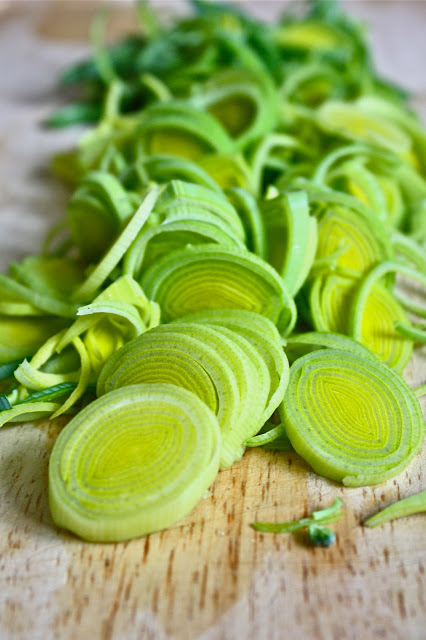
1 leek, thoroughly rinsed and thinly sliced
2 garlic cloves, crushed
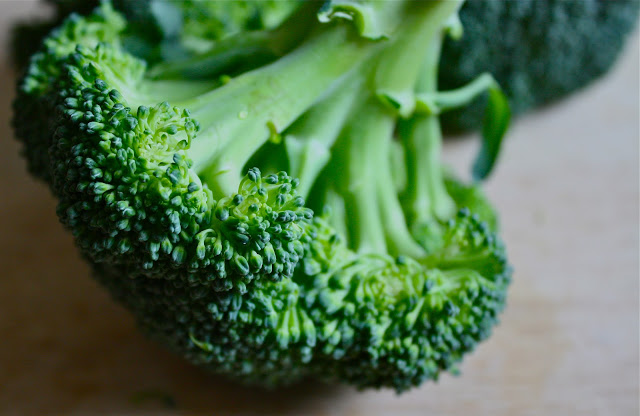
1 large or 2 small heads of broccoli (florets + stems), roughly chopped
4 cups of vegetable stock
approximately 1 cup (packed) of spinach
1 cup of heavy whipping cream (Next time I think I'll use a 1/2 cup and a little bit of milk)
1 tablespoon of freshly-squeezed lemon juice
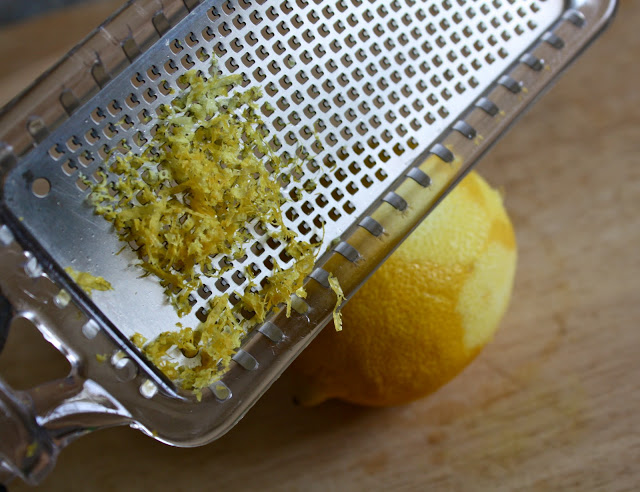
1/4 teaspoon of lemon zest
sea salt and freshly-ground black pepper (season the soup well)
1/2 cup of ricotta
Preparation
1. Add the butter to a medium soup pot and heat it over medium-high heat, until it melts. Add the leek and garlic, and cook for about five minutes (until the leek has softened). Stir occasionally to keep the leek from sticking to the bottom of the pot.
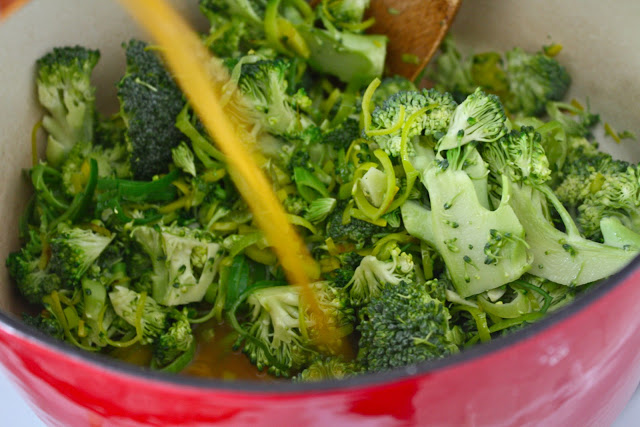
2. Next, toss in the chopped broccoli and vegetable stock. Bring to a boil, then cook over medium-high heat for another 10 or so minutes (until the broccoli is fork-tender). Toss in the spinach, cooking for another few minutes.
3. Remove the pot from the heat and use a hand blender to whiz the soup into a puree.
4. Pour in the cream and stir until it is well-incorporated. Next, add in the lemon juice and zest, and season with salt and freshly ground pepper.
5. To serve, ladle the soup into bowls and top each with a hearty spoonful of ricotta.
Ingredients
1 tablespoon of butter
1 leek, thoroughly rinsed and thinly sliced
2 garlic cloves, crushed
1 large or 2 small heads of broccoli (florets + stems), roughly chopped
4 cups of vegetable stock
approximately 1 cup (packed) of spinach
1 cup of heavy whipping cream (Next time I think I'll use a 1/2 cup and a little bit of milk)
1 tablespoon of freshly-squeezed lemon juice
1/4 teaspoon of lemon zest
sea salt and freshly-ground black pepper (season the soup well)
1/2 cup of ricotta
Preparation
1. Add the butter to a medium soup pot and heat it over medium-high heat, until it melts. Add the leek and garlic, and cook for about five minutes (until the leek has softened). Stir occasionally to keep the leek from sticking to the bottom of the pot.
2. Next, toss in the chopped broccoli and vegetable stock. Bring to a boil, then cook over medium-high heat for another 10 or so minutes (until the broccoli is fork-tender). Toss in the spinach, cooking for another few minutes.
3. Remove the pot from the heat and use a hand blender to whiz the soup into a puree.
4. Pour in the cream and stir until it is well-incorporated. Next, add in the lemon juice and zest, and season with salt and freshly ground pepper.
5. To serve, ladle the soup into bowls and top each with a hearty spoonful of ricotta.


I enjoy traveling, photography, hiking, street art, design, architecture, food trucks, gardening, the cosmos, cooking with the seasons, political activism and wallpaper! I know my interests span a variety of categories, here's where they all come together.

