
Your Custom Text Here
Walking Denver (Part III) and a Winter Pear Salad with Walnuts and Mustard Vinaigrette

The Front Range and Foothills got a whole lot of snow last week. I think the totals were somewhere around a foot. But as I've mentioned in previous posts, the snow is welcomed here in Colorado and the city of Denver looks beautiful. The temperature usually shoots back into the 40's and 50's within a day or two after a storm, so that helps with melting and because of that you don't feel like you're living in a place with an unmanageable winter.

I decided it was time to go on another historic walking tour, one that would take us through a different part of town. We drove over to see some of the larger homes and mansions in the Country Club section of the city. The neighborhood, which was established around 1905, has some impressive residences with architectural influences that include French Chateau, Georgian, Colonial, 1920's Tudor, Victorians, 'Denver Squares' and Santa Fe. (I also spotted a great mid-century modern home which I tried to look into, but things got awkward when the people inside saw me on my tippy-toes, two kids in tow, trying to get a glimpse of their interior furnishings.) Unfortunately for me I was going on this walking tour with a broken toe.
My poor little toe, the fourth one on my right foot (I'll call it my ring toe) got stubbed on the baby's bouncer. It hurt like hell and I knew immediately it was broken. Adding insult to injury, the lovely denizens of Country Club aren't too fond of shoveling their sidewalks and some parts of the neighborhood are without sidewalks all together. That meant that I could only take Otis and Theo on a few well-shoveled streets- which was too bad because I felt like we missed a ton of great architecture. I guess that just means we will have to head back that way again once things melt a bit more.

Anyway, Otis had a great time and Theo slept through most of the tour.
When I got home I whisked up a wonderful vinaigrette and drizzled it on top of a tasty winter pear salad. It was easy and delicious, which makes it my kind of salad.
Enjoy and Happy holidays!


* * *
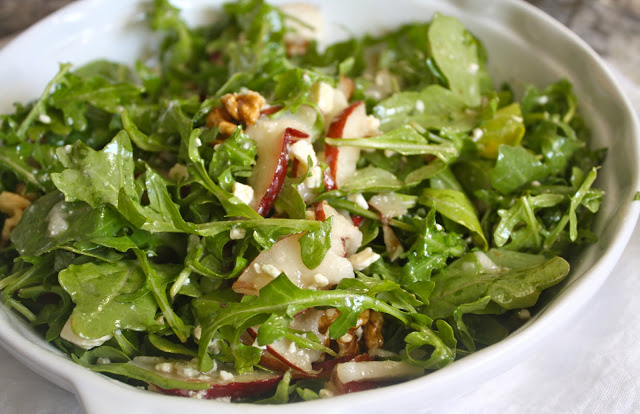
I saw a few variations of this pear salad, so I made a hybrid of sorts by using posts from dishingthedivine and drizzleanddip. This salad is über-simple to make and it's really tasty. There's bitter-goodness from the arugula, sweetness from the pear, a creamy tang from the cheese, and a mustard-ness (is that a word?) from the vinaigrette. Basically, the perfect balance of savory and sweet. You could caramelize the nuts, but since I wanted to keep the prep time and clean-up to a minimum, I skipped that step for now...but it certainly would be a way to jazz this up for a holiday dinner party.

Winter Pear Salad with Walnuts and Mustard Vinaigrette Dressing (Adapted from Drizzle & Dip and Dishing the Divine)
Ingredients
several cups of arugula
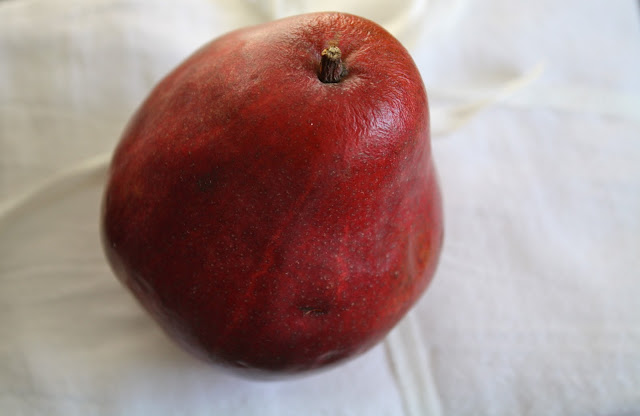
1 pear, thinly sliced (I went with Red Anjou)
2 ounces crumbly cheese (gorgonzola, blue cheese)
1/2 cup walnuts
4 tablespoons of olive oil
2 tablespoons red wine vinegar
1/2 teaspoon Dijon mustard
1 tablespoon and 1 teaspoon of maple syrup
a big pinch of salt
fresh ground pepper to taste
Directions
Place the baby greens in a large, flat bowl. Top with pear slices, walnuts and cheese.
For the dressing, blend oil, vinegar, mustard, maple syrup, salt, and pepper.
Drizzle the dressing over the salad (you will likely have some left over). Mix. Eat! 
The salad dressing is very similar to Mollie Katzen's "Sweet & Tart Mustard Dressing" in The New Moosewood Cookbook. That recipe is as follows:
6 tablespoons of olive oil
2 tablespoons of Dijon mustard
4 tablespoons of red wine vinegar
2 teaspoons of honey or maple syrup
salt and pepper to taste
Whisk everything together. Cover and chill. This dressing is especially good on chilled cooked vegetables, like Brussels sprouts, cauliflower or broccoli.
A Diwali Dinner: Curried Squash & Apple Soup and Indian Pancakes

One of my college room-mates celebrated Diwali. She would get really excited about the holiday and return to our dorm room with some of the best food I have ever eaten. Her mother and grandmother would spend hours preparing a lavish feast and I was happy to be the recipient of the holiday leftovers. It sure beat ramen noodles and instant mac-and-cheese, two of my college staples.
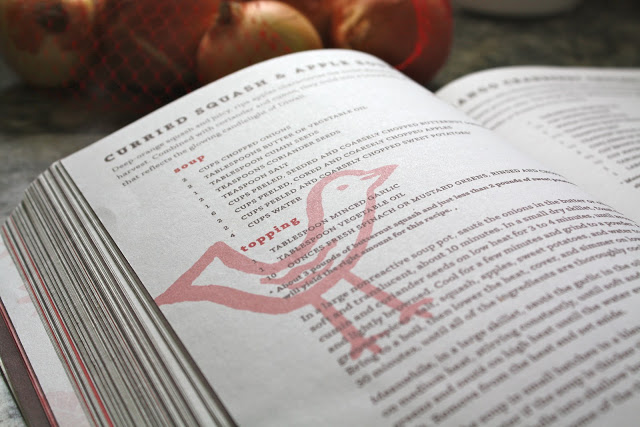
Diwali is the festival of lights, and while I'm not Indian or Hindu (or Jain or Sikh), I never pass up an opportunity to celebrate a holiday...even if it isn't mine. I freakin' love holidays! How fortunate, then, that I came across Moosewood Restaurant Celebrates: Festive Meals for Holidays and Special Occasions at my local library.
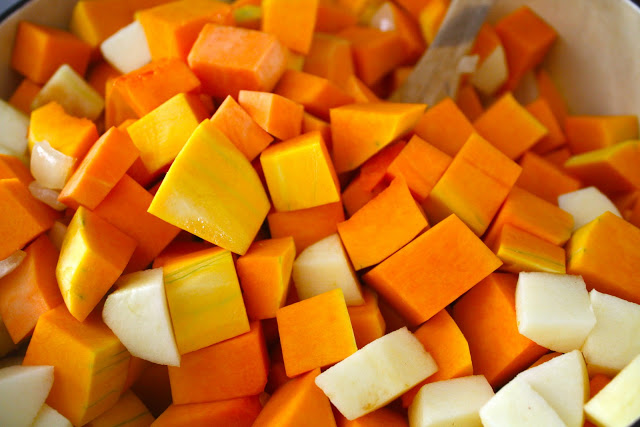
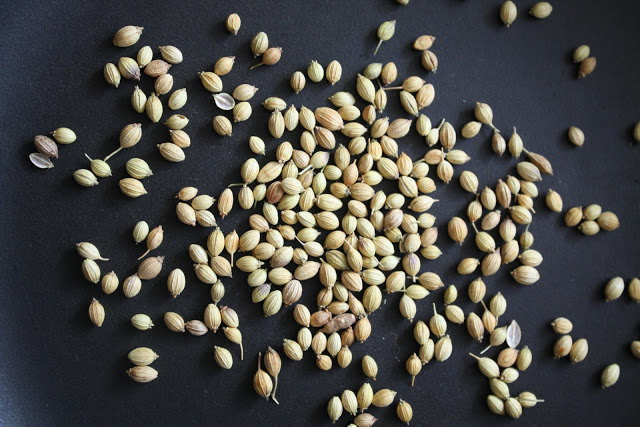
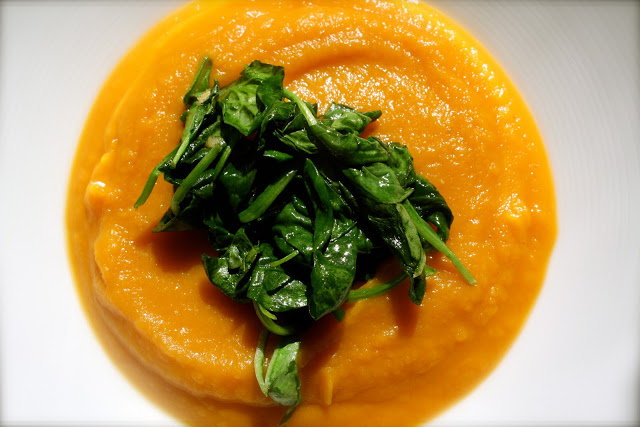
I decided to try the soup and the Indian pancakes. I really liked the soup and it just screams "hey, it's me, Fall!" I bought local squash, Jonathan apples (which I must confess, I don't think I have ever eaten before) and local sweet potatoes. The Indian flavors come through from the cumin and coriander seeds. I'm wondering if I should add some mild Indian curry powder the next time I make this. I'll make it a game-time decision. There's no cream in this soup and I used just one cup of stock (the original recipes uses only water). Healthy, healthy, healthy. The spinach, as it is used here, really isn't a garnish. It's an essential part of the dish and it gives the soup added texture and flavors. So go for it. Hey, it's also good for you...
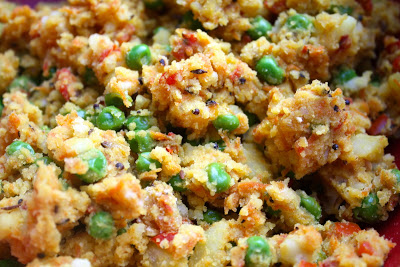
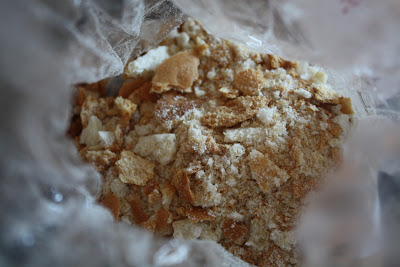
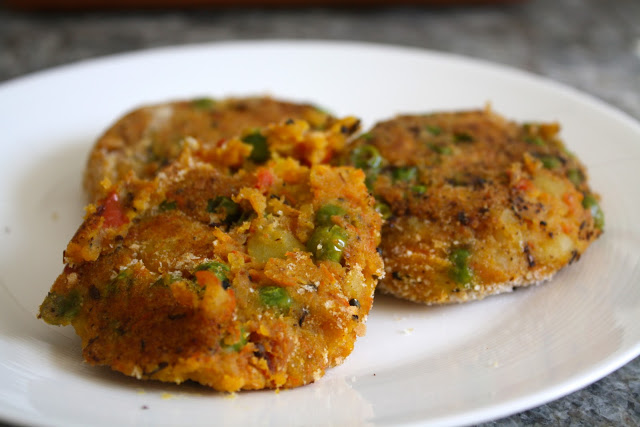
The Indian vegetable pancakes were delicious. They are very similar to samosas-- spiced smashed potato, red pepper, onion, peas, mustard seeds, cumin and a dash of hot pepper sauce. Before I put the patties on the skillet, I lightly dusted them with some fresh bread crumbs. (I used Udi's 'unofficial' bread crumbs from Sunflower Market. The market grinds down leftover baguettes at the end of the night and turn them into bread crumbs.)
Diwali is coming up fast, so get cooking! Happy Holidays!
Curried Squash & Apple Soup (Courtesy of Moosewood Restaurant Celebrates Holidays and Occasions)
Serves 6
Ingredients
Soup
2 cups chopped onions
2 tablespoons butter or vegetable oil
1 tablespoons cumin seeds
2 teaspoons coriander seeds
1 teaspoon salt
6 cups peeled, seeded and coarsely chopped butternut squash*
2 cups peeled, cored and coarsely chopped apples
2 cups peeled and coarsely chopped sweet potatoes*
4 cups water
* About 3 pounds of butternut squash and just less than 2 pounds of sweet potatoes will yield the right amount for this recipe.
Topping
1 tablespoon minced garlic
1 tablespoon vegetable oil
10 ounces fresh spinach or mustard greens, rinsed and chopped
Directions
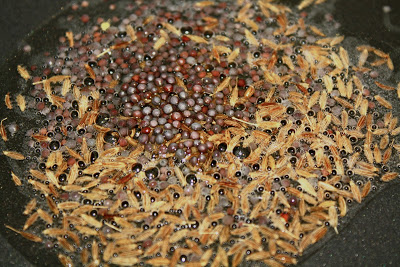
In a large nonreactive soup pot (it needs to be big), sauté the onions in the butter or oil until soft and translucent, about 10 minutes. In a small dry skillet, toast the cumin and coriander seeds on low heat for 3 to 4 minutes, until aromatic and lightly browned. Cool for a few minutes and grind to a powder (I used a coffee grinder). Add the ground spices, salt, squash, apples, sweet potato, and water to the onions. Bring to a boil, then lower the heat, cover, and simmer on low heat for about 30 minutes, until all of the ingredients are thoroughly cooked and tender.
Meanwhile, in a large skillet, sauté the garlic in the oil for about 1 minute on medium heat, stirring constantly, until soft and just golden. Add the greens and sauté on high heat until the water evaporates and the greens wilt. Remove from the heat and set aside.
Purée the soup in small batches in a blender until smooth, adding about 1/4 cup of water if the soup is thicker than you'd like. When ready to serve, gently reheat, ladle into shallow bowls, and top each serving with some of the sautéed greens.
* * *
Second Course
Indian Vegetable Pancakes (Courtesy of Moosewood Cookbook Celebrates)
Yields 12 pancakes
(You can make the pancakes ahead, and then fry just before serving. Top with plain yogurt.)
Ingredients
4 1/2 cups peeled and cubed potatoes (1-inch cubes)- About 8 medium sized potatoes
1 1/2 to 2 teaspoons salt (I used 2)
2/3 cup vegetable oil
1 1/2 teaspoons whole cumin seeds
1 1/2 teaspoons black mustard seeds
1 teaspoon turmeric
1 1/2 cups finely chopped onions
1 1/2 cups diced red bell peppers
2 cups peeled and grated carrots
3 to 4 drops Tabasco or other hot pepper sauce, more to taste (I used 5)
2 cups frozen peas
1 cup bread crumbs
Directions
 In a large pot, bring 2 quarts of water to a boil. Add the potatoes and 1/2 teaspoon of the salt and simmer for 10 to 15 minutes, until tender. Drain the potatoes and reserve some of the cooking liquid. Place the potatoes in a large bowl, moisten them with about 2 tablespoons of the reserved cooking liquid, and mash them with a potato masher. Warm 2 tablespoons of oil in a 10-inch skillet on medium heat. Add the cumin and mustard seeds and cook for about 30 seconds, until the mustard seeds begin to pop. Add the turmeric, 1 teaspoon of the salt, and the onions and continue to sauté for 8 to 10 minutes, until the onions are soft.
Stir in the peppers and carrots and cook for about 5 minutes more, until crisp-tender, adding a splash of water, if needed, to prevent sticking.
Sprinkle on a few drops of Tabasco sauce; the add the peas and stir for 1 to 2 minutes, until the peas soften.
Transfer the vegetables to the bowl of mashed potatoes and stir in 1/4 cup of the bread crumbs. Rinse and dry the skillet. Mix together the vegetables and potatoes and, if necessary, adjust the salt and Tabasco sauce to taste. Divide the potato mixture to form twelve round patties, each about 3 inches across. Set aside on a platter. Sprinkle the remaining bread crumbs on the twelve patties, about 1/2 tablespoon per side.
Meanwhile, warm 3 tablespoons of the oil in the skillet until hot.
Gently slide three patties into the skillet with a wide spatula. Fry on medium heat for about 5 minutes, until crisp on the bottom. Carefully lift each one and turn it over, being careful not to splash the oil. Fry on the second side for 3 to 4 minutes, remove from the skillet, and drain on paper towels. Add more oil and repeat process until you make twelve pancakes.
Serve immediately or place the pancakes in a heatproof dish and keep them warm in a 300-degree oven until ready to serve.
Moosewood's Spanakopita
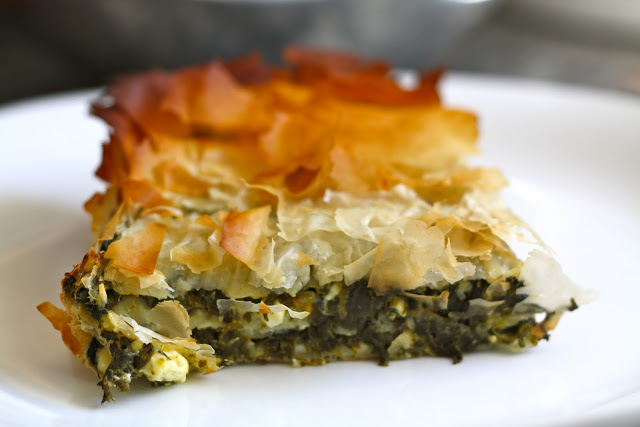
Spanakopita: spinach, cheese, and filo dough flakiness. I love it. It's the kind of thing I could eat for lunch and
dinner- on the very same day. If I could only eat one thing for the rest
of my life, spinach pie would be in the running. I think you get the picture.
I'm pretty serious about this dish. I've made spanakopita (Greek spinach pie) many times before and I thought my go-to recipe was really good. That is, before I tasted this Moosewood recipe, which is pretty much perfect.
The first time I had this Moosewood version was at a
going-away party some friends threw for us right before we left Brooklyn. The
gathering took place in a penthouse apartment overlooking Grand Army Plaza and Prospect
Park. The views were spectacular and you could see the city skyline and the harbor from the roof deck. There were lots of friends sharing stories and yes, I shed a few tears that night. It was a wonderful way to spend the evening- and it was bittersweet to be leaving such great people, but also really exciting to be relocating and trying something new in Denver, Colorado.
The food at the party was incredible. There was pasta, cheese plates, salads and our friend Beth made this spinach pie. The meal was capped off with an amazing devil's food cake soaked with salted caramel, layered with whipped chocolate ganache and frosted with a classic French buttercream (holy delicious!) made by friend Kathryn of Cooking Inside the Box. But I'm not really a baker so I knew there was no way I was going to be able to replicate the perfection of the aforementioned cake. I was confident, however, that I could make the spinach pie, so I asked for the recipe.
The food at the party was incredible. There was pasta, cheese plates, salads and our friend Beth made this spinach pie. The meal was capped off with an amazing devil's food cake soaked with salted caramel, layered with whipped chocolate ganache and frosted with a classic French buttercream (holy delicious!) made by friend Kathryn of Cooking Inside the Box. But I'm not really a baker so I knew there was no way I was going to be able to replicate the perfection of the aforementioned cake. I was confident, however, that I could make the spinach pie, so I asked for the recipe.

This pie is not hard to make, but chopping 2 1/2
pounds of spinach does take some time. In the interest of full disclosure I
will tell you that I now routinely use frozen organic spinach in this recipe.
You can buy good quality frozen filo dough (phyllo dough) at most supermarkets in the
frozen section near the pastry shells- just don't forget to take it out of the
freezer when you start prepping. It must be completely thawed otherwise
it will break and flake and, well, just become a mess. You want the sheets to
be malleable and intact.
This dish can be made a day or two in advance. Keep
it uncooked, covered and refrigerated until you want to serve it. Then put it
in the oven, uncovered, and cook for 45 minutes.
Enjoy this recipe. And trust me, this spanakopita
is worthy of the (Greek) Gods...


Spanakopita
(Courtesy of The Moosewood
Cookbook, adapted
ever-so-slightly)
Yields: About 8 servings
Filling:
2 Tbs olive oil
2 cups minced onion
1/2 tsp salt
1 tsp oregano
1 tsp basil
2.5 lbs fresh spinach, stemmed and finely chopped
(or 2.5 lbs frozen organic spinach)
5 medium cloves garlic, minced
3 Tbs flour
2 to 3 cups (packed) crumbled feta cheese (about 1
lb)
1 1/4 cup cottage or pot cheese
Black pepper, to taste
1/3 to 1/2 cup olive oil, for the filo
1 lb filo pastry leaves (approx. 20 leaves) --
thoroughly defrosted
Directions
Preheat oven to 375 F. Oil a 9 by 13 inch baking
pan.
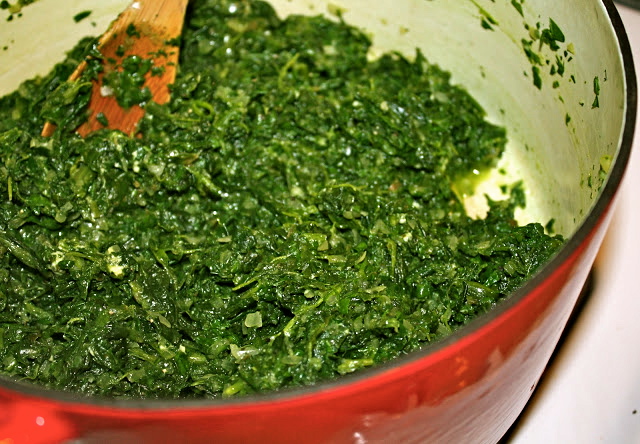
Heat 1 Tbs olive oil in a Dutch oven. Add onion,
salt, and herbs, and sauté for about 5 minutes, or until the onion softens. Add
spinach, turn up the heat, and cook, stirring, until the spinach wilts (5 to 8
minutes). Stir in the garlic.
Sprinkle in the flour, stir, and cook over medium
heat 2 to 3 more minutes. Remove from heat.
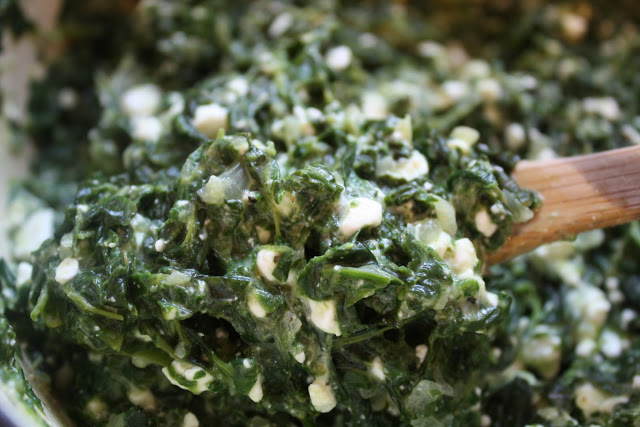
Mix in the cheeses. Taste to correct seasonings,
adding lots of black pepper (and some salt).
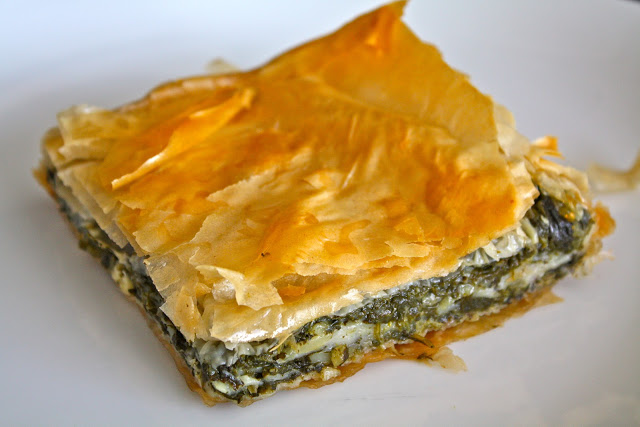
Place a sheet of filo in the oiled pan, letting the
pastry edges climb up the sides. Brush lightly with oil, and add another sheet.
Keep going until you have a pile of 8 oiled sheets. Add half the filling,
spreading it to the edges, then repeat with 8 more sheets of oiled filo,
followed by the remaining filling. Layer the rest of the filo over the filling,
brushing oil in between. Oil the top, tuck in the edges, and bake uncovered for
about 45 minutes or until golden and crispy. Cut into squares and serve hot or
warm.
{Note: After making this recipe several times, I think the best
results were obtained when the pie was baked for 30 minutes COVERED and then an
additional 5 minutes UNCOVERED. The filling was much creamier and the top was
not quite as dark. I recommend doing it this way.}


I enjoy traveling, photography, hiking, street art, design, architecture, food trucks, gardening, the cosmos, cooking with the seasons, political activism and wallpaper! I know my interests span a variety of categories, here's where they all come together.

