Childhood Favorites with a Twist: Comte Grilled Cheese and Queso Quesadillas with Papaya-Avocado Salsa

Last Sunday I stumbled upon a collection of recipes that I had clipped from the New York Times Dining & Wine section. The recipes were part of an article titled "Taking Back A Childhood Favorite" [printed on April 11, 2007] and included grilled cheese sandwiches and cheese quesadillas. But the recipes weren't standard or typical; they offered unique and delicious twists on the classics. And they were incredibly easy to make, with a prep time of about 10-15 minutes each.

Recipe No. 1:
Comtรฉ Grilled Cheese with Cornichon Spread (Adapted Slightly)
2 tablespoons whole grain mustard 
2 tablespoons mayonnaise 
2 tablespoons finely chopped cornichons or other pickles 
4 slices whole-grain bread or multigrain baguette
1/4 pound Comtรฉ cheese, sliced 
1 tablespoons unsalted butter
Preparation:

1. Whisk together mustard, mayonnaise and cornichons. Spread on 4 slices of bread and divide cheese among bread slices, to make 2 sandwiches. 
2. Melt butter in a medium skillet over moderate heat. Cook sandwiches until golden on both sides, 1 to 2 minutes a side, pressing down on sandwiches with spatula. Reduce heat to low and cover; cook until cheese melts completely, about 2 minutes more. Serve hot.

Note: You can also make this in a Panini press. 
Yield: 2 servings.  

*
Recipe No. 2:
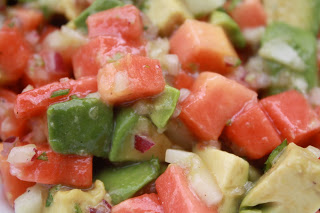
Queso Quesadillas with Papaya-Avocado Salsa- I made it last night. The original recipe calls for queso fresco, but I opted for a really nice Monterey Jack at the suggestion of my local cheese monger.  The sweetness of the papaya mixed with the richness of the avocado, plus a bit of bite from the red onion, was perfection. You could probably use this as a party dip too!


Queso Quesadillas with Papaya-Avocado Salsa (Adapted)
For the salsa: 
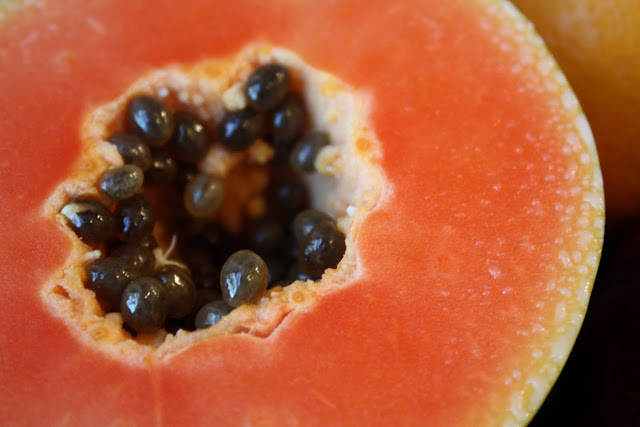
1 cup cubed fresh peeled papaya 
1/2 avocado, peeled and cubed 
1/4 cup cubed, seeded cucumber 
1 tablespoon flat leaf parsley (the original recipe has cilantro, use it if that's your preference)
2 tablespoons finely chopped red onion 
2 tablespoons freshly squeezed orange juice 
2 tablespoons freshly squeezed lime juice 
1 tablespoon extra virgin olive oil 
1/2 teaspoon kosher salt 
Freshly ground black pepper 


For the quesadillas: 
4 6-inch corn tortillas 
1/4 pound of a good Monterey Jack

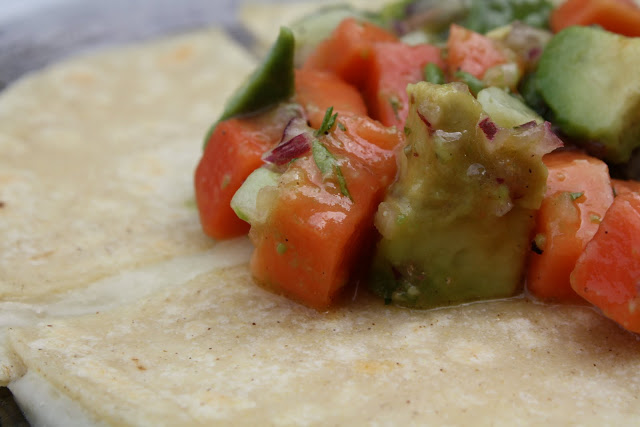
The original recipe calls for broiler cooking (which I did last night), but I found that the cheese oozed out to quickly and the tortilla got a little burnt.  I made this recipe again for lunch today and used a fry pan, with medium heat, and the quesadillas were perfect. Use a tiny bit (not even a pat, but a rub) of butter and place the tortilla on the pan.  Add the cheese and top with another tortilla, cooking each side about a minute. Remove from heat and place salsa on top. Yum.  Serve immediately. 
Yield: 2 servings. 

Ina's Scalloped Tomatoes


Tomatoes. These lycopene-rich fruits are global gems. They originated in South America and spread across the globe through Spanish colonization (from Mexico, to the Caribbean, over to the Philippines and Southeast Asia). The Spaniards brought tomatoes back to Europe and they were easily cultivated across the Mediterranean basin. These juicy red fruits even made it over to jolly/rainy old England and then the British introduced it to their territories in the Middle-East. That's probably why you see tomatoes featured in almost every cuisine around the globe: gazpacho, pan con tomate (Catalan), Mexican salsa, Italian sauces and pizzas, stewed in Chinese cooking and used as a base in some Indian dishes. Versatile and ubiquitous...that's the tomato. 
We had a bit of a blight in our CSA share last summer, but this summer we have gotten the juiciest tomatoes I have ever eaten.  We got beefsteak, cherry, heirloom, green zebra, plum, grape and golden tomatoes in our share so far.
My husband likes to bite into tomatoes as if they were apples. I love them in sauces, preferably pureed, and mixed with other ingredients-- in this case, bread.
This recipe for Scalloped Tomatoes is fantastic. It pops with flavor and color. I have made this dish twice and my only caveat is that you should make it on the day you want to serve and eat it.  Subjecting the delicate boule bread to a cycle of refrigeration and re-heating makes it a little mushy. Also, the Parmesan crust on top of the dish doesn't reheat well. So, make this dish a few hours before you want to consume it and all your guests will rave about how delicious it is! 
SCALLOPED TOMATOES (Adapted from Ina Garten, Barefoot Contessa)
  • 3 tablespoons extra-virgin olive oil 
  • 2 cups (1/2-inch diced) bread from a French boule, crusts removed (Remove the crust from the entire loaf before you start slicing) 
  • 2 1/2 pounds of tomatoes, cut 1/2-inch dice (I've made this dish twice, and I've used Beefsteak and Plum-- both work)
  • 1 tablespoon minced garlic (3 cloves)
  • 2 tablespoons sugar
  • 2 teaspoons kosher salt
  • 1 teaspoon freshly ground black pepper
  • 1/2 cup julienned basil leaves, lightly packed
  • 1 cup freshly grated Parmesan cheese

Directions

Preheat the oven to 350 degrees F.
Heat 3 tablespoons of olive oil in a large (12 inch) saute pan over medium heat. Add the bread cubes and stir to coat with the oil. Cook over medium to medium-high heat for 5 minutes, stirring often, until the cubes are evenly browned.
Meanwhile, combine the tomatoes, garlic, sugar, salt, and pepper in a large bowl. When the bread cubes are done, add the tomato mixture and continue to cook, stirring often, for 5 minutes. Off the heat, stir in the basil.
Pour the tomato mixture into a shallow (6 to 8 cup) baking dish. Sprinkle evenly with the Parmesan cheese and drizzle with 2 tablespoons of olive oil. Bake for 35 to 40 minutes until the top is browned and the tomatoes are bubbly. Serve hot or warm.

I Heart Frijoles (Soup)!

 
Everyone Loves Black Bean Soup!
There are people who can assemble dishes without the assistance of a cookbook or a recipe. My friend Yana is one such person. All she needs to do is take one quick look at the foodstock in her fridge, glance at her spice rack, combine the ingredients and, presto, a wonderful dinner is served.  I'm not like that. I have to plan in advance and shop with a list. One exception to this is my Black Bean Soup. Truth be told it was inspired by Yana's bean soup, yet it is totally original and it was born out of a trial-and-error process, which took place in my itsy-bitsy kitchen. I think it's perfect! It's easy to make, has tons of fiber and it goes down much easier than Metamucil....

Bassy's Black Bean Soup
  • 4 tablespoons extra-virgin olive oil
  • 1 large onion, roughly chopped
  • 2 large carrots, peeled and sliced width-wise about an 1/8 of an inch (in circles)
  • 1 celery rib, top leaves removed and sliced
  • 1 1/4 tablespoon of cumin
  • 3/4 tsp salt (more to taste)
  • 2 15 oz cans of Organic Black Beans (I usually soak and cook my beans, but for this recipe I use canned. I really like Westbrae Organic or Muir Glen. Try and find cans that are BPA-free.)Use the liquid from ONE can of beans.
  • 2 1/4 cups of low-sodium vegetable stock (you can use water, but stock gives it more flavor. Occasionally I make my own stock and freeze it, de-frosting it when needed.)
  • 1 bay leaf (make sure to remove it before you puree the soup, otherwise it leaves a bitter taste.)
  • 1/8 teaspoon of baking soda
  • Lime juice for garnish
  • 1 dollop of sour cream for garnish (optional)
  • 1 tablespoon of avocado for garnish (optional)
In a large heavy pot or a dutch oven, add 4 tablespoons of olive oil. When the oil is heated, add the chopped onions and stir until there are translucent, about 4-5 minutes (make sure they don't brown). Add the celery and carrots. Stir occasionally over a medium flame for 5 minutes. Add the cumin and salt. Cook for 1 minute and then add two cans of black beans, using one can of liquid. Add the stock, baking soda and bay leaf. Lower the flame and cover. Let the soup cook for 20 minutes on a low-to-medium flame. The soup should have a beautiful brown color and not look murky-- that means the baking soda has completely dissolved. Remove the bay leaf. Let the soup cool just a bit. Add some salt if needed.

Use a hand-held immersion blender (or a regular blender if that is what you have) and puree the soup until it's smooth.
Serve hot or cold with 1 tablespoon of fresh lime juice per bowl, a dollop of sour cream and some avocado, which I mash up with a pinch of salt and a drop of lemon juice.


This is a great soup for early fall...Enjoy!

Zucchini-Basil Soup

In a culinary context, zucchini is treated as a vegetable, which means it is usually cooked and presented as a savory dish or accompaniment. Botanically, however, the zucchini is an immature fruit, being the swollen ovary of the female zucchini flower. That's the sort of thing I find interesting and what I learn because I am addicted to reading Wikipedia articles. 
 Zucchini is the queen of summer squashes and we have been eating lots of it. Our CSA* share provided many of this soup's ingredients including the zucchini, onion, garlic and basil. This soup is seasonal, delicious and it does not take a lot of time to make. It comes to you by way of Love & Olive Oil...

Zucchini-Basil Soup (Courtesy of Love and Olive Oil, from Epicurious)
Yields 4-6 servings
Ingredients
2 pounds of zucchini, trimmed and coarsely chopped
3/4 cup chopped onion
2 garlic cloves, chopped
1/4 cup olive oil
4 cups of vegetable stock (I use a low-sodium stock)
1/3 cup packed basil leaves (use a 1/2 cup of basil for a more intense flavor)


Preparation

For the garnish: Julienne skin (only) from half of one zucchini with a peeler; toss with 1/2 teaspoon salt and drain in a sieve until wilted, at least 20 minutes. Set aside.
Soup: Coarsely chop remaining zucchini. Heat oil and cook onion and garlic in a heavy saucepan (or Dutch oven) over medium-low heat, stirring occasionally, until softened, about 5 minutes. Add chopped zucchini and 1 teaspoon salt and cook, stirring occasionally, 5 minutes. Add 3 cups of vegetable stock (you can also use 3 cups of water, but I find that the stock makes the soup more flavorful) and simmer, partially covered, until tender, about 15 minutes. Purรฉe soup with 1/3 cup basil leaves. 
Back to the garnish: Bring remaining cup water to a boil in a small saucepan and blanch julienned zucchini for 1 minute. Drain in a sieve set over a bowl (use liquid to thin soup if necessary).
Season soup with salt and pepper. Serve with julienned zucchini mounded on top.  If you want to skip the zucchini skin garnish altogether, try serving the soup with a crostini topped with goat cheese. Delish! 
*CSA is an acronym for community-supported agriculture. We joined the Prospect Heights CSA because we wanted to purchase locally-grown produce and had a hard time finding quality vegetables at our local supermarket.  The farm that provides us with our weekly bounty is located Upstate and they deliver "the goods" to a nearby school, which is where we pick it up every Thursday.  This is the second summer my husband and I have been involved with the CSA and it's been a great experience. (Shout out to Kathryn L. of Cooking Inside the Box who is also in our CSA!) 
I started making dishes using ingredients I had never used before, or in some cases, was not familiar with at all. Kohlrabi, zebra tomatoes, turnips, wax beans, bok choy, summer squashes, beets, japanese eggplant, swiss chard, cabbages, pickles, all sorts of lettuces, spinach, green beans...I think you get the picture.  Cooking with locally grown, seasonal produce means the dishes that come out of my kitchen pop with flavor! Michael Pollan would be proud. 

Spinach Lasagnette

This is a take on "Thousand Layer Lasagna" from Smitten Kitchen, inspired by 101 Cookbooks. I simplified the most labor-intensive, time consuming step (not to mention extremely difficult for those of us who are spatially challenged when it comes to counter-top area) --- rolling out the paper-thin sheets of pasta.  I know that one day I will have the room and the time to make my own pasta (I do have a pasta machine after all). But until then, I'm using pasta sheets that someone else rolled out.  I also learned a little tip: you can use wonton wrappers for the lasagna layers. They are thin and can be substituted for traditional pasta sheets.

Preparation:
Preheat the oven to 375 degrees.  

Basic, Awesome Tomato Sauce (Adapted from Smitten Kitchen, inspired by 101 Cookbooks)

2 tablespoon butter
2 large shallots, finely chopped
1 teaspoon crushed red pepper flakes
1 teaspoon salt
A couple glugs red wine (and a few more!)
1 28-ounce can whole tomatoes
1 15-ounce can pureed tomatoes
A handful of julienned basil (optional)
Zest of one lemon (optional)

Melt butter in saucepan over medium-high heat until foam subsides. Add shallots, red pepper flakes and salt, sauteing them together for a few minutes until the shallots are translucent and beginning to color. Add the red wine, letting it sizzle and cook down slightly, then the whole and pureed tomatoes. Breaking the whole tomatoes up with a wooden spoon, let the sauce simmer for a few minutes. Season to taste. I used an immersion blender to puree the sauce, but if you like a thicker texture, leave it as is. 

Other lasagnette ingredients: 10 ounces of baby spinach, sauteed in olive oil with two chopped cloves of garlic, seasoned to taste and cooled slightly, then mixed with 1 to 2 cups ricotta (Fairway supermarket has a lovely hand-packed ricotta. If you really want to splurge-- and man, this stuff is great-- Brooklyn Larder has ricotta too) and 1/2 cup grated parmesan, dropped in small dollops around each layer. 
Pull it all together. Ladle a bit of the sauce into the bottom of the prepared baking dish. Cover the bottom with a layer of pasta sheets, a thin layer of sauce, and a bit of cheese.  Keep going until you've used up all the sauce and pasta. You want to finish with a layer of pasta. Top with the last of the sauce and the torn mozzarella.
Bake until everything is melted and fragrant, 35 minutes or so. Let it sit for 10 minutes before serving. Dust with parmesan and a bit of slivered basil. 
Bon Appetito!