
Your Custom Text Here
gazpacho two ways: traditional red (from jose andres) and green (from bon appetite)

For months my husband and I planned to tear up half of the cement driveway that sits to the left of our house. We had 10 feet of concrete slab that was a total waste of space and didn't make sense to maintain since we have one car (and hope to keep it that way) and a scooter. We thought the space should be turned into our family garden.
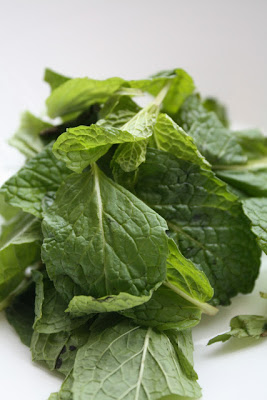
After dragging our feet for most of the spring and early summer, Matt finally rented a jack-hammer. It took only (!) seven hours of drilling in the sun, in temperature that exceeded 100 degrees, to get the job done. We removed the concrete and assembled the elevated garden beds. Then we tilled the hard clay, added bags and bags of soil, and got to planting. We're growing basil, jalapeños, Corsican mint, Kentucky Colonel mint (hello mint juleps! and mojitos!), heirloom tomatoes, kale, marigolds, milk weed, jupiter's beard and a host of other bee-welcoming and butterfly-attracting plants.
After dragging our feet for most of the spring and early summer, Matt finally rented a jack-hammer. It took only (!) seven hours of drilling in the sun, in temperature that exceeded 100 degrees, to get the job done. We removed the concrete and assembled the elevated garden beds. Then we tilled the hard clay, added bags and bags of soil, and got to planting. We're growing basil, jalapeños, Corsican mint, Kentucky Colonel mint (hello mint juleps! and mojitos!), heirloom tomatoes, kale, marigolds, milk weed, jupiter's beard and a host of other bee-welcoming and butterfly-attracting plants.

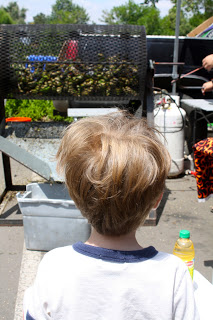
In just under 5 weeks we have started to reap the benefits of our hard work. Otis is in charge of watering the plants
every morning and every evening. Theodore, being slightly less helpful than his older brother, usually takes the garden spade and
swings it in the direction of the tomatoes until something falls off the vine (hopefully he outgrows this soon). There is an enormous satisfaction in knowing that we are
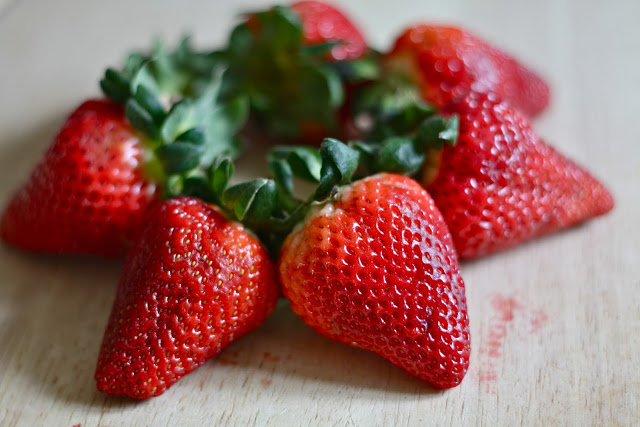
greening the land, and our garden serves as our proudest DIY-it to date. We've come a long way since I tried to grow a strawberry plant on our fire escape in Brooklyn. I lovingly watered that silly plant and placed it in the sun, but the result of all my effort was a pitiful yield - a single and sad looking berry that didn't even taste good.
But times have changed and this garden is a total thrill. It's thriving and it's growing. I can't tell you how amazing it felt to pick some of the gazpacho ingredients from our little plot of Earth....
But times have changed and this garden is a total thrill. It's thriving and it's growing. I can't tell you how amazing it felt to pick some of the gazpacho ingredients from our little plot of Earth....

Patricia's Gazpacho
(Courtsey of Jose Andres via Food + Wine. With thanks to the Truffle Table in Denver for suggesting this recipe.)
(Courtsey of Jose Andres via Food + Wine. With thanks to the Truffle Table in Denver for suggesting this recipe.)
Ingredients
2 pounds ripe plum
tomatoes (about 10), cut into chunks
8 ounces cucumber (1
cucumber), peeled and cut into chunks
3 ounces green pepper,
in large pieces
1 garlic clove
1 tablespoon sherry
vinegar
Spanish extra-virgin
olive oil
Salt
Garnish
1 tablespoon Spanish
extra-virgin olive oil
1 slice rustic white
bread
6 plum tomatoes, with
the seeds, prepared as "fillets"
8 cherry tomatoes,
halved
1 cucumber, peeled and
cut into cubes
4 pearl onions, pulled
apart into segments
2 tablespoons Spanish
extra-virgin olive oil
1 tablespoon sherry
vinegar
Sea salt
4 chives, cut into
1-inch pieces
Preparation
- In a blender, combine the tomatoes, cucumber, green pepper, garlic and sherry vinegar and blend until the mixture becomes a thick liquid. Taste for acidity; this will vary with the sweetness of the tomatoes. If it's not balanced enough, add a little more vinegar. Add the olive oil, season with salt, and blend again. Strain the gazpacho into a pitcher and refrigerate for at least half an hour.
- In a small pan, heat the olive oil over moderately high heat and fry the bread until golden, about 2 minutes. Break into small pieces to form croutons and set aside.
- To serve pour gazpacho into each of 4 bowls. Place 4 croutons, 2 "fillets" of tomatoes with seeds, 4 cherry tomato halves, 3 cucumber cubes and 3 onion segments into each bowl. Add a few drops of olive oil to each onion segment and drizzle a little more around each bowl. Add a few drops of vinegar to each cucumber cube and drizzle a little more around each bowl. Sprinkle sea salt on the tomatoes and sprinkle the chives over the soup. Serve when the gazpacho is refreshingly chilled.
NOTES:
José's tips: If you want to be original, buy yellow or even green tomatoes. Also, if you want to save time, you can simplify the garnishes: Just use a few cubes of cucumber, tomato and green pepper.
José's tips: If you want to be original, buy yellow or even green tomatoes. Also, if you want to save time, you can simplify the garnishes: Just use a few cubes of cucumber, tomato and green pepper.
* * *

I've been on such a gazpacho kick recently that I just had to try this green gazpacho recipe from July’s Bon Appetit magazine. It’s completely different from the traditional red gazapacho, but equally delicious. If you don’t want the soup hot (taste-wise, not temperature-wise) you can reduce the amount of jalapeño or increase the amount of yogurt. But personally, I love a soup with kick!
Green Gazpacho (Courtesy of Bon Appetit Magazine)
Ingredients
¼ cup white wine vinegar
2 tablespoons fresh lime juice
1½ cups whole-milk plain Greek yogurt, divided
½ cup olive oil, plus more for drizzling
4 oz. ciabatta or country-style bread, crust removed, bread torn into 1” pieces (about 2½ cups)
1 medium English hothouse cucumber, halved lengthwise, seeds removed, cut into large pieces
4 oz. ciabatta or country-style bread, crust removed, bread torn into 1” pieces (about 2½ cups)
1 medium English hothouse cucumber, halved lengthwise, seeds removed, cut into large pieces
1 green bell pepper, coarsely chopped
4 large tomatillos (about 12 oz.), husked, quartered
4 scallions, cut into 1” pieces
2 jalapeños, seeds removed, chopped
2 garlic cloves, finely grated
¾ teaspoon kosher salt, plus more
Piment d’Espelette or Hungarian hot paprika (for serving)
Preparation
- Whisk vinegar, lime juice, 1 cup yogurt, and ½ cup oil in a large bowl until smooth. Add bread, cucumber, bell pepper, tomatillos, scallions, jalapeños, garlic, and ¾ tsp. salt and toss to coat (make sure bread is well coated so it can soak up as much flavor as possible). Cover and chill at least 4 hours.
- Working in batches, purée bread and vegetable mixture in a blender until very smooth; transfer to a large bowl and season gazpacho with salt.
- Whisk remaining ½ cup yogurt in a small bowl, thinning with water a tablespoonful at a time, until the consistency of heavy cream; season with salt.
- Serve soup in chilled bowls. Drizzle with thinned yogurt and more oil and sprinkle with piment d’Espelette.
DO AHEAD: Gazpacho can be made 1 day ahead; cover and chill. Mix well
before serving.
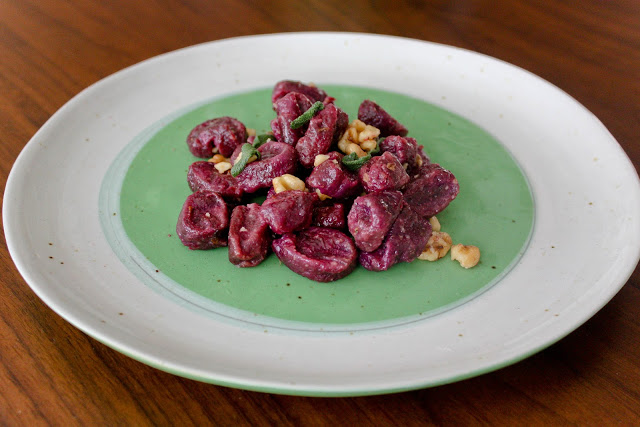
beet gnocchi with walnut-sage butter (and a few other thoughts)
Last night I poured myself a big glass of red wine, put my feet up on our new ottoman, and wrapped myself in a blanket that my great-grandmother crocheted about 60 years ago. The boys were sleeping and I was ready to catch up on GIRLS. I was up to the 3rd episode of season 2, "Bad Friend," also know as the rave episode.
It took me back about a decade. For there was a time, when on occasion, I would wear clothes that were a bit too transparent, dance at random warehouse parties, and surround myself with fabulous gay men (that, thankfully, hasn't changed as much as the other stuff). A day later my friend Richard sent me an email reading:
Just plugged into this show.
Lena Dunham (Hannah) is like you personified.
Only younger (sorry).

Anyway, I'm trying to embrace the changes (gracefully). Not that there's anything I can really do about the passage of time anyway. There's no way of slowing it down, so best to just enjoy the ride. I've embarked on a new career path (which is completely unrelated to law, hooray!) and I've got a busy life that requires juggling motherhood with my own personal interests. In my down time though, I really do like watching GIRLS...even if it makes me aware that I am (in fact) a little bit older. And on that note, I'm thinking of dying my hair red.
Speaking of red (I'm grasping for a connection here), I throughly enjoyed this beet recipe.
Notes on the beets: They were sweet and earthy and I would make them again. I made the entire dough recipe, but I used only half of it for dinner and then stored the other half in the freezer (which should be used within a month). My only adaptation was with the butter- I used less than the recipe called for. I topped the beets with some sage, walnuts, butter sauce (not too much) and a dollop of fresh ricotta. Oh, and when I make this again I'll cut the gnocchi into smaller pieces. Enjoy!


Beet Gnocchi with Walnut-Sage Butter (Adapted ever-so slightly from Food & Wine Magazine)
These intense beet gnocchi are eaten in northwestern Italy. They are sweet and earthy and so delicious, they barely need a sauce. When the beet greens are fresh enough, you can add them to the walnut-sage butter.
+ See notes above.
Ingredients
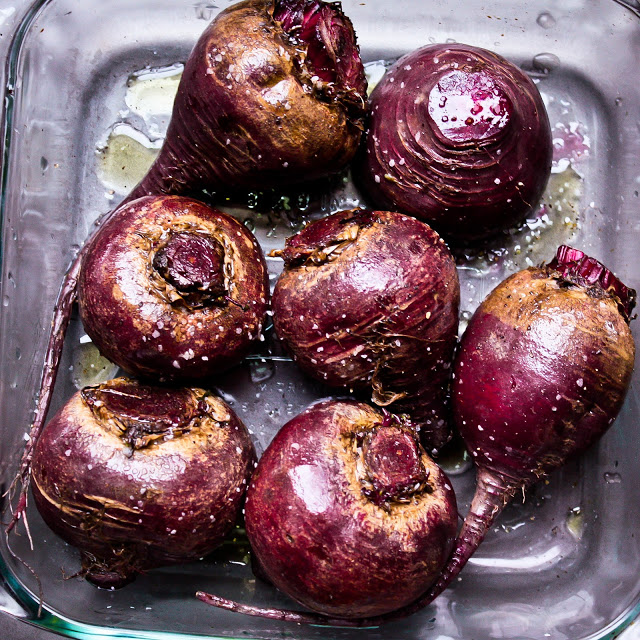
2 pounds medium beets, scrubbed
Extra-virgin olive oil, for brushing
Kosher salt
Freshly ground pepper
1 cup fresh ricotta (8 ounces)
1 large egg, lightly beaten
Pinch of nutmeg, preferably freshly grated
3/4 cup freshly grated Parmigiano-Reggiano cheese (3 ounces), plus more for serving
3 cups all-purpose flour, plus more for dusting
1/2 cup coarsely chopped walnuts
1 1/2 sticks unsalted butter, cubed (I used less, about 1 stick for the entire recipe.)
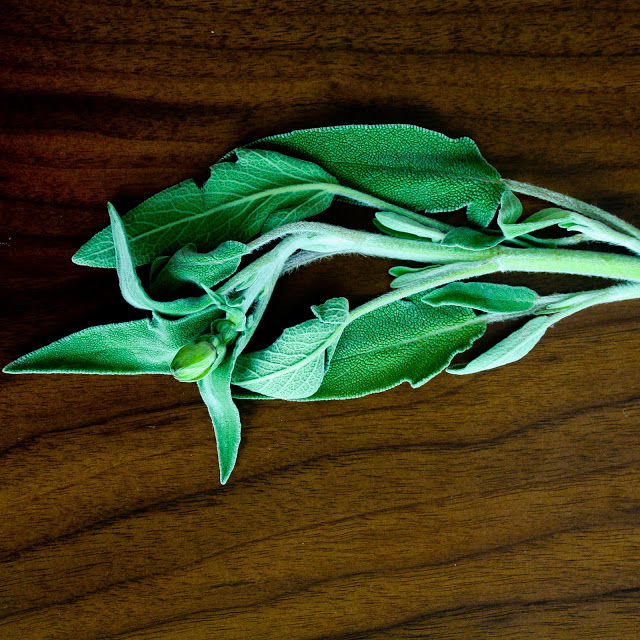
16 small sage leaves
1 tablespoon fresh lemon juice

MAKE AHEAD
The gnocchi can be prepared through Step 5 and frozen on the baking sheet, then transferred to a resealable plastic bag and frozen for up to 1 month. Cook without thawing.
SUGGESTED PAIRING
Walnuts can taste quite bitter when paired with a tannic red wine, so pour a full-bodied white with this dish instead, like an Arneis or a white Burgundy.


2 pounds medium beets, scrubbed
Extra-virgin olive oil, for brushing
Kosher salt
Freshly ground pepper
1 cup fresh ricotta (8 ounces)
1 large egg, lightly beaten
Pinch of nutmeg, preferably freshly grated
3/4 cup freshly grated Parmigiano-Reggiano cheese (3 ounces), plus more for serving
3 cups all-purpose flour, plus more for dusting
1/2 cup coarsely chopped walnuts
1 1/2 sticks unsalted butter, cubed (I used less, about 1 stick for the entire recipe.)
16 small sage leaves
1 tablespoon fresh lemon juice
Optional: fresh ricotta for topping, lightly sauteed beet greens for topping.
Preparation
Preheat the oven to 375º. In a 9-inch square baking dish, brush the beets with olive oil and season with salt and pepper. Add 1/4 cup of water to the baking dish and cover tightly with foil. Bake the beets for about 1 hour, until tender. Uncover the dish and let the beets cool completely.
Peel the beets and cut them into 1-inch pieces. Transfer the beets to a food processor and puree.
In the bowl of a standing mixer fitted with the paddle, combine 1 1/2 cups of the beet puree (reserve any remaining puree for another use) with the ricotta, egg, nutmeg, the 3/4 cup of Parmigiano and 1 tablespoon of salt and mix at low speed until combined. Using a rubber spatula, scrape down the side of the bowl. Sprinkle on the 3 cups of flour and mix at low speed until the dough just comes together, about 1 minute.
Scrape the dough onto a lightly floured work surface and knead gently just until smooth but still slightly sticky. Cover the dough with plastic wrap and let stand at room temperature for 30 minutes.
Line a baking sheet with wax paper and generously dust with flour. Cut the gnocchi dough into 10 pieces and roll each piece into a 1/2-inch-thick rope. Cut the ropes into 1/2-inch pieces and transfer the gnocchi to the prepared baking sheet.
Lightly oil another baking sheet. In a large, deep skillet of simmering salted water, cook one-fourth of the gnocchi until they rise to the surface, then simmer for 1 minute longer, or until they are cooked through. Using a slotted spoon, transfer the gnocchi to the oiled baking sheet. Repeat with the remaining uncooked gnocchi.
In a very large skillet, toast the chopped walnuts over moderate heat, tossing, until golden and fragrant, 3 to 5 minutes. Transfer to a plate and let cool.
Add the butter to the skillet and cook until golden brown, 2 to 3 minutes. Add the sage leaves and cook for 20 seconds, then stir in the lemon juice. Add the gnocchi and cook for 1 minute, tossing gently. Season with salt and transfer the gnocchi to plates. Sprinkle the toasted walnuts on top and serve, passing grated Parmigiano-Reggiano at the table.
MAKE AHEAD
The gnocchi can be prepared through Step 5 and frozen on the baking sheet, then transferred to a resealable plastic bag and frozen for up to 1 month. Cook without thawing.
SUGGESTED PAIRING
Walnuts can taste quite bitter when paired with a tannic red wine, so pour a full-bodied white with this dish instead, like an Arneis or a white Burgundy.
+++

casunsiei (beet ravioli with butter and poppy seeds)
beet and pomegranate salad (scroll down to the bottom of the raspberry picking post)
Market Bounty: Beet Carpaccio and Ginger-Lime Carrots
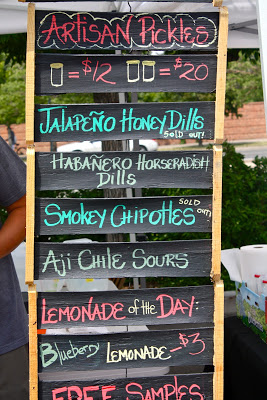
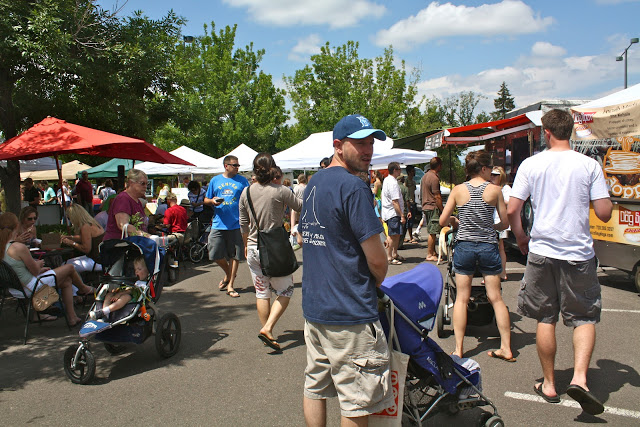
It's pretty much a given that I will spend at least one day on the weekend at a farmers market. The produce really can't be beat and there's also really tasty treats to be eaten.
Last weekend my husband was in town (he travels back and forth between NYC and Denver until we figure out our next move, but one which will hopefully keep us near the Rocky Mountains). We decided to go to the big and always-crowded farmers market at Cherry Creek. It's a lot easier to keep track of the boys when there are 4 hands on deck.
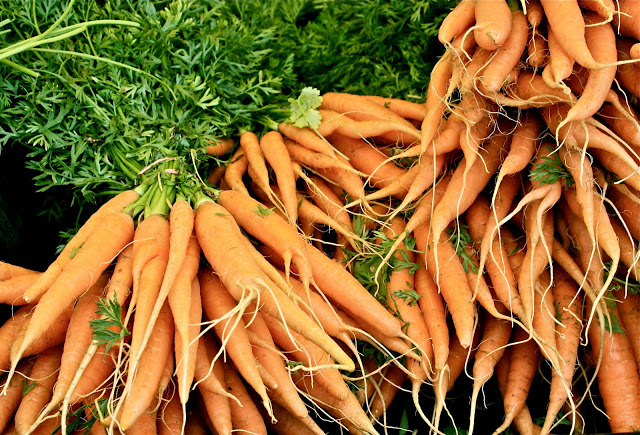
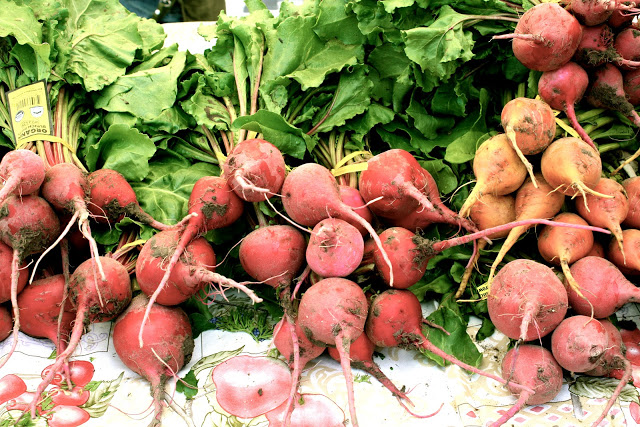
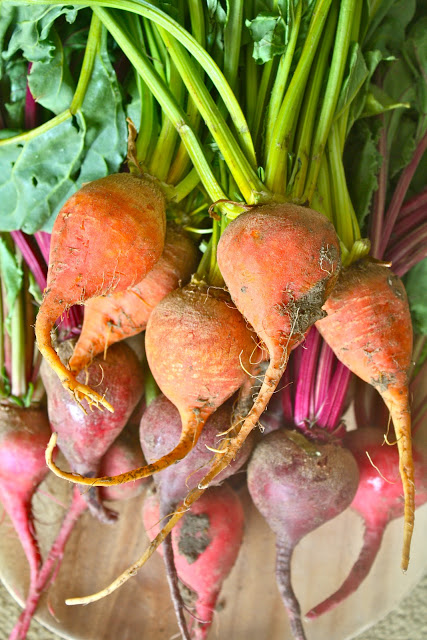
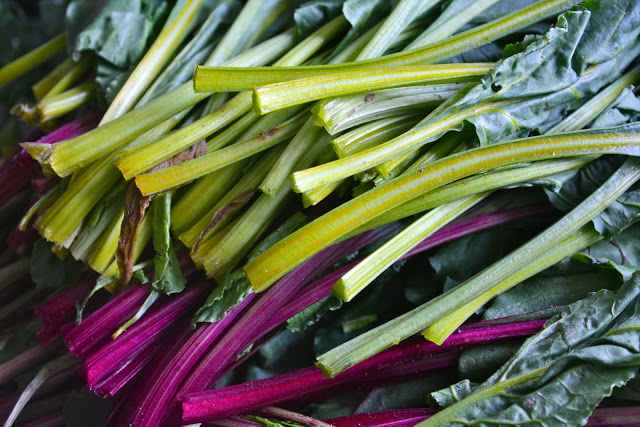
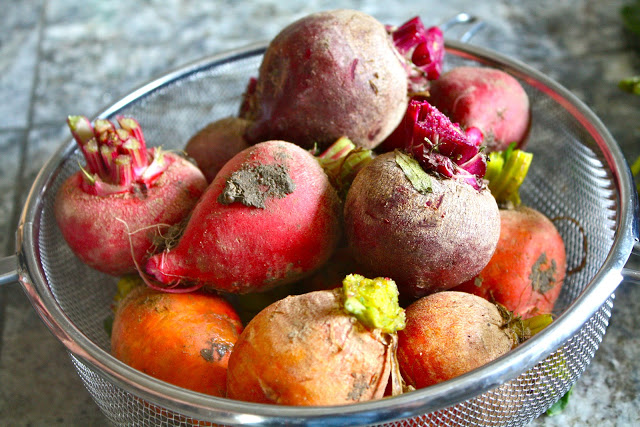
There was tons of seasonal produce. I snagged a huge bunch of carrots and three kinds of beets (golden, red and chioggia) and while I didn't have a scale with me, I would approximate that I was shlepping about 15 pounds of produce around with me the rest of the day. Good bounty, indeed!
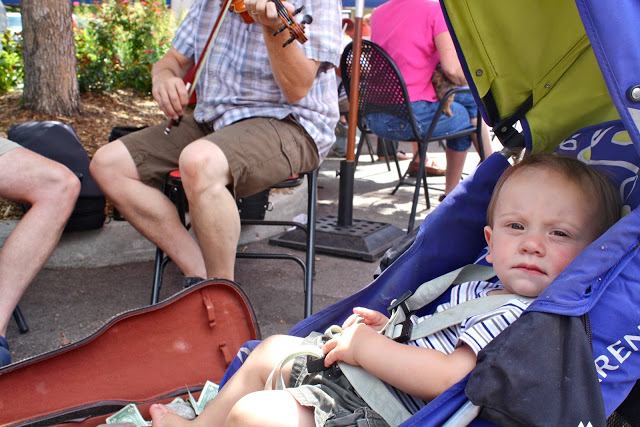
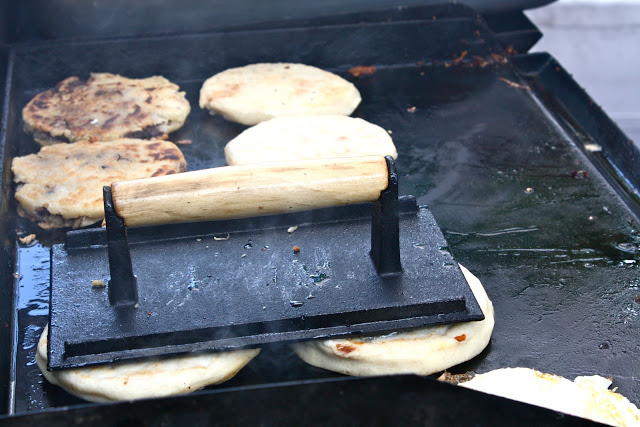
I also ate some fantastic pupusas. I had green chili & cheese, but there were tons of options including pinto and black bean & corn. They reminded me a lot of the ones I used to eat at the Brooklyn Flea...but without the hour-plus wait. Mine was topped with curtido (a fermented slaw) and a tomato-based sauced, plus a big dollop of avocado. Perfect.
We met up with some friends and hung around the market for about an hour. Then we ventured over to the 47th annual Greek Festival. More food, some dancing and lots of "Opa!" But that's a story for another post....


* * *
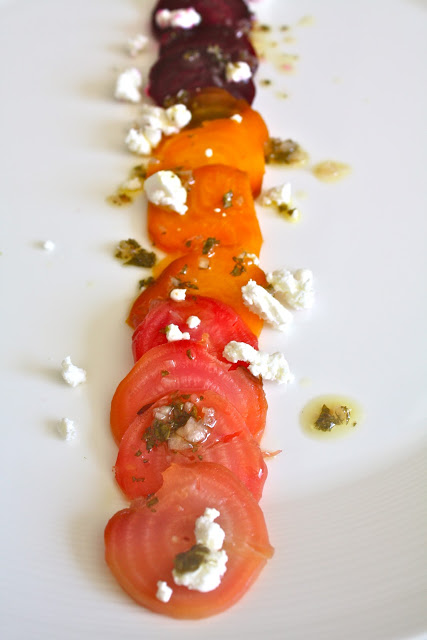
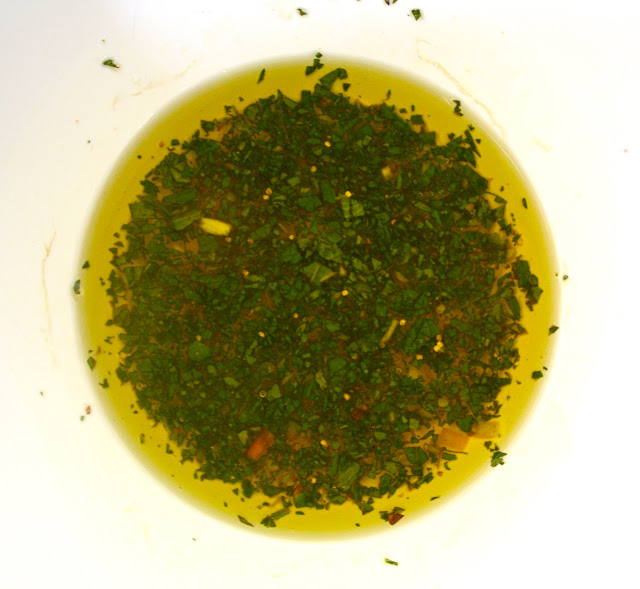
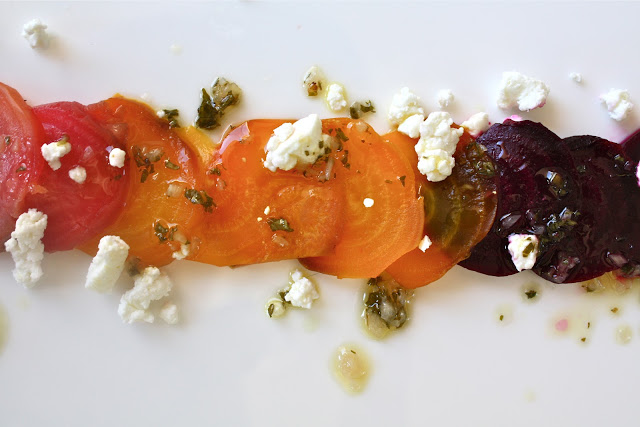
I use beets in soup (Lithuanian Borscht) and I've made my fair share of beet salads: Beets with Blood Oranges, Arugula and Macadamia Nuts, Beet and Apple Salad (with horseradish and pistachios), and Roasted Beets With Chiles, Ginger, Yogurt and Indian Spices. I try not to be too repetitive in my recipe selection, but I felt an intense desire to make another beet salad using the gorgeous vegetables I had just picked up at the market. I mean sometimes it's just hard to beat...beets. (Sorry, that was a bad one.) This time though I was making a salad without greens, and the beets were thinly sliced-- just like beef carpaccio, but with beets! The salad has goat cheese crumbles, but you can omit them if you are vegan or otherwise averse to dairy. I made a few modifications: I added the shallots to the vinaigrette in order to cut their bite a bit and I also made the salad with and without chives. I'm not convinced the chives added much. In contrast, the mint popped and it was an absolutely essential element to the dressing.
I made a note below (see Preparation) about the time it took me to roast the beets. I also drizzled them with olive oil and sprinkled a bit of salt and pepper on top before putting them in the oven.
I think this is a super elegant presentation of beets with goat cheese. It's delicious too.
Beet Carpaccio with Goat Cheese and Mint Vinaigrette (Courtesy of Bon Appetit, via Epicurious)
Ingredients
12 2-inch beets, trimmed
1 cup crumbled soft fresh goat cheese (about 5 ounces)
2 tablespoons minced shallot
1/3 cup unseasoned rice vinegar
1/3 cup chopped fresh mint
1/4 cup walnut oil or olive oil
1 1/2 teaspoons sugar
1/4 cup chopped fresh chives
(Preparation follows)

Preheat oven to 350°F. Line rimmed baking sheet with foil. Place beets on sheet (if using both light- and dark-colored beets, place them on separate sheets to prevent discoloration). Sprinkle beets lightly with water. Cover tightly with foil. Bake until beets are tender when pierced with fork, about 40 minutes. (Note: after 40 minutes on 350 degrees, my beets were not even close to being done. I turned the temperature up to 425 and kept them in for another 35 minutes. That did the trick.) Cool on sheet. Peel beets. (Can be prepared 1 day ahead. Place in resealable plastic bag; chill.)
Using cheese slicer or knife, slice beets very thinly. Slightly overlap slices on 6 plates, dividing equally. Sprinkle with cheese, then shallot, salt, and pepper. Whisk vinegar, mint, oil, and sugar in small bowl. Season with salt and pepper. Drizzle over beets. Sprinkle with chives.

* * *
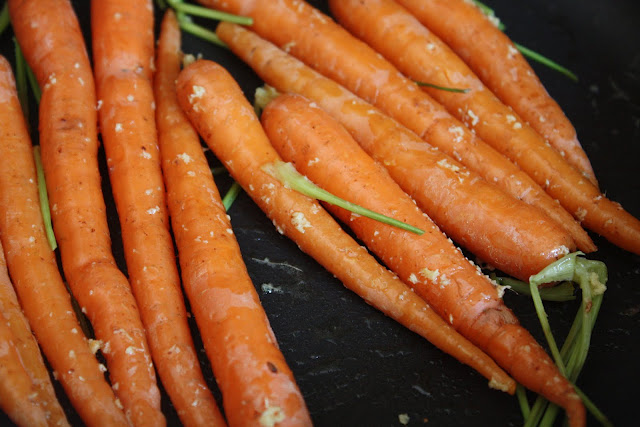
Ginger-Lime Baby Carrots (Courtesy of Richard Blais for Food & Wine Magazine)
{I'm re-posting this recipe, which I made last year. It's a simple baby carrot recipe. The carrots are so sweet--this is really the time to be making them.}
Serves 4
Ingredients
24 baby carrots, tops trimmed to 2 inches
1 tablespoon extra-virgin olive oil
1/2 tablespoon minced fresh ginger
Pinch of cinnamon
1/2 cup chicken stock (I used vegetable)
1 tablespoon unsalted butter
2 teaspoons fresh lime juice
1/4 teaspoon Sriracha
Salt
1 tablespoon furikake (see Note)
Directions
In a large saucepan of boiling salted water, cook the carrots until crisp-tender, about 2 minutes. Drain the carrots.
In a large skillet, heat the olive oil. Add the carrots, ginger and cinnamon and cook over moderate heat, tossing occasionally, until the ginger is fragrant, about 3 minutes. Add the chicken stock and boil over moderately high heat until reduced by half, about 3 minutes. Remove the skillet from the heat and let cool for 30 seconds. Swirl in the butter, lime juice and Sriracha and season with salt. Arrange the carrots on a platter and spoon the ginger-lime sauce on top. (Sprinkle with the furikake and serve.)
Note: Furikake is available at Asian markets and many specialty food stores. It is a mixture of dried and ground fish, sesame seeds and chopped seaweed. I added a a few sesame seeds instead of making a pilgrimage to a Japanese market.
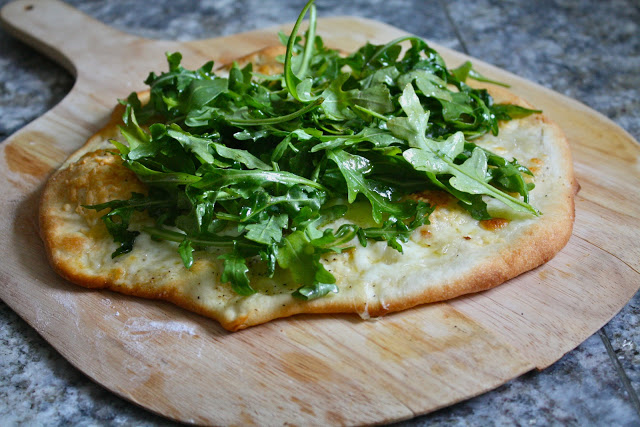
Ina's White Pizza with Arugula, Denver's Chalk Art Festival and Strawberry Salad with Feta and Almonds
The other day I found myself thinking about Ina Garten. I love her as much as you can love a 64-year old, former nuclear policy wonk/budget writer, author, gourmand, home entertaining super-star that you don't really know. And I totally credit Ina with inspiring me to cook-- I mean really cook, for the first time, which happened about 3 years ago. She got me to value high-quality ingredients, delve into seasonal cooking and, okay, decadent desserts too. Time is flying because it's more than a year and a half since I met her at this book signing...and it feels like yesterday.
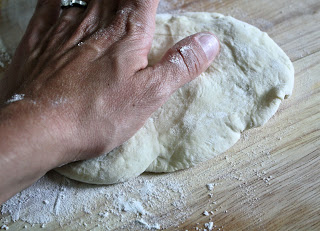
I have all of Ina'a cookbooks and decided to revisit Barefoot Contessa Back to Basics. That's when this recipe for White Pizza with Arugula caught my eye. Now ever since I made homemade tart dough (pâte brisée), I've become a big fan of making things from scratch...time permitting. Sure, there are some really good quality store-bought pizza doughs out there, but I decided to make my dough the night before, after the boys went to bed.
The dough was perfect but next time I think I will have to let it get a little more pliable before I start kneading it. I don't think I kept it at room temperature long enough. As for the baking time of the pizza, the recipe calls for 10-15 minutes in the oven. My pie was done in about 9 minutes-- and had I kept it in the oven for one minute longer, it would have burnt to a crisp. Maybe it's my oven or maybe it's the altitude-- just keep an eye on it.
Now I prefer making recipes that don't require me to buy a ton of ingredients, and in this case I had some goat cheese in the fridge and some leftover fontina cheese from this recipe. I also had a big bag filled with arugula, so pizza with greens it would be.
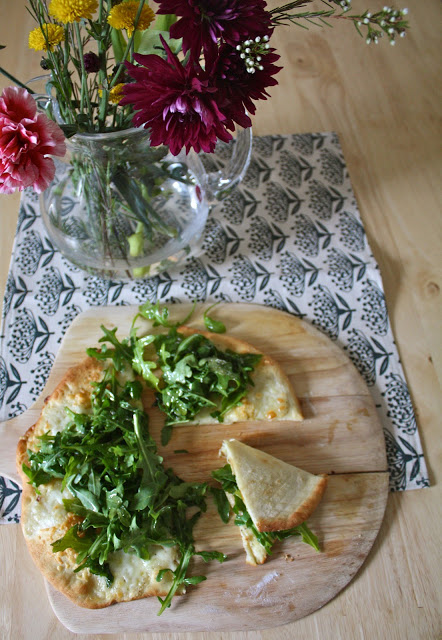
I loved this pizza. There's creamy, cheesy goodness, tangy-lemon dressing and peppery arugula. You can see how this one might be hard to beat...
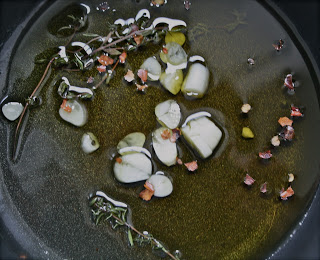
 |
| For the garlic oil I used some of my new purple garlic which I picked up at my local farmers market. |
 |
| Dressed arugula. |
Makes 6 Pizzas
Ingredients:
For the Dough:1 1/4 cups warm (100 to 110) water
2 packages dry yeast
1 tablespoon honey
Good olive oil
4 cups all-purpose flour, plus extra for kneading
Kosher salt
For the Garlic Oil:
4 cloves garlic, sliced
5 sprigs fresh thyme
1/4 teaspoon crushed red pepper flakes
For the topping:
3 cups grated Italian fontina cheese (8 ounces)
1 1/2 cups grated fresh mozzarella cheese (7 ounces)
11 ounces creamy goat cheese, such as montrachet, crumbled
For the vinaigrette:
1/2 cup good olive oil
1/4 cup freshly squeezed lemon juice
Freshly ground black pepper
8 ounces baby arugula
1 lemon, sliced
Directions:
Mix the dough:
- Combine the water, yeast, honey and 3 tablespoons of olive oil in the bowl of an electric mixer fitted with a dough hook. When the yeast is dissolved, add 3 cups of flour, then 2 teaspoons salt, and mix on medium-low speed. While mixing, add up to 1 more cup of flour, or just enough to make a soft dough. Knead the dough for about 10 minutes until smooth, sprinkling it with the flour as necessary to keep it from sticking to the bowl.
- Knead by hand.
- When the dough is ready, turn it out onto a floured board and knead it by hand a dozen times. It should be smooth and elastic.
- Let it rise.
- Place the dough in a well-oiled bowl and turn it to cover it lightly with oil. Cover the bowl with a kitchen towel and allow the dough to rise at room temperature for 30 minutes.
Make garlic oil: Place 1/2 cup of olive oil, the garlic, thyme and red pepper flakes in a small saucepan and bring to a simmer over low heat. Cook for 10 minutes, making sure the garlic doesn't burn. Set aside.
Preheat the oven to 500 degrees.
Portion the dough.
Dump the dough onto a board and divide it into 6 equal pieces. Place the doughs on sheet pans lined with parchment paper and cover them with a damp towel. Allow the dough to rest for 10 minutes. Use immediately, or refrigerate for up to 4 hours.
Stretch the dough.
Press and stretch each ball into an 8-inch circle and place 2 circles on each sheet pan lined with parchment paper. (If you've chilled the dough, take it out of the refrigerator approximately 30 minutes ahead to let it come to room temperature.)
Top the dough.
Brush the pizzas with the garlic oil, and sprinkle each one liberally with salt and pepper. Sprinkle the pizzas evenly with fontina, mozzarella and goat cheese. Drizzle each pizza with 1 tablespoon more of the garlic oil and bake for 10 to 15 minutes,* until the crusts are crisp and the cheeses begin to brown.**
Make the vinaigrette.
Meanwhile, whisk together 1/2 cup of olive oil, the lemon juice, 1 teaspoon salt and 1/2 teaspoon pepper.
Add the greens.
When the pizzas are done, place the arugula in a large bowl and toss with just enough lemon vinaigrette to moisten. Place a large bunch of arugula on each pizza and a slice of lemon and serve immediately.
* Mine took 9 minutes.
** Note: I brushed some of the garlic oil on my pizza mesh (wire) and placed my pie on the mesh. I placed it on my pizza stone-- which I had preheated for 20 minutes at 500 degrees.
TIP Make sure the bowl is warm before you put the water and yeast in; the water must be warm for the yeast to develop.
TIP Salt inhibits the growth of yeast; add half the flour, then the salt, and then the rest of the flour.
TIP To make sure yeast is still "alive," or active, put it in water and allow it to sit for a few minutes. If it becomes creamy or foamy, it's active.
* * *
After lunch, I took the boys down to Larimer Square for the Denver Chalk Art Festival. Now here in the house we use sidewalk chalk all the time. This festival, however, took it to a whole new level. It was so cool. And so creative. Otis really wanted to add his own unique touch to some of the murals, but I told him maybe next year. He looked excited about the prospect and when we got home he started on his sketches. Theo watched him carefully...maybe he'll be the budding artist of the family!


***
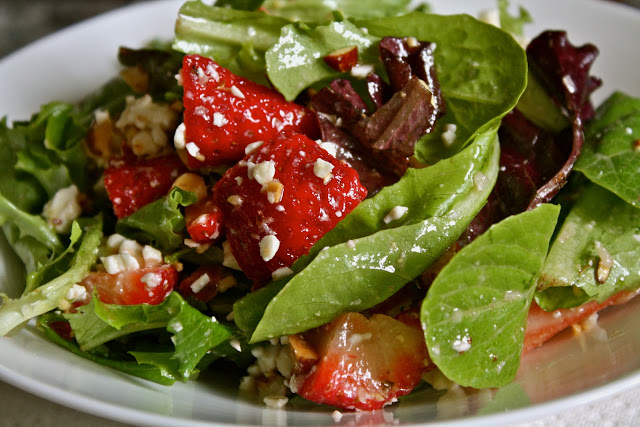
Today I used some leftover greens to make this salad for lunch. It was delicious!


Baby Lettuces, with Feta, Strawberries and Almonds (Courtesy of Food & Wine Magazine)
Serves 8
2 teaspoons Dijon mustard
1 teaspoon honey
1 small shallot, minced
2 tablespoons red wine vinegar, preferably Banyuls
1/3 cup extra-virgin olive oil
Salt
Freshly ground pepper
12 cups packed assorted baby lettuces (about 6 ounces)
1 quart strawberries, hulled—small berries halved, large ones quartered
4 ounces feta (preferably French), crumbled (1 cup)
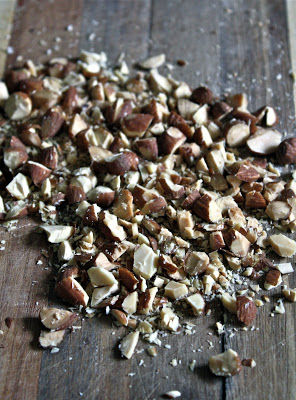
1 cup smoked almonds, chopped
In a small bowl, stir together the mustard, honey, shallot and vinegar. Stir in the olive oil and season with salt and pepper.
Put the lettuces in a large bowl. Add the strawberries, feta and almonds. Drizzle the dressing over the salad, toss well and serve.
Serves 8
2 teaspoons Dijon mustard
1 teaspoon honey
1 small shallot, minced
2 tablespoons red wine vinegar, preferably Banyuls
1/3 cup extra-virgin olive oil
Salt
Freshly ground pepper
12 cups packed assorted baby lettuces (about 6 ounces)
1 quart strawberries, hulled—small berries halved, large ones quartered
4 ounces feta (preferably French), crumbled (1 cup)
1 cup smoked almonds, chopped
In a small bowl, stir together the mustard, honey, shallot and vinegar. Stir in the olive oil and season with salt and pepper.
Put the lettuces in a large bowl. Add the strawberries, feta and almonds. Drizzle the dressing over the salad, toss well and serve.
Suggested Pairing:
Bright, berry-scented rosé echoes the strawberries in this summer salad. Pour a crisp, dry rosé from Provence.
Bright, berry-scented rosé echoes the strawberries in this summer salad. Pour a crisp, dry rosé from Provence.
14,000 Feet and Some Orange Ricotta Pancakes

We moved to Colorado about 8 months ago. This was around the time the uber-delicious Linger opened in Denver (yay!) and many of the mountain passes began to closed for the season. In October, or maybe it was November, we had set out to hike in the areas surrounding Mt. Evans. We soon discovered that the roads were already closed. Snow had accumulated at the higher elevations and the roads were considered unsafe by those in charge.
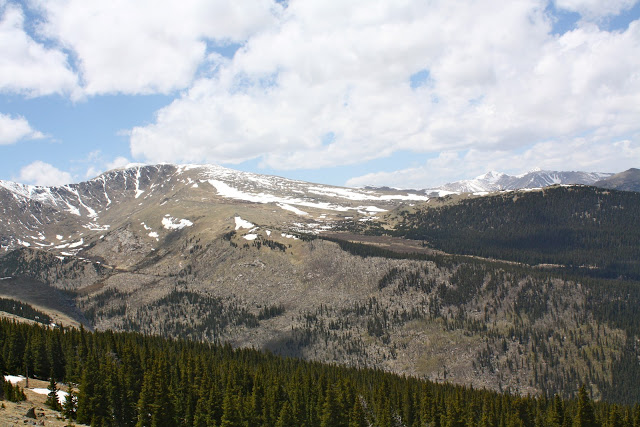
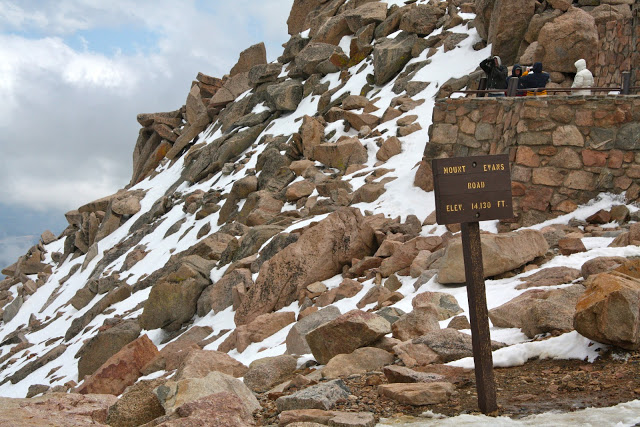
Mt. Evans is high. I'm talking over 14,000 feet high. I haven't been to such heights since hiking Cotopaxi in Ecuador about 7 years ago...and for those of you who know me, you might recall that hike didn't go very well. Cotopaxi is a stratovolcano and it reaches over 19,000 feet. Now I don't remember exactly where I was, but let's say that it was 16,000 feet. We were well above the tree-line, the air was thin, and I remember that the only sensation I had was to urinate (pardon me, but apparently this is very common). I felt really short of breath and wasn't sure if I could make the hike. In fact, I wasn't sure I was going to make it...period! I told my then boyfriend/now husband to go on without me...to "save himself." And indeed he did. He told me that he would come back and get me after he got to where we were supposed to meet the rest of our group. In the meantime I managed to crawl on all fours and I found my group. I was exhausted. The rest of the story isn't so important. Obviously I made it, but the scars of going up into the sky left their mark on my psyche. I was nervous about being that high again.
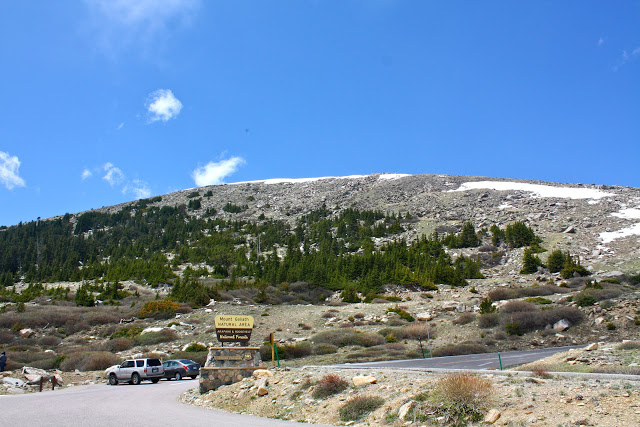
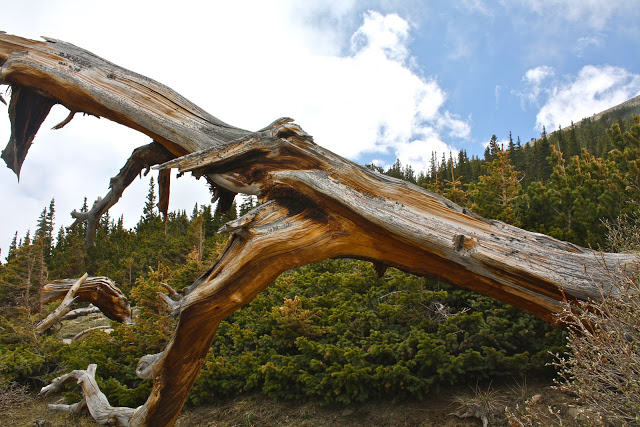
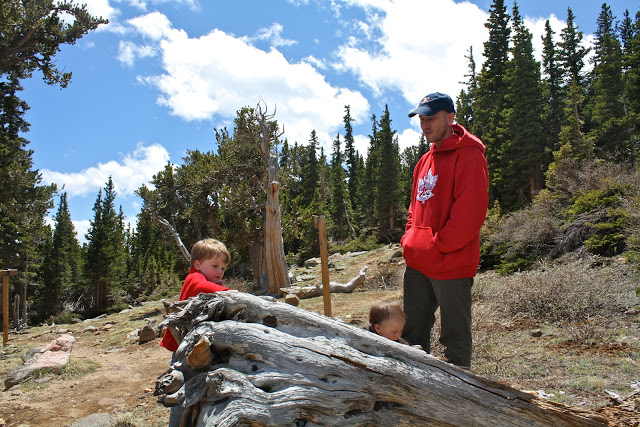
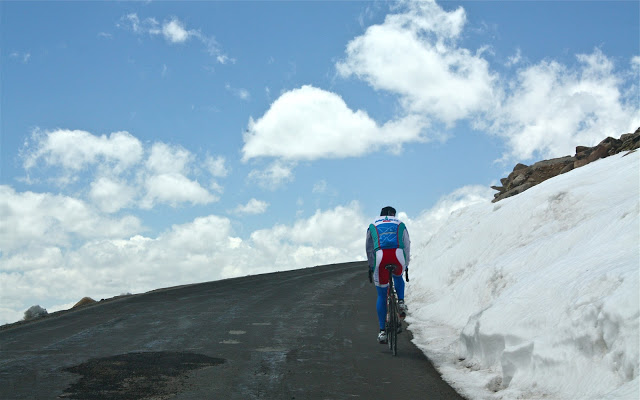
After a long winter closure, the gates to Mt. Evans reopened today (May 25th) at 12:00. We just had to go! Thinking like typical New Yorkers we were sure there was going to be a line of cars and weren't even certain we would get in. But there were no big lines, cars went in and out of the gate with ease, and we decided to take the boys on a walk through an alpine forest, right around the tree-line. (I suspect things get crowded on the weekend, but on opening-day things were easy as could be.)
The mountains were absolutely spectacular. Idaho Springs, the closest "city" to Mt. Evans, is only 45 minutes away from our house in Denver. Add another 20 minutes on winding roads with phenomenal views and you can get pretty remote pretty quickly. It's really amazing. As far as feeling nauseated or short-of-breath, the sensations were slight. I guess that is another benefit of living at altitude; I was already a bit acclimated.
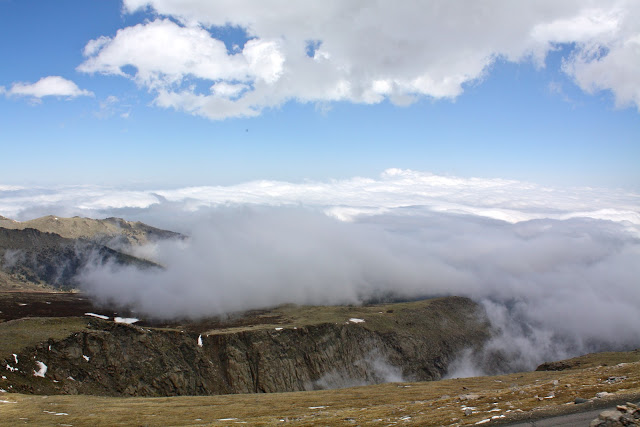
Otis didn't seem to notice the altitude and Theo was just happy to be clapping his hands (his newest trick). We then continued on to Summit Lake and from there we got to the very top of Mt. Evans. Amazing. Spectacular. Sensational. And cold. Temperatures in Denver were around 80 degrees today. At Mt. Evans they were 20 something. Brrrr. And beautiful.
On the way down we saw a pair of mountain goats and a some yellow-bellied marmots (cute!). Otis had been on the lookout for mountain goats for about 1/2 hour, but by the time we spotted them he was sleeping soundly in the backseat...


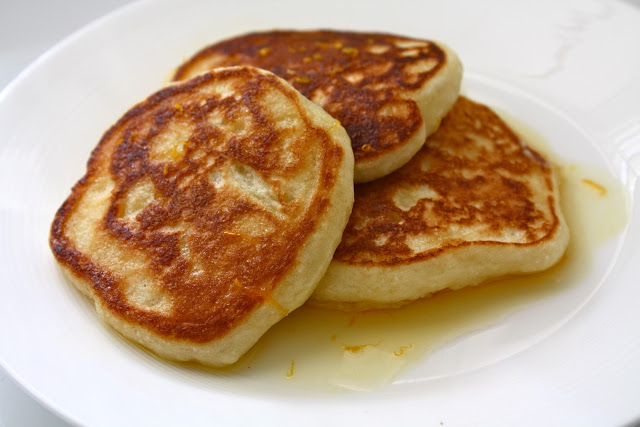
Of course before you head out for high-altitude walks you need to eat a solid breakfast. I made these Orange-Ricotta Pancakes for the occasion. The recipe comes from The Breslin (in the Ace Hotel in NYC). I thought it was a really nice change from our standard buttermilk pancakes and my (relatively-new) favorite oatmeal pancakes. The syrup really added to the pancakes but, truth be told, the consistency was very un-syrupy. I'm not sure what went wrong, as I followed the instructions exactly. Perhaps it had something to do with the altitude. Never the less, they were delicious and a wonderful way to start out the day.
{Note: use a good, fresh ricotta for this recipe...or don't...but I think that makes a difference. I used a local cheese from LazEwe 2 Bar Goat Dairy in Colorado.
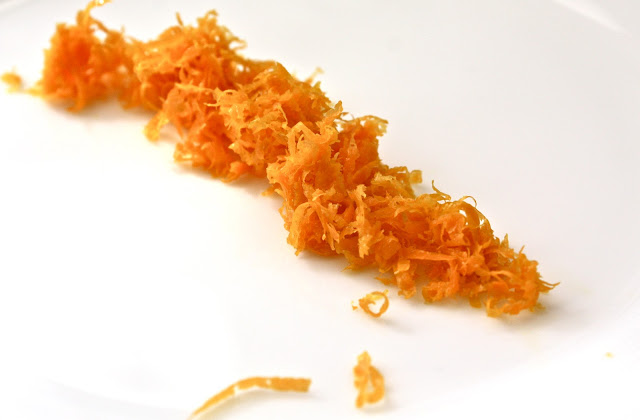
ORANGE SYRUP
1 orange
1 cup fresh orange juice
1 cup sugar
1 cup water
RICOTTA TOPPING (I omitted this step, but will add it next time)
1 1/2 cups fresh ricotta
1 1/2 tablespoons sugar
3/4 teaspoon finely grated lemon zest
Seeds scraped from 1/2 vanilla bean
PANCAKES
1 1/2 cups all-purpose flour
1/4 cup fine white cornmeal
2 tablespoons sugar
1/2 teaspoon salt
1/2 teaspoon baking powder
1/2 teaspoon baking soda
2 cups buttermilk
2 large eggs, separated
1/2 cup fresh ricotta
Vegetable oil, for frying
Toasted almond slices, for serving
Preparation
Peel the zest from the orange in long strips and julienne. In a saucepan of boiling water, blanch the zest for 30 seconds. Drain and repeat. In the saucepan, simmer the orange juice, sugar, water and blanched zest until syrupy, about 10 minutes. Let cool.
In a bowl, mix together all of the ingredients. (This step is for the ricotta topping)
In a large bowl, whisk the flour, cornmeal, sugar, salt, baking powder and soda. In another large bowl, whisk the buttermilk, egg yolks and ricotta. Fold the wet ingredients into the dry ingredients. In a large, clean stainless steel bowl, beat the egg whites until stiff but not dry; fold them into the batter.
In a large cast-iron skillet, heat a thin film of vegetable oil. Drop in 1/4-cup dollops of batter and cook over moderately high heat, 2 minutes per side, until golden and fluffy. Serve about 3 pancakes per person. Pass the orange syrup, ricotta topping and toasted almonds at the table.


I enjoy traveling, photography, hiking, street art, design, architecture, food trucks, gardening, the cosmos, cooking with the seasons, political activism and wallpaper! I know my interests span a variety of categories, here's where they all come together.

