Cochon's Chocolate-Oatmeal Moon Pies and Musings on New Orleans

Believe me when I tell you that New Orleans is the most fascinating and interesting places in the United States. I grew up in New York City, lived in San Francisco, Tel Aviv, Denver, Portland and Cuernavaca, but there is no place that feels more like home than New Orleans. 
I moved to New Orleans when I was 23 years old and lived there for 5 1/2 years. I bought a fabulous bargeboard shotgun house that had a small front porch, a garden with banana trees and was only a few feet away from a trolley barn in Uptown. I loved the ding-ding-ding of the trolley bells and the sound of the trolley coming down the tracks. 
I moved to New Orleans for law school, which was probably a mistake academically since I wasn't the most mature 23 year old and was too enticed by the city's nightlife (and I really never wanted to be a lawyer), but I don't regret my time there. Not for one minute. 
The city of New Orleans is complex: French, Creole and Spanish influences are strongly felt in many of the city's historic neighborhoods and the vestiges of slavery, segregation and post-war Reconstruction have clearly left their mark on the city in terms of poverty, class and equality. And there is crime. But there is also a tremendous warmth in the city, a colorfulness, a rhythm, a uniqueness and an energy that really can't be matched anywhere else in the United States. 
Every year around this time I get a very intense longing for "The City That Care Forgot." I miss the beads, the music, the pageantry, the parades, the Indians, the oak trees, the drinking and the crowds. I love New Orleans. And I love New Orleans during Mardi Gras. 
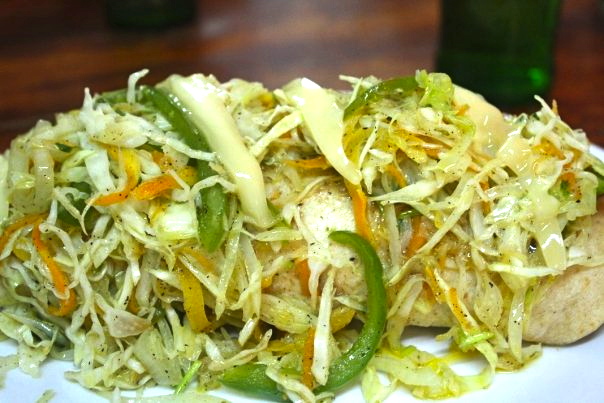
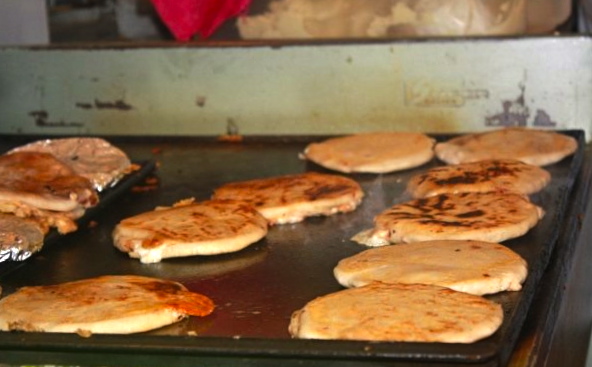
I decided to post these pictures from our most recent trip to the Big Easy, just 12 hours after my husband and I got married in New York. We decided to take that trip because we love the city and it's also where we met. We walked the streets, got lost in the Marigny, sat on the porch at our Bed & Breakfast and heard some great music on the city's street corners. 
While I can't get to New Orleans this year for Mardi Gras, rest assured I will be eating some Chocolate-Oatmeal Moon Pies*, trying to find Baby Jesus in a King Cake and putting back a Sazerac...or two! Happy Mardi Gras. 
*Recipe courtesy of Cochona great New Orleans  restaurants that serves up one of my favorite desserts...second only to the Creole Bread Pudding with Warm Whiskey Sauce at Commander's Palace
 

Chocolate-Oatmeal Moon Pies (Recipe by Chef Stephen Stryjewski of Cochon in New Orleans, LA, published in Bon Appetit Magazine, February 2012)

Ingredients
Cookies
1 1/4 cups unbleached all-purpose flour
3/4 teaspoon baking powder
1/2 teaspoon baking soda
1/2 teaspoon kosher salt
2 1/4 cups old-fashioned oats
1 cup dried tart cherries, chopped
1 cup pecans, chopped
3/4 cup semisweet or bittersweet chocolate (4 ounces), chopped into chocolate chip-size chunks
3/4 cup (1 1/2 sticks) unsalted butter, room temperature
1 1/2 cups (packed) dark brown sugar
1 large egg
1 teaspoon vanilla extract
2 7-ounce jars marshmallow creme
Chocolate Dipping Sauce

1/2 cup semisweet or bittersweet chocolate (2 1/2 ounces), chopped
1 tablespoon honey
1/2 cup heavy cream
Preparation

Cookies:
Arrange racks in upper and lower thirds of oven; preheat to 350°. Line 3 baking sheets with parchment paper. Whisk flour, baking powder, baking soda, and salt in a medium bowl. Combine oats, cherries, pecans, and chocolate in a large bowl.
Using an electric mixer, beat butter and sugar in another large bowl, occasionally scraping down sides of bowl, until smooth, about 2 minutes. Add egg and vanilla and beat to blend. Scrape down sides of bowl. With machine running at low speed, gradually add flour mixture; beat just to blend. Stir in oat mixture with a wooden spoon just to blend. 
Using a 1-oz. ice cream scoop or scooping out 2 level tablespoonfuls of dough, measure dough into 36 portions. Divide among baking sheets. 
Using your hands, gently press down on each dough ball until 1/2" thick.Bake cookies for 12 minutes. Rotate sheets front to back and top to bottom; continue baking until cookies are golden brown and edges have begun to set but centers are still soft (cookies will appear underdone and shiny in centers), 7–8 minutes longer. Do not overbake. Let cookies cool on baking sheets.
DO AHEAD: Cookies can be made 2 days ahead. Store airtight at room temperature.

Spread 1 Tbsp. marshmallow creme on bottom of 18 cookies. Sandwich with remaining cookies.
Chocolate Dipping Sauce: 
Place chocolate and honey in a medium bowl. Bring cream just to a boil in a small saucepan. Pour over chocolate and honey; let stand for 1 minute; stir until melted and smooth. Drizzle over cookies or serve alongside sandwich cookies for dipping.
Yields 18 pies.
Chocolate-Oatmeal Moon Pies
Photograph by Ditte Isager

Butternut Squash Lasagna with Basil Béchamel


A friend of mine affectionately called me and my now-husband "weekend warriors." That was before we had children. We were always up to something, like trying an out-of-the-way eatery, trekking to a remote exhibit, or gathering friends to do something a little quirky. 
Well a bunch of years later. and with two boys added to the mix, we are not quite as intrepid as we used to be, but we still try to get out and do things. Recently I took the kids to the Denver Botanic Gardens for the Orchid Show, we went to Breckenridge to see the International Snow Sculpture Championship and this week we drove to Silverthorne to check out the Ice Castle. There were also trips to the Denver Art Museum, the Clyfford Still Museum, the Butterfly Pavilion and we walked through 10 historic, architecturally significant neighborhoods in town. We are always out and about. 
By the time I get back from our morning outings I'm usually quite exhausted. So I decided that this week I would make some "bulk food." I would spend one afternoon cooking non-stop and that would be it for the week, or at the very least, a few days. Not that I mind cooking. I love food and I love preparing it. But I want to start relaxing a few days a week. I'm also going to try to read a bit more while the kids are napping. I know, sounds crazy! But getting through a book is not quite as easy as it used to be. So I'm going to start with some short stories because they don't require the same time commitment as a 300 page novel. I was thinking about Nathan Englander's What We Talk About When We Talk About Anne Frank, but I am open to suggestions.   
Back to my 'bulk food.' I'm going to make Moosewood's Spanakopita and a quiche, but I also wanted to make a pasta dish. I wasn't in the mood for anything 'red sauce.' I was feeling vegetables, but didn't want anything chunky. I did some digging through my many, many recipe printouts and found this one for Butternut Squash Lasagna with a Basil Béchamel. Perfect. I had all the ingredients on hand: basil, no-boil lasagna noodles (fresh pasta sheets would be really nice here-- but there really are only so many hours in the day), milk, cheese, and a 2 pound squash. 
This is a really nice, filling, seasonal pasta dish. It took me an afternoon to make all the food I wanted to make for the week and now I've got a whole bunch of meals that can easily be paired with a salad or simple side dish. For the next few days I can spend the kid's nap time under a blanket, curled up on the couch...reading some short stories.  
Butternut Squash Lasagna with Basil Béchamel (Adapted from Giada De Laurentiis)
Yield:8 to 10 servings
Ingredients
1 tablespoon olive oil
1 (2 pound) butternut squash, peeled, seeded, and cut into 1-inch cubes
Salt and freshly ground black pepper
1/2 cup water (I added another 1/4 cup as the water evaporated)
3 amaretti cookies, crumbled (I used 3 Graham crackers instead)
1/4 cup butter
1/4 cup all-purpose flour
3 1/2 cups whole milk
Big pinch nutmeg
1 cup (lightly packed) fresh basil leaves
12 no-boil lasagna noodles or fresh pasta sheets from a specialty store
2 1/2 cups shredded whole-milk mozzarella cheese
1/3 cup grated Parmesan
Directions
Heat the oil in a heavy large skillet over medium-high heat. Add the squash and toss to coat. Sprinkle with salt and pepper. Pour the water into the skillet and then cover and simmer over medium heat until the squash is tender, stirring occasionally, about 20 minutes. (I added another 1/4 cup of water about half way through.) Cool slightly and then transfer the squash to a food processor. Add the amaretti (or graham) cookies and blend until smooth. Season the squash puree, to taste, with more salt and pepper.
Melt the butter in a heavy medium-size saucepan over medium heat. Add the flour and whisk for 1 minute. Gradually whisk in the milk. Bring to a boil over medium-high heat. Reduce the heat to medium and simmer until the sauce thickens slightly, whisking often, about 5 minutes. Whisk in the nutmeg. Cool slightly. Transfer half of the sauce to a blender*. Add the basil and blend until smooth. Return the basil sauce to the sauce in the pan and stir to blend. Season the sauce with salt and pepper, to taste.
Position the rack in the center of the oven and preheat to 375 degrees F.
Lightly butter a 13 by 9 by 2-inch glass baking dish. Spread 3/4 cup of the sauce over the prepared baking dish. Arrange 3 lasagna noodles on the bottom of the pan. Spread 1/3 of the squash puree over the noodles. Sprinkle with 1/2 cup of mozzarella cheese. Drizzle 1/2 cup of sauce over the noodles. Repeat layering 3 more times.
Tightly cover the baking dish with foil and bake the lasagna for 40 minutes. Sprinkle the remaining mozzarella and Parmesan cheeses over the lasagna. Continue baking uncovered until the sauce bubbles and the top is golden, 15 minutes longer. Let the lasagna stand for 15 minutes before serving.
*When blending hot liquids: Remove liquid from the heat and allow to cool for at least 5 minutes. Transfer liquid to a blender or food processor and fill it no more than halfway. If using a blender, release one corner of the lid. This prevents the vacuum effect that creates heat explosions. Place a towel over the top of the machine, pulse a few times then process on high speed until smooth.

I Do "Belize" I'd Like A Slice of Key Lime Pie (Steve's Authentic Key Lime Pie)

The other day I found myself trying to organize some of my digital photos. There are thousands...and thousands...and thousands. I've got happy clicking fingers thanks to my digital SLR. Anyway, I stumbled upon our pictures from Belize, which is where we went on our "babymoon" exactly three years ago this week. Crazy! 
I was three months pregnant with our first son and we wanted to take a vacation that could give us some adventure and some relaxation. I didn't have any place particular in mind, though I was thinking someplace tropical would be nice. We had many adventurous travels under our belt by that time-- there were journeys through (parts of) the Middle East, a two-week safari in Africa, three-weeks in Southeast Asia, a boating adventure in the Galapagos Islands, trips to Guatemala, Costa Rica, Mexico, Scandinavia, Chile, Peru, caber-tossing at the Highland Clans Games in Scotland, a honeymoon in Hawaii...and so on. So, where to go? The decision was made for us when an amazing deal popped up on slickdeals.net. Round trip airfare from New York to Belize for $132...um, did I mention that was round trip? The tickets were booked. Immediately. 
We went to Belize with our two close friends Ori and Jenn and we had a fabulous time. There was a visit to the Mayan ruins at Xunantunich, where the vistas were breathtaking and the temples dated from 700 AD. There was some "caving" too-- that was a first for me. We ventured into the interior part of the country and slept in jungle huts at the Black Rock Lodge. We canoed down the Macal river and yes, yours truly capsized...twice, despite the fact that I proclaimed myself to be "an expert canoer" and declined instruction prior to our departure. (They didn't mention the strong currents.) Matt and I took two days to visit the Caribbean part of the coast, and then we all reconvened in Ambergris Caye. We never made it to the Great Blue Hole (must go back), but we did some amazing snorkeling in the Belize Barrier Reef - the second largest reef in the world. And we ate. 
The food was fresh, seasonal and had a local flare. There were Caribbean (ceviches) and Meso-American (empanadas) influences, a whole lot of hot sauce, refreshing smoothies and the world's best key lime pie I ever ate in my life. Believe me when I tell you I've eaten many-a-key-lime pie. It was also one of my daily cravings during my first pregnancy. 
Now I know what you're thinking. Key Lime Pie was inventing in the Florida Keys, and not in Belize. Well, that may be true, but the cayes of Belize have excellent Key Lime Pie. It is a very tropical dessert and all the varieties I ate while on the islands were delicious. 
A day after going through our travel photos, I found myself at our local Sunflower Market. Key limes were in stock and on sale. It got me thinking. It was time to make my own Key Lime Pie. I found the recipe for Steve's Authentic Key Lime Pie (this is what I ate non-stop when I was pregnant with No. 2) and adapted it slightly. I added a splash more key lime juice, topped the pie with the zest from 1 whole lime, and I baked the pie for 8 minutes at 325 degrees. I think the more "authentic" pies just chill in the fridge once the filling is added without baking it in the oven. But the thought of giving my son salmonella (from the raw egg) had me thinking twice. It's possible that the acidity of the lime juice kills anything that could make you sick, but I decided to use my oven and avoid taking that chance.  
So decide for yourself whether you want to bake or not. Either way this is a great recipe that does right by the classic. Enjoy.  
And now for a little Key Lime Pie. This recipe is adapted from Steve's Authentic Key Lime Pie in Red Hook, Brooklyn. 
Key Lime Pie (Adapted from Steve's Authentic Key Lime Pie
Ingredients
Crust:
8 ounces graham crackers, crushed (a little more than 1/2 of a typical box)
4 tablespoons of butter, melted
Filling:
1 cup canned sweetened condensed milk, chilled
4 egg yolks, cold
1/2 cup key lime juice, cold (I added an additional tablespoon because I like it very tart)
Whipped cream, for garnish 

Grated zest of 1 Key lime
Directions
Preheat oven to 325 degrees F.
To make the crust, combine the ingredients in a bowl and mix well for 2 minutes. Mold the mixture into a greased, 10-inch pie shell and bake for 8 minutes or until golden brown. Remove the crust from the oven and allow to cool.
To make the filling, combine the milk and the egg yolks and mix well. Slowly add the key lime juice and mix just until incorporated. Do not overmix. Pour the mix into the pre-baked pie shell. Put it in the oven (still at 325 degrees F) for 8 minutes. Remove from the oven, let it cool. Top pie with Key lime zest. Refrigerate until set.
To serve, slice the pie and serve with whipped cream or serve plain.

Food Lab's Best Basic Guacamole

I saw this recipe posted on Food Lab: The Best Guacamole (and the Science of Avocados) and knew that I had to try it. I had a bunch of avocados in my kitchen...and they were getting riper by the minute. 
This really is a fantastic guacamole that takes about 15 minutes to make. I made two adjustments: I used about 1/3 cup of cilantro (instead of the recommended 1/2 cup) and replaced serrano chili with jalapeño because that's what I had in my house. My only caveat is this: don't serve this guacamole with super-salty chips. The dip has enough salt in it, and if you use a salty chip, it could be a bit a much. That said, this is now going to be my go-to guacamole recipe. Chunky, creamy and the heat's just right. There aren't many ingredients (6 to be exact) and this is a very affordable homemade party dip. The texture is perfect and the taste is fabulous! Enjoy.
Best Basic Guacamole (Adapted from J. Kenji Lopez-Alt, Serious Eats
Serves 8 as an appetizer
Ingredients
1 small yellow onion, roughly chopped
1 jalapeño chili, roughly chopped (original recipe uses serrano)
1/3 cup picked cilantro leaves, finely chopped, divided (original recipe uses 1/2 cup)
2 teaspoons kosher salt (*go with 1 1/2 teaspoons to start, and add more to taste)
4 ripe avocados
2 tablespoons fresh lime juice
Preparation
Place onion, chili, half of cilantro leaves, and salt in a mortar and pestle. Pound into a fine paste. Alternatively, combine onion, chili, half of cilantro, salt, and half of lime juice in a food processor or blender and process until smooth paste is formed, scraping down sides as necessary.
Split each avocado in half, discard pits, and spoon out flesh into a medium bowl. Roughly mash with a stiff whisk. Add onion/chili puree, remaining cilantro leaves, and half of lime juice. Fold to combine. Season to taste with more salt and lime juice. Serve immediately with warm tortilla chips.

'Root Down' Inspired Carrot and Red Curry Soup


Our dear friend Megan came to visit us a few weeks ago from Los Angeles. Megan is also affectionately called "Min"-- as in Minister, as in Universal Life Church, as in they ordain online! She presided over our wedding ceremony at Wave Hill a few years ago. (And so that my mother doesn't read this post and have a kanipshin, you should note that we also had a separate religious ceremony, one officiated by a rabbi.)

We had a wonderful time talking, walking, drinking, and dining. We strolled around the Washington Park neighborhood and had some great ice cream at Bonnie Brae, an old-fashioned, classic ice cream parlor not far from the park. We also scoped out some homes in Congress Park, which admittedly is a bit premature since we don't know if we will stay in Denver long-term, but a girl can dream, right?! 
We ate at Shish Kabob on Capital Hill and my falafel sandwich was lip-smacking good. Plans to visit the Clyfford Still Museum were foiled when we found out the museum is closed on Mondays, but I'll take Min on her next visit.
On Megan's final night, my husband watched the boys and Megan and I had ladies night. Our venue? Root Down-- a fantastic neighborhood eatery with great design and even more amazing food...seasonal and delicious. I ordered the Carrot Soup with Thai Red Curry and Apple-Pear Chutney as a starter-- it was wonderful. My entree was a delicious Butternut-Ricotta Gnocchi (with mushrooms, spinach, black currants, shallots, chile flake, brown butter, sage-hazelnut pesto & pecorino). For dessert we split a Mexican Chocolate Mousse that was to-die-for. Back to the soup. Like I said, it was delicious. I haven't been able to get it out of my head and I wanted to recreate it. 
After a bit of research, I found a Red Curry Carrot Soup recipe from an old Food & Wine magazine. While it wasn't exactly the same as the Root Down version, my craving was sated. I simplified the dish a bit, but you can see the original recipe here. Serve with a little drizzle of canola oil, some matchstick scallions and a pinch of finely chopped basil. Yum.

Red Curry Carrot Soup (Adapted from Grace Parisi, Food & Wine Magazine, June 1999)

Serves 2 - 4 
Ingredients
1 tablespoon canola oil
6 large carrots, or 8 medium-sized carrots, peeled
2 slices peeled fresh ginger, about 1/4 inch slices
1 medium white onion, finely chopped
4 cups vegetable stock
1 1/2 cups water
1/3 cup unsweetened coconut milk
1 teaspoon red curry paste
Salt and freshly ground pepper
1 scallion, cut into matchsticks
1 tablespoon cilantro leaves (optional)
1 tablespoon finely chopped basil (optional)
Preparation
Heat the oil in a large saucepan. Add the sliced carrots and ginger and cook over moderately high heat, stirring, until the carrots are crisp-tender and lightly browned, 6 to 7 minutes. Add the onion and cook until softened but not browned, about 2 minutes.
Add the vegetable stock, water, coconut milk and curry paste to the saucepan and bring to a boil. Simmer over moderate heat until the carrots are tender, about 25 minutes. Using an immersion blender, puree the soup. Or, puree the soup in batches using a blender. Season with salt and pepper. Ladle the soup into bowls, sprinkle with the scallion, cilantro and basil and serve.