
Your Custom Text Here
Dorie's Strozzapreti: Corsican Spinach and Mint Gnocchi
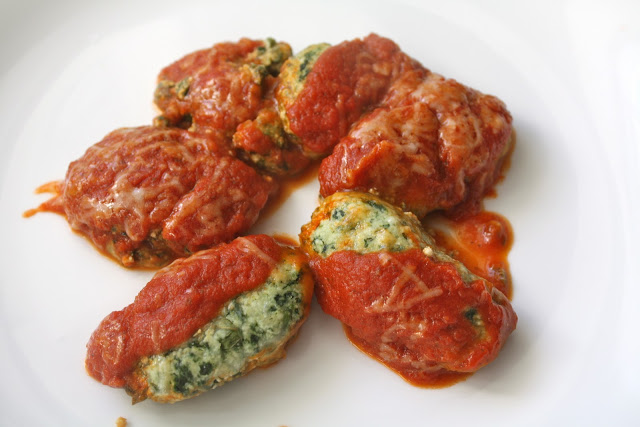
In Italian, 'Strozzapreti' translates to "priest
choker" or "priest strangler," but in a culinary context they
are typically an elongated form of cavatelli (or fusilli). In Corsica, and
throughout the Tuscan and Umbria regions of Italy, Strozzapreti can also
refer to a baked cheese and vegetable dish, or gnocchi. It has been said that
these gnocchi are large enough to choke a person (read: priest) if eaten whole,
hence the name "priest choker." I hope that doesn't render these
dumplings unappetizing!
This is another recipe from Dorie Greenspan's, Around My French
Table. (Have I mentioned how much I love this cookbook?) It's very
much Italian in terms of influence, but since this is a Corsican dish, and
Corsica is part of France, it's included in Greenspan's tome on French cuisine.
It's a bit time consuming to make (some of that is wait time though), but it's
worth it and you can divide the work up into parts. I made the gnocchi ahead of
time and chilled them in the refrigerator overnight. The next day I boiled and
baked them.
I love these little dumplings. The mint really makes these
gnocchi pop and it gives them a wonderful freshness. They remind me of
the spinach gnocchi
I made about a year ago, but those were topped with an asiago cream sauce and
these are smothered in homemade tomato sauce.
Heeding the caveat implied in the
dish's name (Strozzapreti), I cut mine in half.
So, go ahead, enjoy
these gnocchi…just be sure not to swallow them whole!
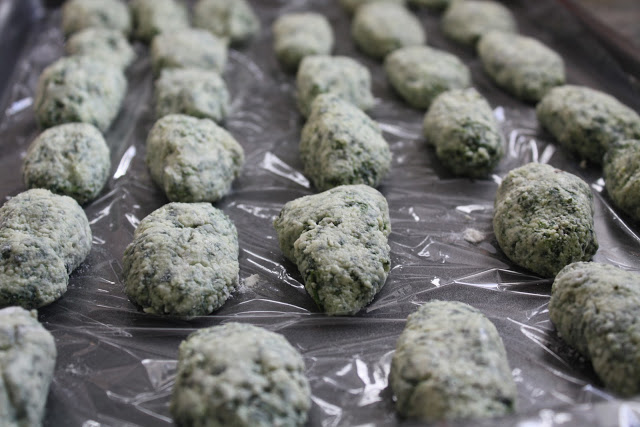


Use fresh ricotta and fresh mint...it
really makes the dish.
Strorzzapretis: Corsican Spinach and Mint
Gnocchi
(Courtesy of Dorie Greenspan,
Around My French Table)
Serves 6 starter servings or 4 main-course
servings
Ingredients
10 ounces spinach, trimmed
1 pound whole-milk ricotta or fresh brocciu, if you can
get it
1 large egg
5 ounces cheese, such as Gruyere or Emmenthal or a combination
of Gruyere and Parmesan, grated (about 1 1/4 cup)
1 bunch mint leaves, finely chopped (about 1 cup)
2 tablespoons all-purpose flour, plus more for shaping
Salt and freshly ground pepper
Olive oil
1 1/2 cups tomato sauce (I made my own but you can use a
good-quality store bought marinara as well)
Preparation
Wash the spinach in several changes of cool water, toss into a
large pot, with the water still clinging to the leaves. Place the pot over
medium-low heat, cover and cook the spinach, turning often, until it is soft,
about 5 minutes. Turn the spinach into a colander and shake out as much of the
water as possible.
When the spinach is cool enough to handle, press out the
remainder of the water (or as much as you can) by squeezing small bunches of
the spinach between your palms or by twisting them in a kitchen towel. Coarsely
chop the spinach, toss it into a bowl, and use your fingers to pull the clumps
of spinach apart as best you can.
With a sturdy rubber spatula or wooden spoon, beat the ricotta
or brocciu into the spinach, followed by an egg. Stir in half of the
grated cheese and the mint, sprinkle over the flour, season with salt and
pepper and blend. You'll have a soft, malleable mixture.
Line a baking sheet or tray that will fit in the fridge with
plastic wrap. Make a mound of about 1/4 cup flour on your work surface.
Working with two tablespoons, scoop up a tablespoonful of the
cheese mixture with one spoon and then scrape the mix from one spoon to the
other until you've formed a cohesive quenelle. Drop the quenelle into the mound
of flour, and then toss it gently from hand to hand to shake off the excess.
After working the mixture this way, your quenelle will probably look like
a large, slightly misshapen bullet, and that's just fine. Put the nugget on the
lined sheet and continue until you've used all the dough, you'll have about 3
dozen strozzapreti.
Chill or freeze the strozzapreti for about 30 minutes, just to
firm them a bit. (I refrigerated them overnight).
Center a rack in the oven and preheat the oven to 425 degrees F.
Lightly oil an 9x13 baking dish (glass, porcelain or pottery).
Bring a large pot of salted water to a boil, and have a big bowl
of ice and cold water nearby.
Remove the strozzapretis from the refrigerator or freezer. Lower
the heat under the pot so that the water is at a simmer, and carefully drop
some strozzapreti into the pot-- don't crowd the pot-- work in batches of 8 to
10 at a time. The nuggets will sink to the bottom of the pot and then pop to
the top. After they do, let them gently bob around in the pot for about 5
minutes, then lift them out of the simmering water with a slotted spoon and
drop them into the ice water.
Continue poaching and cooling the rest.
Drain the strozzapreti, and dry between sheets of paper towels--
be careful, they're soft and fragile-- then arrange them in the oiled pan. Pour
the tomato sauce over the strozzapreti, top with the remaining grated cheese,
and slide the pan into the oven.
Bake for about 15 minutes, until the sauce is bubbling hot, the
cheese melted and the strozzapreti heated through. Serve immediately.

"Harlem of the West" and some Gougeres (French Cheese Puffs)

Happy 2012! We had great New Year's weekend and I hope you did too. Our final weekend of 2011 started off with a little gathering at our house. We ate Indian (sub-continent, not Native-American) and it was good! I made Julie Sahni's Dum Aloo- whole potatoes with spicy yogurt gravy- and our friend Teo made Chana Masala, which was excellent. The next day we went to a NYE party- with the kids- and had a lovely time. The hosts of the party hired two babysitters, so the kids were all being supervised downstairs in the basement while the adults hung out upstairs. Brilliant.
I brought over French cheese puffs, or Gougère, which I'm pretty sure I mispronounced the whole night, despite studying French in high school. The gougère (pronounced: goo/zhehr) were delicious. I decided to make Dorie Greenspan's, but the recipes from David Lebovitz and Martha Stewart looked great too. They were puffed, airy, light and cheesy. I decided to use a mix of Gruyere and White Cheddar. It was the way to go. Gougère are the perfect compliment to a glass of champagne.

The next day I woke up early. I decided it was a good day to take the kids on an historic walking tour. Most of the shops and restaurants were closed, and almost no one was milling about on the streets, but the sun was shining and there was architecture to see.
We ventured over to the 'Five Points' section of the city. It's about a mile away from downtown and is named 'Five Points' due to the transit stop that culminates at the point where Washington Street, 27th Street, 26th Avenue, and Welton Street all meet (the intersection is five-ways). This area is also affectionately called "Harlem of the West."
Five Points is one of the oldest sections of the city and the first predominantly African-American neighborhood in Denver. It was well known for its Jazz history and Duke Ellington, Billie Holiday and Miles Davis (to name a few) all passed through. There's some great architecture in this part of town as well. There are buildings from the 1880's and 90's, 1910-1920 (like the Rossonian) and some great Queen Anne-style mansions. Of course there are some modern add-ons too.


* * *

Back to the puffs: They are the perfect thing to make for a special occasion, a little soirée or just any day...
I love these little gougeres!
Ingredients
1/2 cup whole milk
1/2 cup water
8 tablespoons (1 stick) unsalted butter, cut into 4 pieces
1/2 teaspoon salt
1 cup all-purpose flour
5 large eggs, at room temperature
1 1/2 cups coarsely grated cheese, such as Gruyère or cheddar, or a mix (about 6 ounces)
Preparation
Position the racks to divide the oven into thirds and preheat the oven to 425 degrees F. Line two baking sheets with silicone baking mats or parchment paper.

Bring the milk, water, butter, and salt to a rapid boil in a heavy-bottomed medium saucepan over high heat. Add the flour all at once, lower the heat to medium-low, and immediately start stirring energetically with a wooden spoon or heavy whisk. The dough will come together and a light crust will form on the bottom of the pan. Keep stirring—with vigor—for another minute or two to dry the dough. The dough should now be very smooth.

Turn the dough into the bowl of a mixer fitted with the paddle attachment or into a bowl that you can use for mixing with a hand mixer or a wooden spoon and elbow grease. Let the dough sit for a minute, then add the eggs one by one and beat, beat, beat until the dough is thick and shiny.

Make sure that each egg is completely incorporated before you add the next, and don't be concerned if the dough separates—by the time the last egg goes in, the dough will come together again. Beat in the grated cheese.

Once the dough is made, it should be spooned out immediately.

Using about 1 tablespoon of dough for each gougère , drop the dough from a spoon onto the lined baking sheets, leaving about 2 inches of puff space between the mounds. Using about 1 tablespoon of dough for each gougère, drop the dough from a spoon onto the lined baking sheets, leaving about 2 inches of puff space between the mounds.

Slide the baking sheets into the oven and immediately turn the oven temperature down to 375 degrees F. Bake for 12 minutes, then rotate the pans from front to back and top to bottom. Continue baking until the gougères are golden, firm, and, yes, puffed, another 12 to 15 minutes or so. Serve warm, or transfer the pans to racks to cool.
Serving
Gougères are good straight from the oven and at room temperature. I like them both ways, but I think you can appreciate them best when they're still warm. Serve with kir, white wine, or Champagne.
Storing
The best way to store gougères is to shape the dough, freeze the mounds on a baking sheet, and then, when they're solid, lift them off the sheet and pack them airtight in plastic bags. Bake them straight from the freezer—no need to defrost—just give them a minute or two more in the oven. Leftover puffs can be kept at room temperature over night and reheated in a 350-degree-F oven, or they can be frozen and reheated before serving.

1/2 cup water
8 tablespoons (1 stick) unsalted butter, cut into 4 pieces
1/2 teaspoon salt
1 cup all-purpose flour
5 large eggs, at room temperature
1 1/2 cups coarsely grated cheese, such as Gruyère or cheddar, or a mix (about 6 ounces)
Preparation
Position the racks to divide the oven into thirds and preheat the oven to 425 degrees F. Line two baking sheets with silicone baking mats or parchment paper.
Bring the milk, water, butter, and salt to a rapid boil in a heavy-bottomed medium saucepan over high heat. Add the flour all at once, lower the heat to medium-low, and immediately start stirring energetically with a wooden spoon or heavy whisk. The dough will come together and a light crust will form on the bottom of the pan. Keep stirring—with vigor—for another minute or two to dry the dough. The dough should now be very smooth.
Turn the dough into the bowl of a mixer fitted with the paddle attachment or into a bowl that you can use for mixing with a hand mixer or a wooden spoon and elbow grease. Let the dough sit for a minute, then add the eggs one by one and beat, beat, beat until the dough is thick and shiny.
Make sure that each egg is completely incorporated before you add the next, and don't be concerned if the dough separates—by the time the last egg goes in, the dough will come together again. Beat in the grated cheese.
Once the dough is made, it should be spooned out immediately.
Using about 1 tablespoon of dough for each gougère , drop the dough from a spoon onto the lined baking sheets, leaving about 2 inches of puff space between the mounds. Using about 1 tablespoon of dough for each gougère, drop the dough from a spoon onto the lined baking sheets, leaving about 2 inches of puff space between the mounds.
Slide the baking sheets into the oven and immediately turn the oven temperature down to 375 degrees F. Bake for 12 minutes, then rotate the pans from front to back and top to bottom. Continue baking until the gougères are golden, firm, and, yes, puffed, another 12 to 15 minutes or so. Serve warm, or transfer the pans to racks to cool.
Serving
Gougères are good straight from the oven and at room temperature. I like them both ways, but I think you can appreciate them best when they're still warm. Serve with kir, white wine, or Champagne.
Storing
The best way to store gougères is to shape the dough, freeze the mounds on a baking sheet, and then, when they're solid, lift them off the sheet and pack them airtight in plastic bags. Bake them straight from the freezer—no need to defrost—just give them a minute or two more in the oven. Leftover puffs can be kept at room temperature over night and reheated in a 350-degree-F oven, or they can be frozen and reheated before serving.
Walking Denver (Part III) and a Winter Pear Salad with Walnuts and Mustard Vinaigrette

The Front Range and Foothills got a whole lot of snow last week. I think the totals were somewhere around a foot. But as I've mentioned in previous posts, the snow is welcomed here in Colorado and the city of Denver looks beautiful. The temperature usually shoots back into the 40's and 50's within a day or two after a storm, so that helps with melting and because of that you don't feel like you're living in a place with an unmanageable winter.
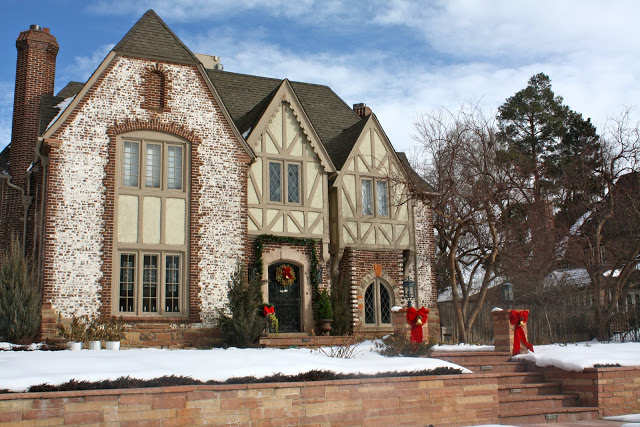
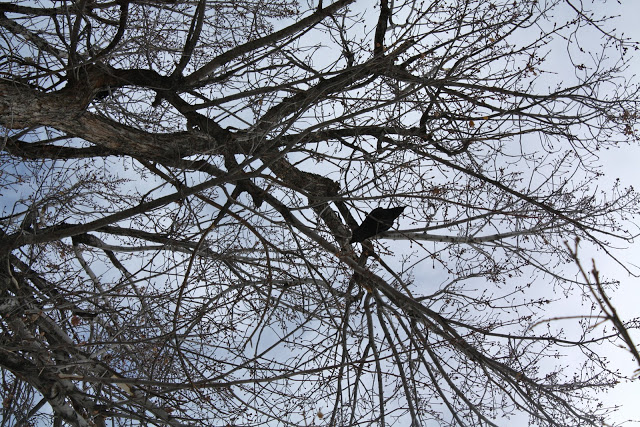
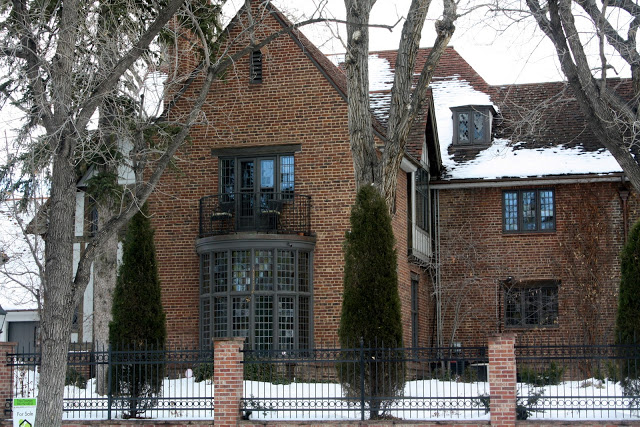
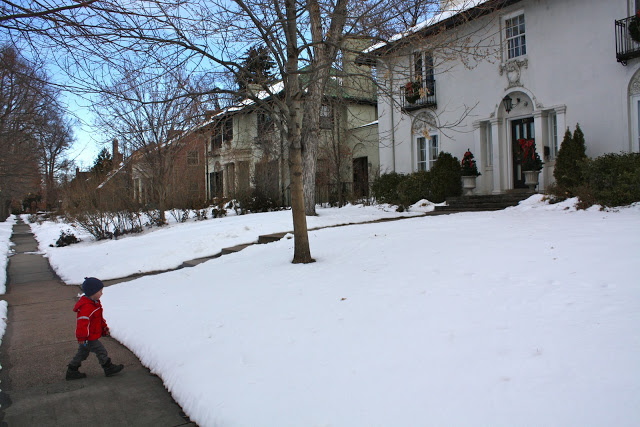
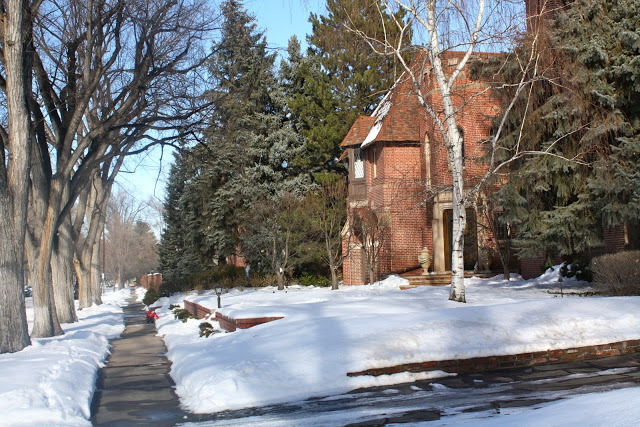
I decided it was time to go on another historic walking tour, one that would take us through a different part of town. We drove over to see some of the larger homes and mansions in the Country Club section of the city. The neighborhood, which was established around 1905, has some impressive residences with architectural influences that include French Chateau, Georgian, Colonial, 1920's Tudor, Victorians, 'Denver Squares' and Santa Fe. (I also spotted a great mid-century modern home which I tried to look into, but things got awkward when the people inside saw me on my tippy-toes, two kids in tow, trying to get a glimpse of their interior furnishings.) Unfortunately for me I was going on this walking tour with a broken toe.
My poor little toe, the fourth one on my right foot (I'll call it my ring toe) got stubbed on the baby's bouncer. It hurt like hell and I knew immediately it was broken. Adding insult to injury, the lovely denizens of Country Club aren't too fond of shoveling their sidewalks and some parts of the neighborhood are without sidewalks all together. That meant that I could only take Otis and Theo on a few well-shoveled streets- which was too bad because I felt like we missed a ton of great architecture. I guess that just means we will have to head back that way again once things melt a bit more.
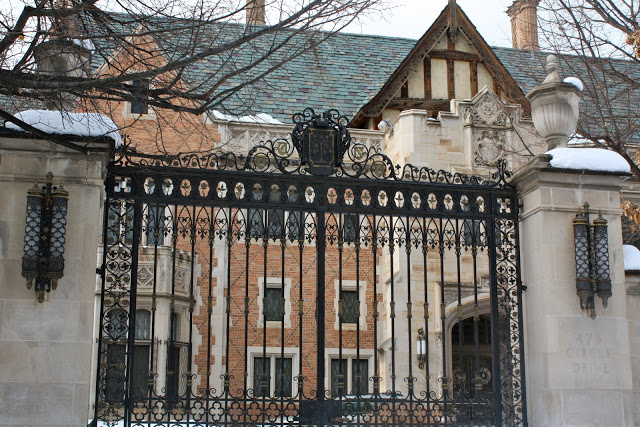
Anyway, Otis had a great time and Theo slept through most of the tour.
When I got home I whisked up a wonderful vinaigrette and drizzled it on top of a tasty winter pear salad. It was easy and delicious, which makes it my kind of salad.
Enjoy and Happy holidays!









* * *
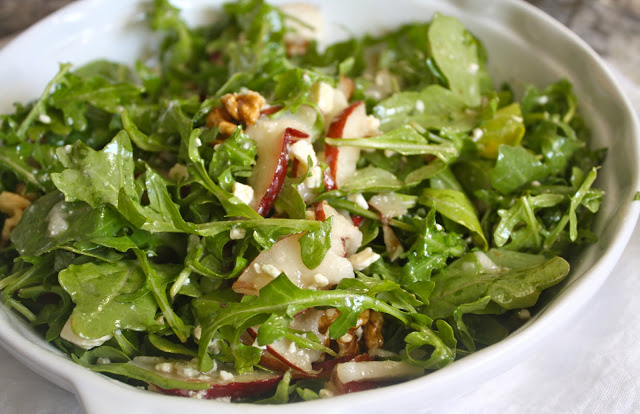
I saw a few variations of this pear salad, so I made a hybrid of sorts by using posts from dishingthedivine and drizzleanddip. This salad is über-simple to make and it's really tasty. There's bitter-goodness from the arugula, sweetness from the pear, a creamy tang from the cheese, and a mustard-ness (is that a word?) from the vinaigrette. Basically, the perfect balance of savory and sweet. You could caramelize the nuts, but since I wanted to keep the prep time and clean-up to a minimum, I skipped that step for now...but it certainly would be a way to jazz this up for a holiday dinner party.

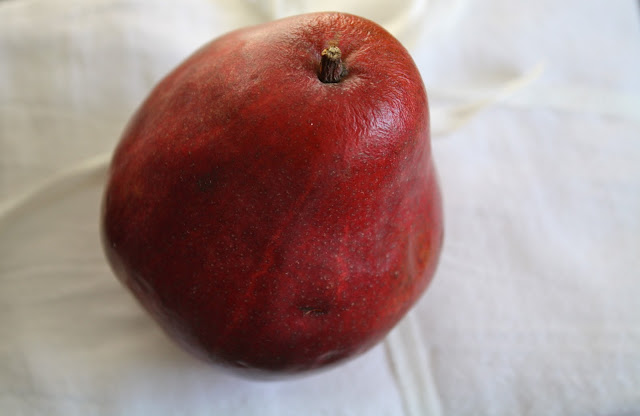
Winter Pear Salad with Walnuts and Mustard Vinaigrette Dressing (Adapted from Drizzle & Dip and Dishing the Divine)
Ingredients
several cups of arugula
1 pear, thinly sliced (I went with Red Anjou)
2 ounces crumbly cheese (gorgonzola, blue cheese)
1/2 cup walnuts
4 tablespoons of olive oil
2 tablespoons red wine vinegar
1/2 teaspoon Dijon mustard
1 tablespoon and 1 teaspoon of maple syrup
a big pinch of salt
fresh ground pepper to taste
Directions
Place the baby greens in a large, flat bowl. Top with pear slices, walnuts and cheese.
For the dressing, blend oil, vinegar, mustard, maple syrup, salt, and pepper.
Drizzle the dressing over the salad (you will likely have some left over). Mix. Eat! 
The salad dressing is very similar to Mollie Katzen's "Sweet & Tart Mustard Dressing" in The New Moosewood Cookbook. That recipe is as follows:
6 tablespoons of olive oil
2 tablespoons of Dijon mustard
4 tablespoons of red wine vinegar
2 teaspoons of honey or maple syrup
salt and pepper to taste
Whisk everything together. Cover and chill. This dressing is especially good on chilled cooked vegetables, like Brussels sprouts, cauliflower or broccoli.
Serve with a Side of Dreidel: Non-Traditional Latkes (Leek and Cardamom Fritters)

I love holidays that are celebrated with lights and food. Around this time of year there are plenty of holidays that fit that bill. There's St. Lucia Day in Sweden, Kwanzaa, Christmas and Chaunkah (or Hanukkah), to name a few. I'm focusing on Chanukah here.
The holiday commemorates the triumph of Judah the Maccabee over the King Antiochus in the 2nd Century BCE. Hooray for the revolutionaries! There was also a little miracle that happened in the Temple. A small amount of oil miraculously burned for 8 days (yes, that's one long lasting flame). To commemorate this surprising event, latkes are served because the oil in which they are fried is symbolic of the aforementioned miracle. Latkes, in modern tradition, are made of grated potatoes, but historically they were made with whatever local ingredients were around-- vegetables, legumes, etc. I decided to try some non-traditional latkes this year, opting for Leek and Cardamom Fritters. I figure that since they are pan fried in olive oil, they are still very much in the spirit of Chanukah. They are shallow little pancakes that contain flour and egg- which is similar to the traditional potato latke. I think these work well for the holiday.
The recipe is a Mark Bittman adaptation of a Yotam Ottolenghi dish. It was printed in The New York Times Magazine a few weeks ago. Special thanks to my friend Richard who sent me the link and to Melissa who sent me the hard copy of this recipe.
Happy holidays!

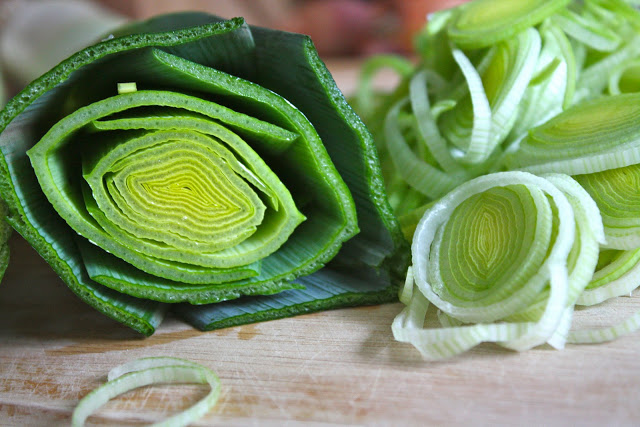


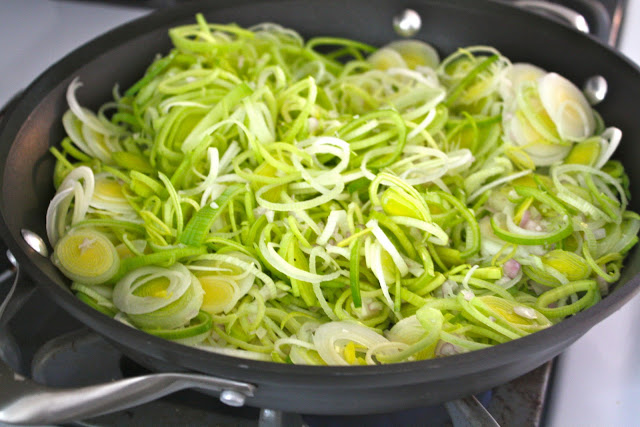
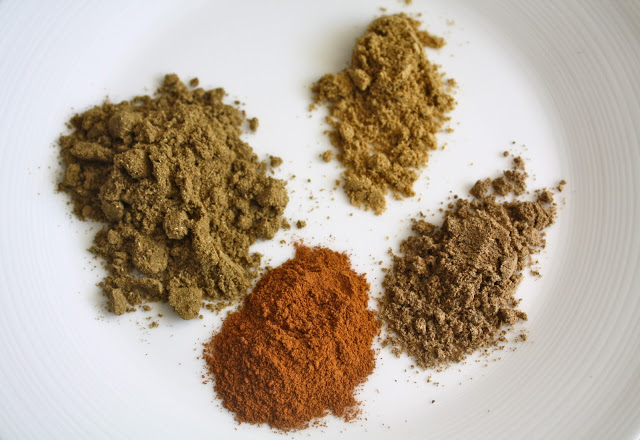

 Leek-and-Cardamom Fritters (Courtesy of Mark Bittman, New York Times Magazine, adapted from Yotam Ottolenghi)
Yield: 4 servings (about 8 large fritters)
Ingredients
About 2/3 cup olive oil
3 leeks, thickly sliced
5 shallots, finely chopped
1 teaspoon ground cumin
1/2 teaspoon ground coriander
1/2 teaspoon ground cardamom
1/4 teaspoon ground cinnamon
1 fresh red chili (like Thai), seeded and sliced
1 cup fresh parsley (leaves and fine stems), finely chopped
2/3 cup fresh cilantro (leaves and fine stems), finely chopped
2 to 3 ounces manouri cheese, broken into large chunks (or drained ricotta cheese or young goat cheese)
1 teaspoon salt
1 egg white
1 cup all-purpose flour
1 1/2 teaspoons baking powder
1 whole egg
1/2 cup milk
4 tablespoons unsalted butter, melted
Lemon wedges for serving.
Directions
1. Heat the oven to 200. Put 1⁄3 cup of the oil in a large skillet over medium heat. When it’s hot, add the leeks and shallots and cook, stirring occasionally, until softened, about 10 minutes. Add the cumin, coriander, cardamom and cinnamon and continue to cook for 5 minutes. Transfer the onion mixture to a large bowl and add the chili, parsley, cilantro, manouri and salt. Allow to cool, then stir gently.
2. Beat the egg white until soft peaks form, and fold it into the onions. In a separate bowl, stir together the flour, baking powder, whole egg, milk and butter to form a smooth batter. Gently fold it into the onion mixture.
3. Put 2 tablespoons of the remaining oil in a large skillet over medium heat. When it’s hot, ladle four spoonfuls (about half of the batter) into the pan to make four large fritters. Fry them until golden and crisp, 2 to 3 minutes per side. Drain on paper towels, then transfer to a platter in the oven to keep warm. Repeat with the remaining batter, adding more of the oil as needed. Serve warm or at room temperature, with lemon wedges.

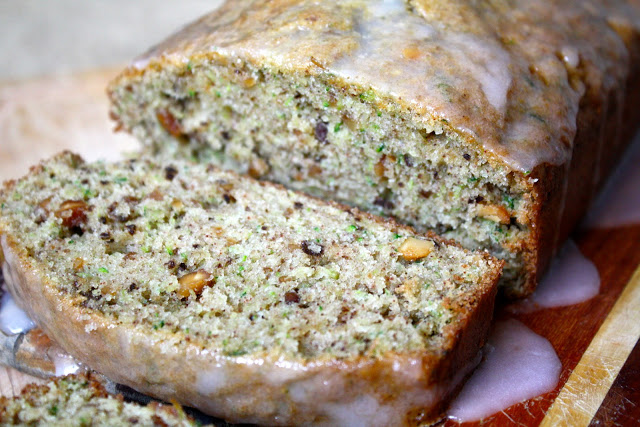
Zucchini-Olive Oil Cake with Crunchy Lemon Glaze
A week before Otis was born my husband and I ate our last supper out, that is as a couple without children. We knew things were going to change in a big way. So we thought long and hard about where we should go for this big (and very special) celebration. We already had the good fortune of dining at Per Se on my 30th birthday (that's a story for another time, but holy cow!) and we'd been to some of the city's best restaurants including Eleven Madison Park, Gramercy Tavern, Le Bernandin and Del Posto. Babbo was a place we'd always wanted to go to but never did, until the week before our first son arrived. Getting reservations was no picnic, but we got it done. We ate course after course and each plate was more delicious than the one preceding it. I was really glad to be wearing loose maternity garb, if you know what I mean. Babbo was a truly wonderful dining experience.
When I saw this recipe for Zucchini Olive-Oil cake posted on David Lebovitz's website, I made a mental note that I just had to make it -- due in large part to the fact that the original recipe came from Gina DePalma, the James Beard Award winning pastry chef who worked at Chanterelle, Gramery (under Claudia Fleming) and who currently makes the sweets at Babbo.
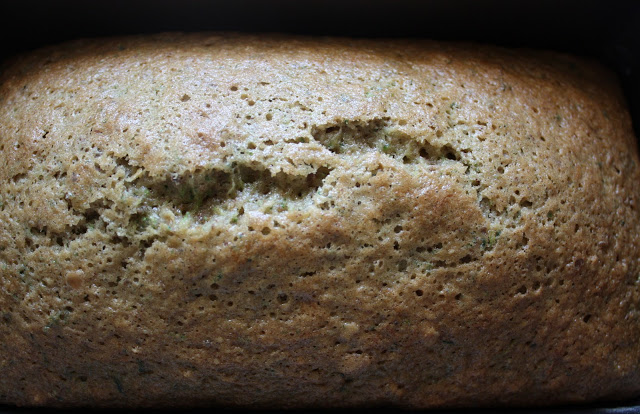
Though the traditional zucchini season has ended and summer is a distant memory, I was reminded of this cake when I discovered it on The Moveable Feasts. Amy, the author of the aforementioned blog, left a comment on one of my posts and I had some free time (the kids were sleeping) so I started to scroll through some of Amy's entries (her blog is terrific). And there it was...that recipe...the one for Zucchini Olive-Oil Cake with Crunchy Lemon Glaze. Amy had seen it on Lottie + Doof, who had also adapted the original De Palma recipe from Dolce Italiano: Desserts from the Babbo Kitchen. The cake was once again on my radar.
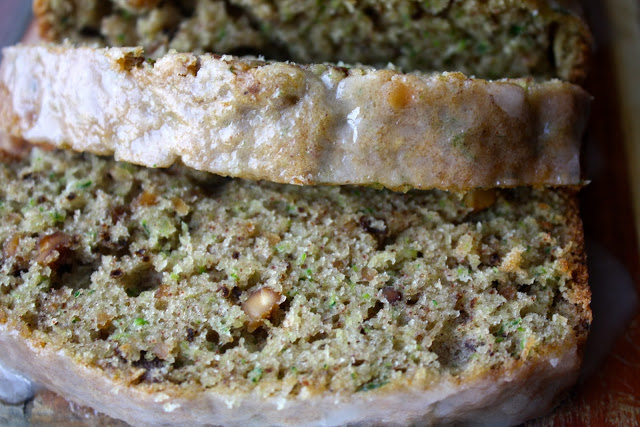
The recipe is homey, and much more comfort-foody than the traditional pastry/dessert fare at Babbo. But don't let that fool you; it is no less delicious. The zucchini, walnuts, and olive-oil are fantastic together. And don't get me started on the crunchy lemon glaze...
This is, hands down, my favorite zucchini bread/cake. Enjoy and happy baking!
* * *
Some notes: The original recipe uses a bundt pan, which certainly has a more sophisticated look than cake loaf pans-- but I used 2 loaf pans because that's what I have and it worked perfectly.
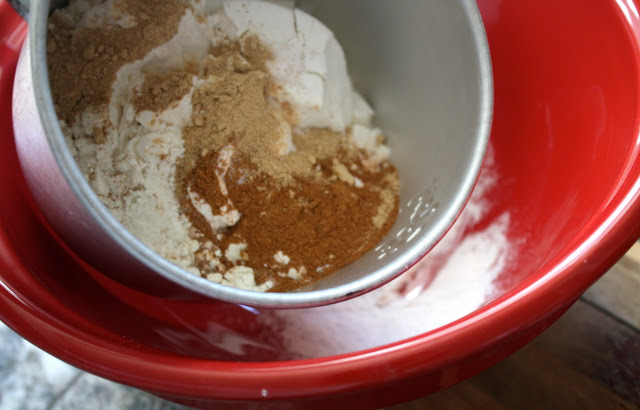
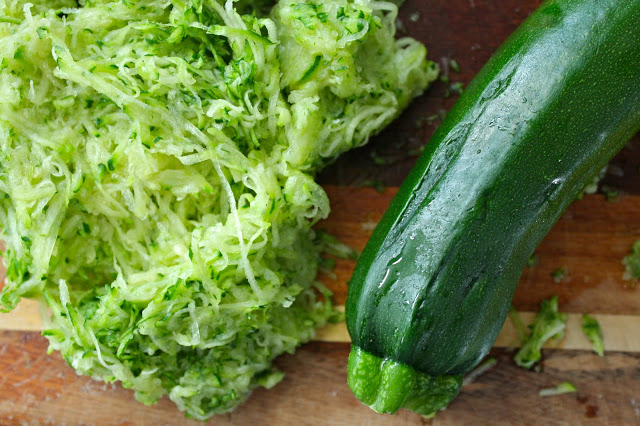
Re: Grating the Zucchini. I grated about 3 medium zucchinis by using the finer side of a standard box grater. This yielded about 3 cups. Then I used a cheesecloth to drain some of the liquid out of the zucchini.
Before you get scared by the large amount of sugar, remember this is for 2 loaves, not one. I saw an adaptation that replaced the cup of olive oil for 1/4 cup olive oil and 3/4 applesauce. I haven't tried this modification and likely won't as I love olive oil, but if you do, let me know how it turns out.
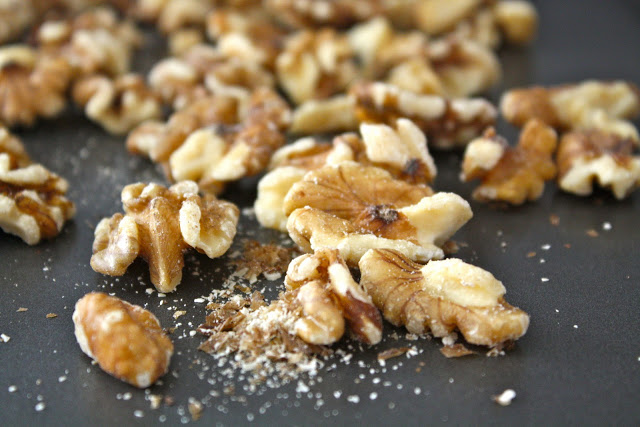
Zucchini Cake with Crunchy Lemon Glaze (Adapted from Gina DePalma’s Dolce Italiano, via The Moveable Feasts, via Lottie + Doof)
Ingredients
1 cup walnut pieces
2 cups unbleached all-purpose flour
1 teaspoon baking powder
1/2 teaspoon baking soda
1 teaspoon kosher salt (sounds like a lot, but you want it all)
1 1/2 teaspoons ground cinnamon
1 teaspoon ground ginger
1/2 teaspoon freshly ground nutmeg
3 large eggs
1 3/4 cups granulated sugar
1 cup extra-virgin olive oil
2 teaspoons pure vanilla extract
2 1/2 – 3 cups grated zucchini (about 3 small zucchini)
1/4 cup freshly squeezed lemon juice
1/3 cup granulated sugar
1 cup confectioners’ sugar
Directions
Preheat the oven to 350° F. Grease two loaf pans (or a 10-inch bundt) and dust them with flour.
Place the walnuts in a single layer on a baking sheet and toast them until they are golden brown and aromatic, 12-14 minutes. Cool completely and then finely chop them.
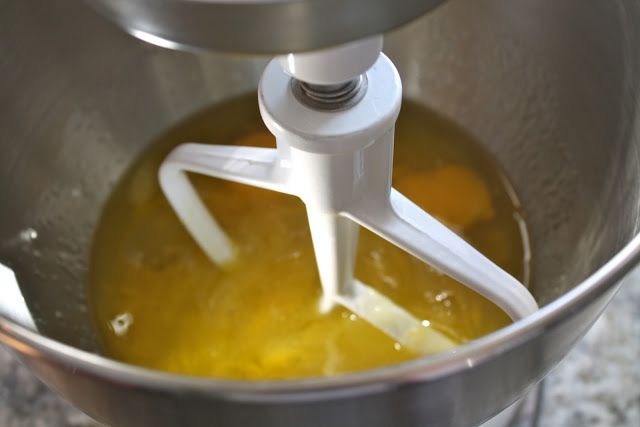
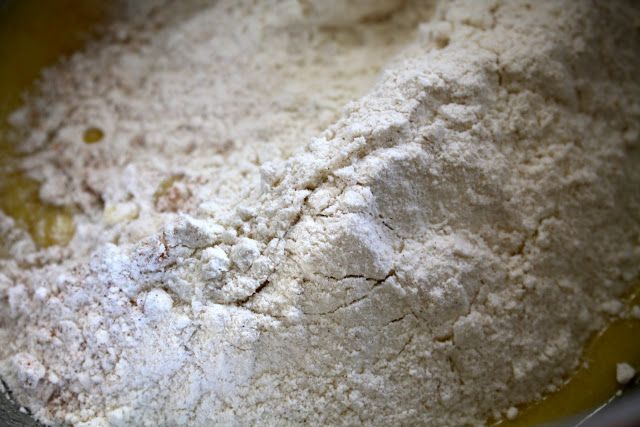
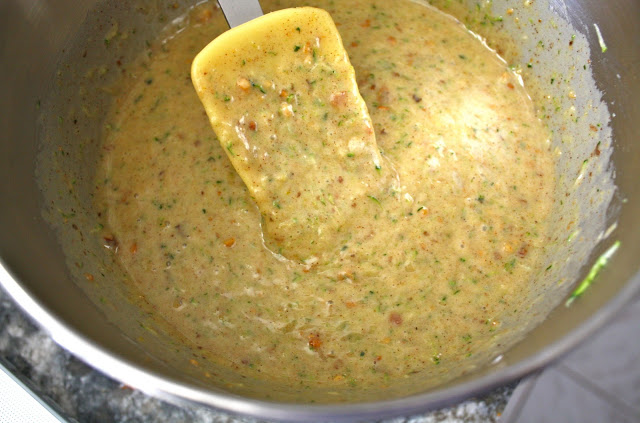
Sift the flour, baking powder, baking soda, salt, and spices into a medium bowl and set aside . In an electric mixer fitted with the paddle attachment, beat the eggs, sugar and olive oil together on medium speed until light and fluffy, about 3 minutes, then beat in the vanilla extract. Scrape down the sides of the bowl as needed. Beat in the dry ingredients all at once on low speed until they are thoroughly combined, then switch to medium speed and mix for 30 seconds. Mix in the zucchini and walnuts on low speed until they are completely incorporated.
Pour the batter into the prepared pans, smoothing the top with a spatula. Bake the cakes for 40 to 45 minutes or until a tester inserted in the cakes comes out clean and the cakes have begun to pull away from the sides of the pans.
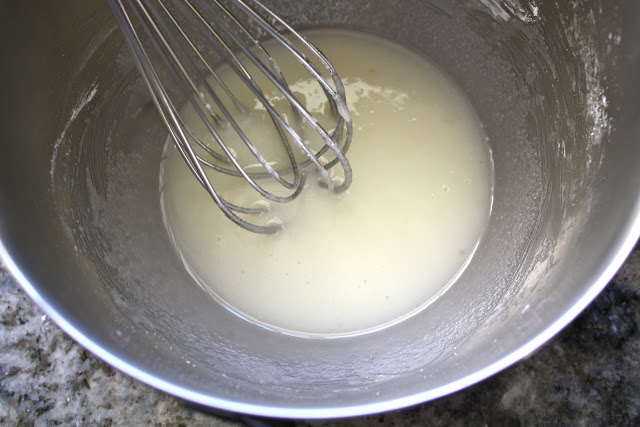
While the cake is baking, prepare the glaze. In a medium bowl, whisk together the lemon juice and granulated sugar, then whisk in the confectioners’ sugar until the glaze is completely smooth.
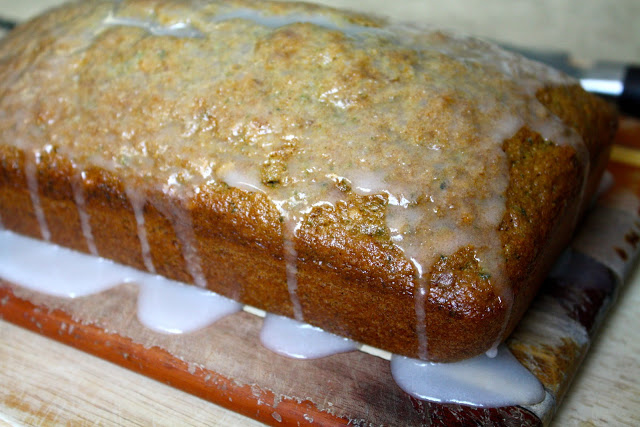
Allow the cakes to cool in the pans for 10 minutes, then carefully invert them onto a wire rack. Using a pastry brush, immediately brush the glaze over the entire surface of the warm cake, using all of the glaze; it will adhere to the cake and set as the cake cools. Allow the cake to cool completely and the glaze to dry.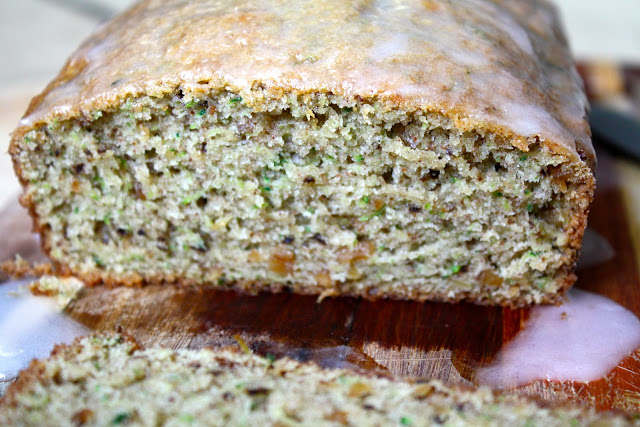
Ingredients
1 cup walnut pieces
2 cups unbleached all-purpose flour
1 teaspoon baking powder
1/2 teaspoon baking soda
1 teaspoon kosher salt (sounds like a lot, but you want it all)
1 1/2 teaspoons ground cinnamon
1 teaspoon ground ginger
1/2 teaspoon freshly ground nutmeg
3 large eggs
1 3/4 cups granulated sugar
1 cup extra-virgin olive oil
2 teaspoons pure vanilla extract
2 1/2 – 3 cups grated zucchini (about 3 small zucchini)
1/4 cup freshly squeezed lemon juice
1/3 cup granulated sugar
1 cup confectioners’ sugar
Directions
Preheat the oven to 350° F. Grease two loaf pans (or a 10-inch bundt) and dust them with flour.
Place the walnuts in a single layer on a baking sheet and toast them until they are golden brown and aromatic, 12-14 minutes. Cool completely and then finely chop them.
Sift the flour, baking powder, baking soda, salt, and spices into a medium bowl and set aside . In an electric mixer fitted with the paddle attachment, beat the eggs, sugar and olive oil together on medium speed until light and fluffy, about 3 minutes, then beat in the vanilla extract. Scrape down the sides of the bowl as needed. Beat in the dry ingredients all at once on low speed until they are thoroughly combined, then switch to medium speed and mix for 30 seconds. Mix in the zucchini and walnuts on low speed until they are completely incorporated.
Pour the batter into the prepared pans, smoothing the top with a spatula. Bake the cakes for 40 to 45 minutes or until a tester inserted in the cakes comes out clean and the cakes have begun to pull away from the sides of the pans.
While the cake is baking, prepare the glaze. In a medium bowl, whisk together the lemon juice and granulated sugar, then whisk in the confectioners’ sugar until the glaze is completely smooth.
Allow the cakes to cool in the pans for 10 minutes, then carefully invert them onto a wire rack. Using a pastry brush, immediately brush the glaze over the entire surface of the warm cake, using all of the glaze; it will adhere to the cake and set as the cake cools. Allow the cake to cool completely and the glaze to dry.


I enjoy traveling, photography, hiking, street art, design, architecture, food trucks, gardening, the cosmos, cooking with the seasons, political activism and wallpaper! I know my interests span a variety of categories, here's where they all come together.

